This is the multi-page printable view of this section.
Click here to print.
Return to the regular view of this page.
Amazon Web Services in MC
Management Console provides specific resources for managing database clusters on AWS.
Management Console provides specific resources for managing database clusters on AWS.
You can provision an Eon Mode or Enterprise Mode database cluster on AWS.
You can revive an Eon Mode database cluster on AWS. For more information, see Reviving an Eon Mode database on AWS in MC.
The MC provision and revive wizards for AWS configure separate volumes for the data, depot, catalog, and temp database directories. The specific volumes it uses for each directory depend upon the mode and the specific AWS instance type you select when you provision or revive the cluster. For details on the volumes configured for clusters on AWS, see:
1 - Creating an Eon Mode database in AWS with MC
Choose one of the following setup options:.
After you deploy Management Console on Amazon Web Services (AWS) with a CloudFormation Template, you can provision a cluster and database. Vertica clusters are provisioned in the same Virtual Private Cloud (VPC) as the Vertica Management Console. You can create an initial cluster of up to 60 hosts.
Note
See
Creating a cluster using MC if you installed Management Console with an RPM, or to provision an on-premises database and cluster.
Prerequisites
Before you begin, complete or obtain the following:
Choose one of the following setup options:
-
Quick Setup: Select your cluster size based on your estimated compressed working data size. The Management Console calculates the volume size per node, and reserves part of the disk for catalog and temp storage.
-
Advanced Setup: This option provides more granular control over configuration settings related to subnet, Node IP, and depot, temp, and catalog volume sizes.
Quick setup
-
Log in to the Vertica Management Console.
-
On the Management Console home page, select Create new database.
-
On Database Storage Mode, click Eon Mode.
-
Click Next. On Vertica License, select one of the following license mode options:
-
Community Edition: A free Vertica license to preview Vertica functionality. This license provides limited features. If you use a Community Edition license for your deployment, you can upgrade the license later to expand your cluster load. See Managing licenses form more information.
-
Premium Edition: Use your Vertica license. After you select this option, click Browse to locate and upload your Vertica license key file, or manually enter it in the field.
-
Click Next. On Setup Path, select Quick Setup.
-
Click Next. In the Vertica Settings section, select the desired Vertica database version. You can select from the latest hotfix of recent Vertica releases. For each database version, you can also select the operating system. See Choose a Vertica AMI Operating Systems for available OS and major version options.
-
In the AWS EC2 Instance Type section, select from one of the following instance types:
-
Ephemeral Depot
-
EBS Depot
-
In the Cluster Size section, select the number of instances to deploy with your cluster based on your working data size. For details about working data size, see Configuring your Vertica cluster for Eon Mode.
Note
If you are using a Community Edition license, your cluster size selections are limited to Small, Medium, and Large.
-
In the Database Parameters section, supply the following information:
-
Database Name: The name for your new database. See Creating a database name and password for database name requirements.
-
Administrator Username: The name of the database superuser.
-
Administrator Password: The password for the database administrator user account. For details, see Password guidelines.
-
Confirm Password: Reenter the Administrator Password.
-
Load Sample Data: Optional. Click the slider to the right to preload your database with example clickstream data. This option is useful if you are testing features and want some preloaded data in the database to query.
-
In the AWS Environment section, supply the following information:
-
AWS Key Pair: Your Amazon key pair for SSH access to EC2 instances.
-
IP Access: The cluster IP address range for SSH and client access to cluster hosts.
-
S3 Communal Storage URL: The path to a new subfolder in your existing AWS S3 bucket for Communal Storage of your Eon Mode database. Vertica creates the subfolder in the existing S3 bucket.
Important
Use an existing S3 bucket in the same region as your Management Console instance. In addition, you must use the S3 bucket that you specified when you
deployed the CloudFormation template.
-
Tag EC2 Instances: Optional. Assign distinct, searchable metadata tags to the instances in this cluster. Many organizations use labels to organize, track responsibility, and assign costs for instances.
To add a tag, click the slider to the right to display the Tag Name and Tag Value fields. Click Add to create the tag. Added tags are displayed below the fields.
-
Click Create Database Cluster to create a Eon Mode cluster on AWS.
Advanced setup
-
Log in to the Vertica Management Console.
-
On the Management Console home page, select Create new database.
-
On Database Storage Mode, click Eon Mode.
-
Click Next. On Vertica License, select one of the following license mode options:
-
Community Edition: A free Vertica license to preview Vertica functionality. This license provides limited features. If you use a Community Edition license for your deployment, you can upgrade the license later to expand your cluster load. See Managing licenses form more information.
-
Premium Edition: Use your Vertica license. After you select this option, click Browse to locate and upload your Vertica license key file, or manually enter it in the field.
-
Click Next. On Setup Path, select Advanced Setup.
-
Click Next. On AWS Environment, supply the following information:
-
AWS Key Pair: Your Amazon key pair for SSH access to EC2 instances.
-
AWS Subnet: The subnet for your cluster. By default, Vertica creates your cluster in the same subnet as your MC instance.
Important
Use security groups and network access control lists (ACLs) to secure your subnet. For details, see the
Amazon documentation.
-
IP Access: The cluster IP address range for SSH and client access to cluster hosts.
-
Node IP Setting: Select Private, Public, or Elastic. For details about each option, see the Amazon documentation.
-
S3 Communal Storage URL: The path to a new subfolder in your existing AWS S3 bucket for Communal Storage of your Eon Mode database. Vertica creates the subfolder in the existing S3 bucket.
Note
Use an existing S3 bucket in the same region as your Management Console instance.
-
Tag EC2 Instances: Optional. Assign distinct, searchable metadata tags to the instances in this cluster. Many organizations use labels to organize, track responsibility, and assign costs for instances.
To add a tag, click the slider to the right to display the Tag Name and Tag Value fields. Click Add to create the tag. Added tags are displayed below the fields.
-
Click Next. Database Parameters accepts information about your Vertica license. Supply the following information:
-
Database Name: The name for your new database. See Creating a database name and password for database name requirements.
-
Administrator Username: The name of the database superuser.
-
Administrator Password: The password for the database administrator user account. For details, see Password guidelines.
-
Confirm Password: Reenter the Administrator Password.
-
Vertica Version: Select the desired Vertica database version. You can select from the latest hotfix of recent Vertica releases. For each database version, you can also select the operating system. See Choose a Vertica AMI Operating Systems for available OS and major version options.
-
Load Sample Data: Optional. Click the slider to the right to preload your database with example clickstream data. This option is useful if you are testing features and want some preloaded data in the database to query.
-
Click Next. On AWS Configuration, supply the following information:
-
Number of Nodes: The initial number of nodes for your database.
-
Number of Vertica Database Shards: Sets the number of shards in your database. Vertica suggests a number of shards automatically, based on your node count. After you set this value, you cannot change it later. The shard count must be greater than or equal to the maximum subcluster count. Be sure to allow for node growth. See Configuring your Vertica cluster for Eon Mode for recommendations.
-
EC2 Instance Type: The instance types used for the nodes. See Choosing AWS Eon Mode Instance Types for a list of recommended AWS instances. For details about each instance type, see the Amazon EC2 Instance Types documentation.
-
Local Storage: Customize your cluster according to your storage needs. For guidance, see Eon Mode volume configuration defaults for AWS for the Vertica default settings for each supported instance.
-
Click Next. On Review, confirm your selections. Click Edit to return to a previous section and make changes.
-
When you are satisfied with your selections, click the I accept the terms and conditions checkbox.
-
Click Create Cluster to create a Eon Mode cluster on AWS.
After creating the database
After you create the database, click Get Started to view the Databases page. To view your database, select Manage and View Your Vertica Database to go to the database Overview.
You can also view your database from the Recent Databases section of the MC home page.
For additionalinformation about managing your cluster, instances, and database using Management Console, see Managing database clusters .
2 - Creating an Enterprise Mode database in AWS with MC
After the cluster and database is successfully created, click Get Started to view the Fast Tasks page.
After you deploy Management Console on Amazon Web Services (AWS) with a CloudFormation Template, you can provision a cluster and database. Vertica clusters are provisioned in the same Virtual Private Cloud (VPC) as the Vertica Management Console. You can create an initial cluster of up to 60 hosts.
Note
See
Creating a cluster using MC if you installed Management Console with an RPM, or to provision an on-premises database and cluster.
Prerequisites
Before you begin, complete or obtain the following:
Provisioning a cluster and database
-
Log in to the Vertica Management Console.
-
On the Management Console home page, select Create new database.
-
On Database Storage Mode, click Enterprise Mode.
-
Click Next. Create a New Vertica Cluster | mode: Enterprise provides you with two workflow options for creating your database. Select one of the following:
-
Click Next. On Enter AWS Credentials and preferences, AWS Region is filled with the region of the Management Console host. Supply the following information:
-
AWS Subnet: Under Show Advanced Options. Select the subnet used to create your cluster.
-
AWS Access Key ID: Displayed if MC was configured to use the AWS Access Keys authentication method. Enter your access key.
-
AWS Secret Access Key: Displayed if MC was configured to use the AWS Access Keys authentication method. Enter the password associated with the AWS Access Key ID.
-
AWS Key Pair: Your Amazon key pair for SSH access to EC2 instances.
-
CIDR Range: The cluster IP address range for SSH and client access to cluster hosts.
-
Click Next. Enter Vertica database name and login credentials accepts information about your Vertica license. Supply the following information:
-
Vertica Database Name: The name for your new database. See Creating a database name and password for database name requirements.
-
Vertica Version: Custom Create mode only. Select the desired Vertica database version. You can select from the latest hotfix of recent Vertica releases. For each database version, you can also select the operating system. See Choose a Vertica AMI Operating Systems for available OS and major version options.
-
Vertica Database User Name: The name of the database superuser.
-
Password: The password associated with the database username. For details, see Password guidelines.
-
Confirm Password: Reenter the Password.
-
Database Node Count: The number of nodes that you want to deploy in this cluster. Quick Create mode provides options for 1 or 3 database node counts.
-
Vertica License: Custom Create mode only. Click Browse to locate and upload your Vertica license key file. If you do not supply a license key file here, the wizard deploys your database with a Vertica Community Edition license. This license has a three node limit, so the value in the Database Size filed cannot be larger than 3 if you do not supply a license. If you use a Community Edition license for your deployment, you can upgrade the license later to expand your cluster load more than 1TB of data. See Managing licenses form more information.
-
Load example test data: Optional. Click the checkbox to preload your database with example clickstream data. This option is useful if you are testing features and want some preloaded data in the database to query.
-
Click Next. Specify cloud instance and main data storage info provides options to let you customize your instance configuration. In Quick Create mode, the options on this screen are pre-selected and read-only.
Database Data Path is filled with the path to your persistent database storage.
EBS Volume Type and EBS Volume Size (GB) per Volume per Available Node fields are filled with default values for the selected EC2 Instance Type. See Eon Mode volume configuration defaults for AWS for more information.
In Custom Create mode, supply information for the following:
-
EC2 Instance Type: The instance type your cluster deploys. See Supported AWS instance types for more information.
-
EBS Volume Type: The block-level storage type for each node in your cluster. See Enterprise Mode volume configuration defaults for AWS for recommendations about supported volume types.
-
EBS Volume Size (GB) per Volume per Available Node: The amount of disk space available on each disk attached to each node in your cluster. This field shows you the total disk space available per node in your cluster.
-
Enable EBS Volume Encryption: Optional. Select the checkbox if you want server-level encryption on your EC2 instances. With AWS, only 4th and 5th generation instance types (c4/5, r4/5, and m4/5) support encryption.
-
Node IP setting: Select Private, Public, or Elastic. For details about each option, see the Amazon documentation.
-
Click Next. Specify additional storage and tag info lets you allocate additional storage for your cluster. In Quick Create mode, the options on this screen are pre-selected and read-only.
-
Database Catalog Path is the location of the local copy of the database catalog. Database Temp Path is the temporary storage space for each node, if the node instance type includes the temporary storage option.
-
In Custom Create mode, select or enter a value for EBS Volume Type, EBS Volume Size (GB) per Volume per Available Node, and Enable EBS Volume Encryption under each path. Each field has the same definition as described in the previous step.
-
Tag EC2 instances: Optional. Assign distinct, searchable metadata tags to the instances in this cluster. Many organizations use labels to organize, track responsibility, and assign costs for instances.
After you click the checkbox, the Tag Name and Tag Value fields are displayed. Click Add to create the tag. Added tags are displayed below the fields.
-
Click Next. On the Review screen, confirm your selections. To edit your selections, click Back until you reach the screen containing information that you want to edit.
-
When you are satisfied with your selections, click the Accept terms and conditions of the "Software Only Terms" for your territory checkbox.
-
Click Create to create an Enterprise Mode cluster on AWS.
After the cluster and database is successfully created, click Get Started to view the Databases page. To view your database, select Manage and View Your Vertica Database to go to the database Overview.
You can also view your database from the Recent Databases section of the MC home page.
See Managing database clusters for further managing your cluster, instances, and database using Management Console.
3 - Reviving an Eon Mode database on AWS in MC
You can also revive a database using admintools.
Important
You can also revive a database using
admintools. You must use admintools in order to revive a database on an existing cluster. For example, use admintools if you stopped a cluster whose hosts use instance storage where data is not persistently stored, and plan to bring back the database on the same cluster.
An
Eon Mode database keeps an up-to-date version of its data and metadata in its communal storage location. After a cluster hosting an Eon Mode database is terminated, this data and metadata continue to reside in communal storage. When you revive the database later, Vertica uses the data in this location to restore the database in the same state on a newly provisioned cluster.
If Management Console has been installed using a CloudFormation template from the AWS Marketplace, you can use the Provision and Revive wizard in Management Console.
During a revive of your database, when you select a Vertica version that is higher than the version of the original database in the communal storage, Vertica upgrades your database to match the Vertica version you selected. This upgrade may cause the database revive to take longer. To bypass this upgrade, select the Vertica version of your original database.
Note
After upgrading a Vertica database, you can not revert to an earlier version.
Prerequisites
-
Communal storage location (an AWS S3 bucket) of the stopped Eon Mode database you plan to revive. For guidance, see Viewing and managing your cluster.
-
Username and password of the Eon Mode database you plan to revive.
-
AWS account with permissions to create a VPC, subnet, security group, instances, and roles.
-
Amazon key pair for SSH access to an instance.
Revive the database on the cloud
You use a wizard in Management Console to provision a new cluster on AWS and revive a database onto it. For the new cluster, Management Console automatically provisions the same number of AWS instances used by the database when it was last shut down.
Caution
You should not use the same communal storage location for running multiple databases, as it causes data corruption. To avoid corruption, you should also never use the revive functionality to simultaneously run the same Eon Mode database on different clusters.
-
From the Management Console home page, select Revive Eon Mode Database. The Revive an Eon Mode Database wizard opens.
-
Enter your cloud credentials and cluster preferences. Your cluster must be in the same region as your communal storage location's S3 bucket. To revive the cluster in a new region, you must:
-
Create an S3 bucket in the new region.
-
Copy the previous S3 bucket's contents into it.
-
Provide the new S3 bucket URL in Step 3.
-
By default, Vertica creates your cluster in the same subnet as your Management Console instance. If you want to manage all Vertica clusters in the same VPC, you can provision your Vertica database in a different subnet than the Management Console instance. To do so, on the AWS Credentials page, select Show Advanced Options and enter a value in the Subnet field.
Important
If you specify a different subnet for your database, make sure to secure the subnet.
-
Enter the S3 URL of the database that you are reviving. You can only revive databases that use an S3 bucket that you specified when you deployed the CloudFormation template.
When you enter an S3 bucket location, Management Console discovers all known Eon Mode databases.
-
Select the correct database to revive.
-
Provide the database administrator credentials for the database you are reviving. These credentials are the same as the ones used by the database in the previous cluster.
-
In the Database Version field, choose the desired Vertica database version. Select from the latest hotfix of recent Vertica releases. For each Vertica version, you can select from a list of associated Linux operating systems.
If you select a Vertica version that is higher than the version of the original database in the communal storage, Vertica upgrades your database to match the Vertica version you selected. This upgrade may cause the database revive to take longer. To bypass this upgrade, select the Vertica version of your original database.
Note
After your Vertica database has been upgraded, you can not downgrade your database later.
-
Choose instance types for the cluster. Management Console provisions the same number of instances used by the database when it was last shut down.
The MC populates the existing paths for the depot, catalog, and temp directories.
Note
You cannot persist the catalog with ephemeral instances.
The last step displays a confirmation page showing the configured volumes. For details on the volume configurations that MC provides, see Eon Mode volume configuration defaults for AWS and Enterprise Mode volume configuration defaults for AWS.
Caution
To ensure against data loss, choose instances that use EBS storage. EBS storage is durable, while instance store is temporary. For Eon mode, Management Console displays an alert to inform the user of the potential data loss when terminating instances that support instance store.
-
Choose whether to encrypt your EBS volumes. With AWS, only 4th and 5th generation instance types (c4, r4, and m4; c5, r5, and m5) support encrypting EBS volumes.
-
Optionally, you can tag the instances. In the Tag EC2 instances field, if another cluster is already running, Management Console fills those fields with the tag values for the first instance in the cluster. You can accept the defaults, or enter new tag values.
-
Review your choices, accept the license agreement, and click Create to revive the database on a new cluster. If the version of Management Console you use to revive is higher than that of the database, Management Console first notifies you that it is about to automatically upgrade the database. After starting the revive process, the wizard displays its progress. After a successful revive, the database starts automatically.
Important
If the database fails to start automatically, check the controlmode setting in /opt/vertica/config/admintools.conf. This setting must be compatible with the network messaging requirements of your Eon implementation. AWS relies on unicast messaging, which is compatible with a controlmode setting of point-to-point (pt2pt). If the source database controlmode setting was broacast and you migrate to S3/AWS communal storage, you must change controlmode with admintools:
$ admintools -t re_ip -d dbname -T
When the revive process is complete, click Get Started to navigate to the Databases page.
4 - Eon Mode volume configuration defaults for AWS
When you provision or revive an Eon Mode database cluster, Management Console configures separate volumes for the depot, catalog, and temp directories.
When you provision or revive an Eon Mode database cluster, Management Console configures separate volumes for the depot, catalog, and temp directories. The specific volumes and sizes that Management Console configures vary depending on the AWS instance type you select when provisioning or reviving the cluster.
MC follows these rules when allocating resources for these directories for an Eon Mode database cluster:
-
Depot: Allocate instance store if available with the selected instance type. Otherwise, allocate EBS volumes. (In Eon Mode on AWS, S3 is the backup.)
-
Catalog: Always allocate an EBS volume, to ensure the catalog is durable.
-
Temp: Allocate instance store if available with the selected instance type. Otherwise, allocate EBS volumes.
Note
Table below includes all instances types that include instance store.
|
Instance Type API Name |
Instance Storage |
Depot |
Catalog |
Temp |
|
Supported EBS Volumes |
N/A |
Configurable 8 EBS volumes
Default to 75G per volume
|
Configurable 1 EBS volume
Default to 50G
|
Configurable 1 EBS volume
Default to 100G
|
|
c3.4xlarge |
320 G (2 * 160 GiB SSD) |
Configurable 8 EBS volumes
Default to 75G per volume
|
Configurable 1 EBS volume
Default to 50G
|
Instance store
2x160G
|
|
c3.8xlarge |
640 G (2 * 320 GiB SSD) |
Configurable 8 EBS volumes
Default to 75G per volume
|
Configurable 1 EBS volume
Default to 50G
|
Instance store
2x320G
|
|
c5d.4xlarge |
4000 G (1 * 400 GiB SSD) |
Configurable 8 EBS volumes
Default to 75G per volume
|
Configurable 1 EBS volume
Default to 50G
|
Instance store
1x400G
|
|
i3.4xlarge |
3800 G (2 * 1900 GiB NVMe SSD) |
Instance store
1x1900G
|
Configurable 1 EBS volume
Default to 50G
|
Instance store
1x1900G
|
|
i3.8xlarge |
7600 G (4 * 1900 GiB NVMe SSD) |
Instance store
3x1900G
|
Configurable 1 EBS volume
Default to 50G
|
Instance store
1x1900G
|
|
i3.16xlarge |
15200 G (8 * 1900 GiB NVMe SSD) |
Instance store
6x1900G
|
Configurable 1 EBS volume
Default to 50G
|
Instance store
2x1900G
|
|
i3en.3xlarge |
7500 G (1 * 7500 GiB NVMe SSD) |
Configurable 8 EBS volumes
Default to 75G per volume
|
Configurable 1 EBS volume
Default to 50G
|
Instance Store
1x7500G
|
|
i3en.6xlarge |
15000 G (2 * 7500 GiB NVMe SSD) |
Instance store
1x7500G
|
Configurable 1 EBS volume
Default to 50G
|
Instance Store
1x7500G
|
|
i3en.12xlarge |
30000 G (4 * 7500 GiB NVMe SSD) |
Instance store
3x7500G
|
Configurable 1 EBS volume
Default to 50G
|
Instance Store
1x7500G
|
|
i4i.4xlarge |
3750 G (1 * 3750 GiB NVMe SSD) |
Configurable 8 EBS volumes
Default to 75G per volume
|
Configurable 1 EBS volume
Default to 50G
|
Instance store
1x3750G
|
|
i4i.8xlarge |
7500 G (2 * 3750 GiB NVMe SSD) |
Instance Store
1x3750G
|
Configurable 1 EBS volume
Default to 50G
|
Instance store
1x3750G
|
|
i4i.16xlarge |
15000 G (4 * 3750 GiB NVMe SSD) |
Instance store
3x3750G
|
Configurable 1 EBS volume
Default to 50G
|
Instance store
1x3750G
|
|
m5d.4xlarge |
600 G (2 * 300 GiB NVMe SSD) |
Configurable 8 EBS volumes
Default to 75G per volume
|
Configurable 1 EBS volume
Default to 50G
|
Instance store
2x300G
|
|
m5d.8xlarge |
1200 G (2 * 600 GiB NVMe SSD) |
Configurable 8 EBS volumes
Default to 75G per volume
|
Configurable 1 EBS volume
Default to 50G
|
Instance store
2x600G
|
|
m5d.12xlarge |
1800 G (2 * 900 GiB NVMe SSD) |
Instance store
1x900G
|
Configurable 1 EBS volume
Default to 50G
|
Instance store
1x900G
|
|
m5d.16xlarge |
2400 G (4 * 600 GiB NVMe SSD) |
Instance store
3x600G
|
Configurable 1 EBS volume
Default to 50G
|
Instance store
1x600G
|
|
r3.4xlarge |
32G (1 * 320G SSD) |
Configurable 8 EBS volumes
Default to 75G per volume
|
Configurable 1 EBS volume
Default to 50G
|
Instance store
320G
|
|
r3.8xlarge |
640 G (2 * 320 GiB SSD) |
Configurable 8 EBS volumes
Default to 75G per volume
|
Configurable 1 EBS volume
Default to 50G
|
Instance store
2x320G
|
|
r5d.4xlarge |
600 G (2 * 300 GiB NVMe SSD) |
Configurable 8 EBS volumes
Default to 75G per volume
|
Configurable 1 EBS volume
Default to 50G
|
Instance store
2x300G
|
|
r5d.8xlarge |
1200 G (2 * 600 GiB NVMe SSD) |
Configurable 8 EBS volumes
Default to 75G per volume
|
Configurable 1 EBS volume
Default to 50G
|
Instance store
2x600G
|
|
r5d.12xlarge |
1800 G (2 * 900 GiB NVMe SSD) |
Instance store
1x900G
|
Configurable 1 EBS volume
Default to 50G
|
Instance store
1x900G
|
|
r5d.16xlarge |
2400 G (4 * 600 GiB NVMe SSD) |
Instance store
3x600G
|
Configurable 1 EBS volume
Default to 50G
|
Instance store
1x600G
|
Supported EBS volumes
-
c4.4xlarge
-
c4.8xlarge
-
c5.4xlarge
-
c5.9xlarge
-
c6i.4xlarge
-
c6i.8xlarge
-
c6i.12xlarge
-
c6i.16xlarge
-
c6i.24xlarge
-
c6i.32xlarge
-
m4.4xlarge
-
m4.10xlarge
-
m5.4xlarge
-
m5.8xlarge
-
m5.12xlarge
-
r4.4xlarge
-
r4.8xlarge
-
r4.16xlarge
-
r5.4xlarge
-
r5.8xlarge
-
r5.12xlarge
-
r6i.4xlarge
-
r6i.8xlarge
-
r6i.12xlarge
-
r6i.16xlarge
-
r6i.24xlarge
-
r6i.32xlarge
5 - Enterprise Mode volume configuration defaults for AWS
When you provision an Enterprise Mode database cluster, Management Console configures separate volumes for the data, catalog, and temp directories.
When you provision an Enterprise Mode database cluster, Management Console configures separate volumes for the data, catalog, and temp directories.
The specific volumes and sizes that MC uses vary depending on the AWS instance type you select when provisioning the cluster.
MC follows these rules when selecting resources for these directories for an Enterprise Mode database cluster:
-
Data: Always use EBS volumes, to ensure the data is durable.
-
Catalog: Always use an EBS volume, to ensure the catalog is durable.
-
Temp: If the chosen instance type offers instance store, then use volumes from instance store.
Note
Table below includes all instance types that include instance store.
|
Instance Type API Name |
Instance Storage |
Data |
Catalog |
Temp |
|
Supported EBS Volumes |
N/A |
Configurable 8 EBS volumes
Default to 75G per volume
|
Configurable 1 EBS volume
Default to 50G
|
Configurable 1 EBS volume
Default to 100G
|
|
c3.4xlarge |
320 G (2 * 160 GiB SSD) |
Configurable 8 EBS volumes
Default to 75G per volume
|
Configurable 1 EBS volume
Default to 50G
|
Instance Store
2x160G
|
|
c3.8xlarge |
640 G (2 * 320 GiB SSD) |
Configurable 8 EBS volumes
Default to 75G per volume
|
Configurable 1 EBS volume
Default to 50G
|
Instance Store
2x320G
|
|
c5d.4xlarge |
400 G (1 * 400 GiB SSD) |
Configurable 8 EBS volumes
Default to 75G per volume
|
Configurable 1 EBS volume
Default to 50G
|
Instance Store
1x400G
|
|
i3.4xlarge |
3800 G (2 * 1900 GiB NVMe SSD) |
Configurable 8 EBS volumes
Default to 75G per volume
|
Configurable 1 EBS volume
Default to 50G
|
Instance Store
2x1900G
|
|
i3.8xlarge |
7600 G (4 * 1900 GiB NVMe SSD) |
Configurable 8 EBS volumes
Default to 75G per volume
|
Configurable 1 EBS volume
Default to 50G
|
Instance Store
4x1900G
|
|
i3.16xlarge |
15200 G (8 * 1900 GiB NVMe SSD) |
Configurable 8 EBS volumes
Default to 75G per volume
|
Configurable 1 EBS volume
Default to 50G
|
Instance Store
8x1900G
|
|
i3en.3xlarge |
7500 G (1 * 7500 GiB NVMe SSD) |
Configurable 8 EBS volumes
Default to 75G per volume
|
Configurable 1 EBS volume
Default to 50G
|
Instance Store
1x7500G
|
|
i3en.6xlarge |
15000 G (2 * 7500 GiB NVMe SSD) |
Configurable 8 EBS volumes
Default to 75G per volume
|
Configurable 1 EBS volume
Default to 50G
|
Instance Store
2x7500G
|
|
i3en.12xlarge |
30000 G (4 * 7500 GiB NVMe SSD) |
Configurable 8 EBS volumes
Default to 75G per volume
|
Configurable 1 EBS volume
Default to 50G
|
Instance Store
4x7500G
|
|
i4i.4xlarge |
3750 G (1 * 3750 GiB NVMe SSD) |
Configurable 8 EBS volumes
Default to 75G per volume
|
Configurable 1 EBS volume
Default to 50G
|
Instance Store
1x3750G
|
|
i4i.8xlarge |
7500 G (2 * 3750 GiB NVMe SSD) |
Configurable 8 EBS volumes
Default to 75G per volume
|
Configurable 1 EBS volume
Default to 50G
|
Instance Store
2x3750G
|
|
i4i.16xlarge |
15000 G (4 * 3750 GiB NVMe SSD) |
Configurable 8 EBS volumes
Default to 75G per volume
|
Configurable 1 EBS volume
Default to 50G
|
Instance Store
4x3750G
|
|
r3.4xlarge |
320 G (1 * 320 GiB SSD) |
Configurable 8 EBS volumes
Default to 75G per volume
|
Configurable 1 EBS volume
Default to 50G
|
Instance Store
320G
|
|
m5d.4xlarge |
600 G (2 * 300 GiB NVMe SSD) |
Configurable 8 EBS volumes
Default to 75G per volume
|
Configurable 1 EBS volume
Default to 50G
|
Instance Store
2x300G
|
|
m5d.8xlarge |
1200 G (2 * 600 GiB NVMe SSD) |
Configurable 8 EBS volumes
Default to 75G per volume
|
Configurable 1 EBS volume
Default to 50G
|
Instance Store
2x600G
|
|
m5d.12xlarge |
1800 G (2 * 900 GiB NVMe SSD) |
Configurable 8 EBS volumes
Default to 75G per volume
|
Configurable 1 EBS volume
Default to 50G
|
Instance Store
2x900G
|
|
m5d.16xlarge |
2400 G (4 * 600 GiB NVMe SSD) |
Configurable 8 EBS volumes
Default to 75G per volume
|
Configurable 1 EBS volume
Default to 50G
|
Instance Store
4x600G
|
|
r3.8xlarge |
640 G (2 * 320 GiB SSD) |
Configurable 8 EBS volumes
Default to 75G per volume
|
Configurable 1 EBS volume
Default to 50G
|
Instance Store
2x320G
|
|
r5d.4xlarge |
600 G (2 * 300 GiB NVMe SSD) |
Configurable 8 EBS volumes
Default to 75G per volume
|
Configurable 1 EBS volume
Default to 50G
|
Instance Store
2x300G
|
|
r5d.8xlarge |
1200 G (2 * 600 GiB NVMe SSD) |
Configurable 8 EBS volumes
Default to 75G per volume
|
Configurable 1 EBS volume
Default to 50G
|
Instance Store
2x600G
|
|
r5d.12xlarge |
1800 G (2 * 900 GiB NVMe SSD) |
Configurable 8 EBS volumes
Default to 75G per volume
|
Configurable 1 EBS volume
Default to 50G
|
Instance Store
2x900G
|
|
r5d.16xlarge |
2400 G (4 * 600 GiB NVMe SSD) |
Configurable 8 EBS volumes
Default to 75G per volume
|
Configurable 1 EBS volume
Default to 50G
|
Instance Store
4x600G
|
Supported EBS volumes
-
c4.4xlarge
-
c4.8xlarge
-
c5.4xlarge
-
c5.9xlarge
-
c6i.4xlarge
-
c6i.8xlarge
-
c6i.12xlarge
-
c6i.16xlarge
-
c6i.24xlarge
-
c6i.32xlarge
-
m4.4xlarge
-
m4.10xlarge
-
m5.4xlarge
-
m5.8xlarge
-
m5.12xlarge
-
r4.4xlarge
-
r4.8xlarge
-
r4.16xlarge
-
r5.4xlarge
-
r5.8xlarge
-
r5.12xlarge
-
r6i.4xlarge
-
r6i.8xlarge
-
r6i.12xlarge
-
r6i.16xlarge
-
r6i.24xlarge
-
r6i.32xlarge
6 - Add nodes to a cluster in AWS using Management Console
When you use MC to add nodes to a cluster in the cloud, MC provisions the instances, adds the new instances to the existing Vertica cluster, and then adds those hosts to the database.
When you use MC to add nodes to a cluster in the cloud, MC provisions the instances, adds the new instances to the existing Vertica cluster, and then adds those hosts to the database.
In the Vertica Management Console, you can add nodes in several ways, depending on your database mode.
For Eon Mode databases, MC supports actions for subcluster and node management for the following public and private cloud providers:
Note
Enterprise Mode does not support subclusters.
For Enterprise Mode databases, MC supports these actions:
Note
In the cloud on GCP, Enterprise Mode databases are not supported.
Adding nodes in an Eon Mode database
In an Eon Mode database, every node must belong to a subcluster. To add nodes, you always add them to one of the subclusters in the database:
Adding nodes in an Enterprise Mode database on AWS
In an Enterprise Mode database on AWS, to add an instance to your cluster:
-
On the MC Home page, click View Infrastructure to go to the Infrastructure page. This page lists all the clusters the MC is monitoring.
-
Click any cluster shown on the Infrastructure page.
-
Select View or Manage from the dialog that displays, to view its Cluster page. (In a cloud environment, if MC was deployed from a cloud template the button says "Manage". Otherwise, the button says "View".)
Note
You can click the pencil icon beside the cluster name to rename the cluster. Enter a name that is unique within MC.
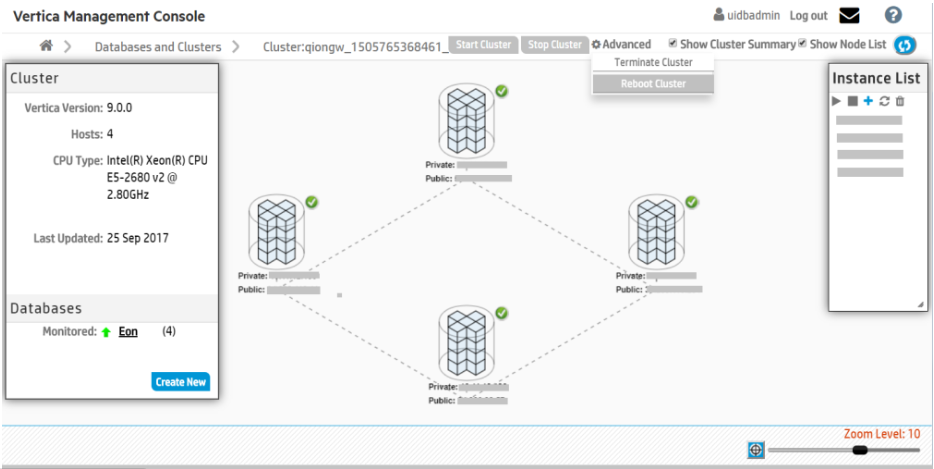
-
Click the Add (+) icon on the Instance List on the Cluster Management page.
MC adds a node to the selected cluster.
7 - Loading data from Amazon S3 using MC
You can use the Data Load Activity page in Management Console to import data from Amazon S3 storage to an existing Vertica table.
You can use the Data Load Activity page in Management Console to import data from Amazon S3 storage to an existing Vertica table. When you run a load job, Vertica appends rows to the target table you provide. If the job fails, or you cancel the job, Vertica commits no rows to the target table.
When you view your load history on the Instance tab, loading jobs initiated in MC using Amazon S3 have the name MC_S3_Load in the Stream Name column.
Prerequisites
To use the MC Load feature, you must have:
-
Access to an Amazon S3 storage account.
-
An existing table in your Vertica database to which you can copy your data. You must be the owner of the table.
-
(For non-CloudFormation Template installs) An S3 gateway endpoint.
If you aren't using a CloudFormation Template (CFT) to install Vertica, you must create an S3 gateway endpoint in your VPC. For more information, see the AWS documentation.
For example, the Vertica CFT has the following VPC endpoint:
"S3Enpoint" : {
    "Type" : "AWS::EC2::VPCEndpoint",
    "Properties" : {
    "PolicyDocument" : {
        "Version":"2012-10-17",
        "Statement":[{
        "Effect":"Allow",
        "Principal": "*",
        "Action":["*"],
        "Resource":["*"]
        }]
    },
    "RouteTableIds" : [ {"Ref" : "RouteTable"} ],
    "ServiceName" : { "Fn::Join": [ "", [ "com.amazonaws.", { "Ref": "AWS::Region" }, ".s3" ] ] },
    "VpcId" : {"Ref" : "VPC"}
}
Create a loading job
To load data from an Amazon S3 bucket to an existing table in your target database:
-
On the target database MC dashboard, click on the Load tab at the bottom of the page to view the Data Load Activity page.
-
Click on the Instance tab.
-
Click New S3 Data Load at the top-right of the tab. The Create New Amazon S3 Loading Job dialog box opens.
-
Enter your AWS account credentials and your target location information in the required fields, which are indicated by asterisks (*). Use the format S3:// for the bucket name.
-
(Optional) Specify additional options by completing the following fields:
For more about using these fields, see About configuring a data load from S3.
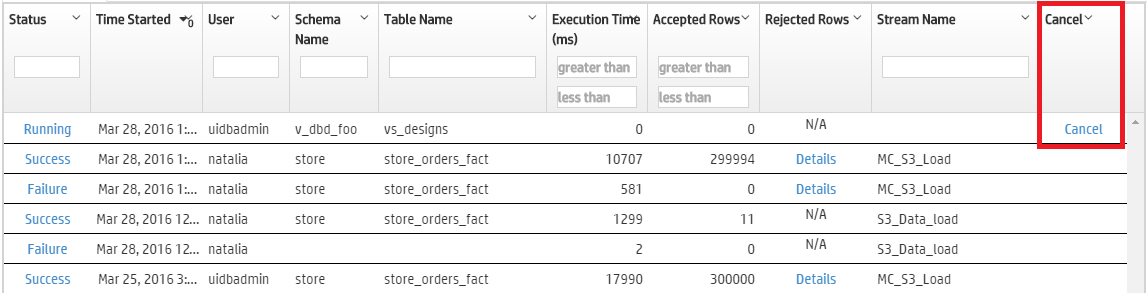
Cancel an initiated loading job
If a loading job is in progress, you can cancel it using the Cancel option in the Load History tab's Cancel column. Click Cancel to cancel the loading job. When you cancel a job, Vertica rolls back all rows and does not commit any data to the target table.
See also
7.1 - About configuring a data load from S3
When you create an S3 Data Load using MC, you have the option of further configuring the load operation.
When you create an S3 Data Load using MC, you have the option of further configuring the load operation. You can optionally specify the following:
Add COPY parameters
MC performs the load operation with COPY. You can use the COPY Parameters field to further configure the COPY operation. This field accepts parameters that are specified after the COPY statement's FROM clause. For details on these parameters and special requirements, see Parameters.
Note
The FILTER and PARSER parameters must appear in that order and precede all other parameters.
For example, you can specify the DELIMITER and SKIP parameters to separate columns with a comma, and skip one record of input data, respectively:
DELIMITER ',' SKIP 1
You can also add comments in this field with standard C comment notation.
Note
This field does not support SQL comment notation (double hyphen --).
Capture rejected data in a table
Set Capture rejected data in a table to Yes to create a table that contains rejected row data. You can view this data in the Load History tab.
This table uses the following naming convention:
schema.s3_load_rejections_target-table-name
You must have CREATE privilege on the schema if the table doesn't already exist. When you invoke multiple load processes for the same target table, MC appends all rejections data to the same table. For details, see Saving rejected data to a table.
Set a rejected records maximum
Set Reject Max to the maximum number of rows that can be rejected before the load operation fails. If COPY rejects the specified maximum rows, Vertica rolls back the entire load operation.
See also
7.2 - Viewing load history
You can view a history of all your continuous and instance loading jobs in Vertica on the Data Load Activity page.
You can view a history of all your continuous and instance loading jobs in Vertica on the Data Load Activity page.
-
Continuous jobs: Loading jobs that continuously monitor a source and stream data from the source.
-
Instance jobs: Loading jobs that batch load from a source. Instance jobs are of a fixed length and shorter-term than continuous loads.
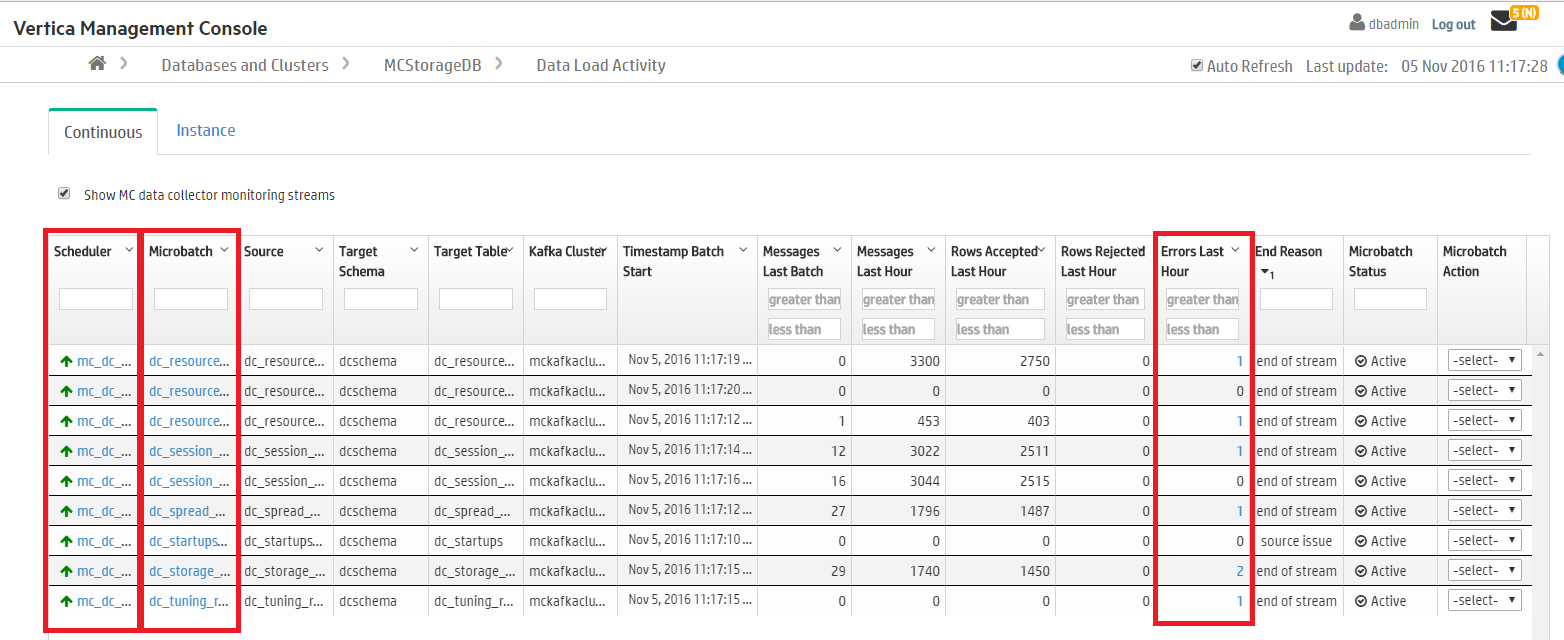
View continuous loads
The Continuous tab on the Data Load Activity page displays history of your database’s continuous loading jobs. For example, you can see loading jobs you create using the Vertica integration with Kafka (see Apache Kafka integration). Additionally, if you enable the MC extended monitoring feature, the Continuous tab displays the continuous jobs that stream data from your monitored database to a storage database. (See Extended monitoring for more on how MC can use Kafka to monitor databases externally.)
Use the Continuous tab to view details about continuous jobs, such as their source, target tables, and other microbatch configuration details.
If extended monitoring is enabled, jobs streaming to the MC storage database show mc_dc_kafka_config as the scheduler name. Deselect Show MC data collector monitoring streams at the top of the tab to remove these jobs from the display.
In the Continuous tab, click the labels in the Scheduler, Microbatch, and Errors Last Hour to view additional details about those loading jobs.
For more on continuous data streaming terminology, see Data streaming integration terms.
View load instances
In the Instance tab, you can see a history of your database's one-time loading jobs. For example, you can view instance jobs you created using the COPY command in vsql (see COPY), or instance jobs you created in MC to copy data from an Amazon S3 bucket. (For more about initiating loading jobs in MC, see Loading data from Amazon S3 using MC.)
In the Instance tab, click the labels in the Status column and Rejected Rows column to view more details about completed jobs. For more about rejected rows, see Handling messy data.
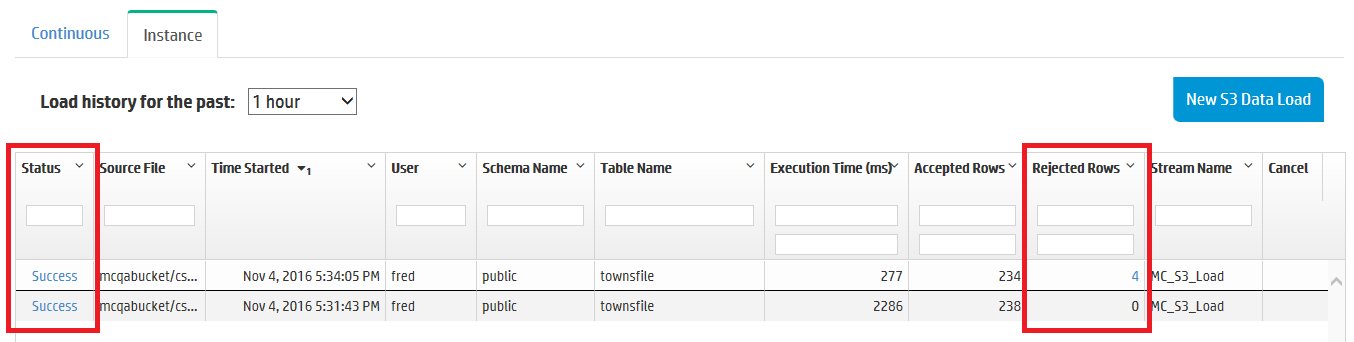
The number of load history results on the Instance tab depends on the Data collector retention policy for Requests Issued and Requests Completed. To change the retention policy, see Configuring data retention policies.
See also