This is the multi-page printable view of this section.
Click here to print.
Return to the regular view of this page.
Set up Vertica on the cloud
This section explains how you can deploy Vertica clusters running on Amazon Web Services (AWS), Microsoft Azure, or Google Cloud Platform (GCP).
This section explains how you can deploy Vertica clusters running on Amazon Web Services (AWS), Microsoft Azure, or Google Cloud Platform (GCP). It assumes that you are familiar with the cloud environment on which you will create your Vertica cluster.
Vertica offers simple, automatic deployment on all three platforms. By setting a few parameters, you can launch a fully functional environment with Vertica and Management Console already installed.
If launching a pre-configured environment doesn't work for your specific needs, you can instead set up your nodes in the cloud and manually install Vertica in order to have more control over your setup. AWS also supports manually deploying a Vertica Amazon Machine Image (AMI) that has Vertica pre-installed and allows for greater control over your environment configuration.
After you set up your environment, you can create a database in either Enterprise Mode or Eon Mode.
Vertica offers automatic configuration of resources and quick deployment on the cloud.
AWS
Vertica provides CloudFormation Templates (CFTs) in the AWS Marketplace. You can use a CFT to automatically launch preconfigured AWS resources in minutes, with Vertica and Management Console automatically installed.
Each CFT includes the in-browser Vertica Management Console. When you install Vertica using one of the CFTs, Management Console provides AWS-specific cluster management options, including the ability to quickly create a new cluster and Vertica database.
To deploy Vertica on AWS automatically, see Deploy Vertica using CloudFormation templates.
After deployment, you can create an Eon Mode or Enterprise Mode cluster and database using Management Console.
For more information about the AWS environment, see the official Amazon Web Services documentation.
For GCP, Vertica provides an automated installer that is available from the Google Cloud Marketplace.
Input a few parameters, and the Google Cloud Launcher will deploy the Vertica solution, including your new database. You can create up to a 16-node cluster. The solution includes the Vertica Management Console as the primary UI to get started.
To deploy Vertica on GCP automatically, see Deploy Vertica from the Google cloud marketplace.
For more information about the GCP environment, see the official Google Cloud Platform documentation.
Microsoft Azure
Vertica offers a fully automated cluster deployment from the Microsoft Azure Marketplace. This solution will automatically deploy a Vertica cluster and create an initial database, allowing you to log in to the Vertica Management Console and start using it after deployment has finished.
To deploy Vertica on Azure automatically, see Deploy Vertica from the Azure Marketplace.
For more information about the Azure environment, see the official Microsoft Azure documentation.
Manual installation and deployment (GCP, azure)
Manual installation might be the right option for you if you have many specific configuration requirements, and have an administrator who is familiar with setting up and maintaining cloud resources in the environment of your choice. Setup and maintenance may take longer and requires more expertise, but you will have more control over how your cluster is configured.
The process of installing Vertica manually on cloud resources is very similar to doing so with on-premises hardware.
If you manually install the Vertica server on cloud hosts, you cannot access Management Console.
Vertica offers cloud-specific manual installation instructions for GCP and Azure. If you want more control over your AWS cluster configuration, see Manual Deployment. Before you install, make sure to refer to the documentation of the platform you are using in order to set up your cloud resources correctly.
To install Vertica on GCP manually, see the GCP section of the Vertica documentation: Vertica on Google Cloud Platform.
Refer to the official Google Cloud Platform documentation for more detail on setting up your GCP resources.
Microsoft Azure
To install Vertica on Azure manually, see the Azure section of the Vertica documentation: Vertica on Microsoft Azure.
Refer to the official Microsoft Azure documentation for more detail on setting up your Azure resources.
Manual deployment (AWS)
Manual deployment is only available on AWS, which supports Amazon Machine Images (AMI) that include the Vertica software and the recommended configuration. The Vertica AMI acts as a template, requiring fewer configuration steps than a manual installation but still allowing control over your configuration. Vertica provides AMIs for both Management Console and cluster hosts.
For more information about the manual deployment process, see Manually deploy Vertica on AWS.
1 - Vertica on Amazon Web Services
Vertica clusters on AWS can operate on EC2 instances automatically provisioned using a CloudFormation Template (CFT), or manually deployed using Amazon Machine Images (AMIs).
Vertica clusters on AWS can operate on EC2 instances automatically provisioned using a CloudFormation Template (CFT), or manually deployed using Amazon Machine Images (AMIs). For information about these deployment methods, see Deploy Vertica using CloudFormation templates and Manually deploy Vertica on AWS.
You can deploy a Vertica database on AWS running in either Enterprise Mode or Eon Mode. The differences between these two modes lay in their architecture, deployment, and scalability:
-
Enterprise Mode stores data locally on the nodes in the database.

-
Eon Mode stores its data in an S3 bucket.

Eon Mode separates the computational processes from the communal storage layer of your database. This separation lets you elastically vary the number of nodes in your database cluster to adjust to varying workloads.
Vertica also supports the following AWS features:
-
Enhanced Networking: Vertica recommends that you use the AWS enhanced networking for optimal performance. For more information, see Enabling Enhanced Networking on Linux Instances in a VPC in the AWS documentation.
-
Command Line Interface: Use the Amazon command-line Interface (CLI) with your Vertica AMIs. For more information, see What Is the AWS Command Line Interface?.
-
Elastic Load Balancing: Use elastic load balancing (ELB) for queries up to one hour. When enabling ELB, configure the timer to 3600 seconds. For more information see Elastic Load Balancing in the AWS documentation.
For more information about Amazon cluster instances and their limitations, see the Amazon documentation.
In this section
1.1 - Supported AWS instance types
Vertica supports a range of Amazon Web Services instance types, each optimized for different purposes.
Vertica supports a range of Amazon Web Services instance types, each optimized for different purposes. Choose the instance type that best matches your requirements. The two tables below list the AWS instance types that Vertica supports for Vertica cluster hosts, and for use in MC. For more information, see the Amazon Web Services documentation on instance types and volumes.
Important
If you plan to use an Amazon Machine Image (AMI) on multiple AWS accounts, make sure to subscribe to the image on all your accounts. This allows you to access an image even when it is delisted from the AWS Marketplace.
Instance types for Vertica cluster hosts
Each Amazon EC2 Instance type natively provides one of the following storage options:
-
Elastic Block Store (EBS) provides durable storage: Data files stored on instance persist after instance is stopped.
-
Instance Store provides temporary storage: Data files stored on instance are lost when instance is stopped.
Vertica AMIs can use either the Instance Metadata Service Version 1 (IMDSv1) or the Instance Metadata Service Version 2 (IMDSv2) to authenticate to AWS services, including S3.
For more information about storage configuration in AWS, see Configure storage.
Note
Instance types that support EBS volumes support encrypting.
|
Optimization |
Instance Types Using Only EBS Volumes (Durable) |
Instance Types Using Instance Store Volumes (Temporary) |
|
General purpose |
m4.4xlarge
m4.10xlarge
m5.4xlarge
m5.8xlarge
m5.12xlarge
|
m5d.4xlarge
m5d.8xlarge
m5d.12xlarge
|
|
Compute |
c4.4xlarge
c4.8xlarge
c5.4xlarge
c5.9xlarge
c6i.4xlarge
c6i.8xlarge
c6i.12xlarge
c6i.16xlarge
c6i.24xlarge
c6i.32xlarge
|
c3.4xlarge
c3.8xlarge
c5d.4xlarge
c5d.9xlarge
|
|
Memory |
r4.4xlarge
r4.8xlarge
r4.16xlarge
r5.4xlarge
r5.8xlarge
r5.12xlarge
r6i.4xlarge
r6i.8xlarge
r6i.12xlarge
r6i.16xlarge
r6i.24xlarge
r6i.32xlarge
|
r3.4xlarge
r3.8xlarge
r5d.4xlarge
r5d.8xlarge
r5d.12xlarge
|
|
Storage |
|
d2.4xlarge
d2.8xlarge
i3.4xlarge
i3.8xlarge
i3.16xlarge
i3en.3xlarge
i3en.6xlarge
i3en.12xlarge
i4i.4xlarge
i4i.8xlarge
i4i.16xlarge
|
Note
By default, the c4.8xlarge, d2.8xlarge, and m4.10xlarge instances have their processor C-states set to a value of 1 in the Vertica AMI. This measure is meant to improve performance by limiting the sleep states that an instance running Vertica uses.
For more information about sleep states, visit the AWS Documentation.
Instance types available for MC hosts
|
Optimization |
Type |
Supports EBS Storage (Durable) |
Supports Ephemeral Storage (Temporary) |
|
Computing |
c4.large
c4.xlarge
c5.large
c5.xlarge
|
Yes
Yes
Yes
Yes
|
No
No
No
No
|
Choosing AWS Eon Mode instance types
When running an Eon Mode database in AWS, choose instance types that support ephemeral instance storage or EBS volumes for your depot, depending on cost and availability. Vertica recommends either r4 or i3 instances for production clusters. It is not mandatory to have an EBS-backed depot, because in Eon Mode, a copy of the data is safely stored in communal storage. However, you must have an EBS-backed catalog for Eon Mode databases.
The following table provides information to help you make a decision on how to pick instances with ephemeral instance storage or EBS only storage. Check with Amazon Web Services for the latest cost per hour.
Important
If you select instances that use instance store, if you then terminate those instances there is the potential for data loss. For Eon mode, MC displays an alert to inform the user of the potential data loss when terminating instances that support instance store.
|
Storage Type |
Instance Type |
Pros/Cons |
|
Instance storage |
i3.8xlarge |
Instance storage offers better performance than EBS attached storage through multiple EBS volumes. Instance storage can be striped (RAIDed) together to increase throughput and load balance I/O.
Data stored in instance-store volumes is not persistent through instance stops, terminations, or hardware failures.
|
|
EBS-only storage |
r4.8xlarge with 600 GB
EBS volume attached
|
Newer instance types from AWS have only the EBS option. In most AWS regions, it's easier to provision a large number of instances.
You can terminate an instance but leave the EBS volume around for faster revive. Perserving the EBS will preserve the depot. While some of the cached files might have become stale, they will be ignored and evicted. Much of the cached data will not be stale. It will save time when the node revives and warms its depot.
Take advantage of full-volume encryption.
|
For more information about Amazon cluster instances and their limitations, see Manage Clusters in the Amazon Web Services documentation.
1.2 - AWS authentication
Amazon defines two ways to control access to AWS resources such as S3: IAM roles and the combination of id, secrets, and (optionally) session tokens.
Amazon defines two ways to control access to AWS resources such as S3: IAM roles and the combination of id, secrets, and (optionally) session tokens. For long-term access to non-communal storage buckets, you should use IAM roles for access control centralization. You do not need to change your application's configuration if you want to change its access settings. You just alter the IAM role applied to your EC2 instances.
However, for one-time tasks like backing up and restoring the database or loading data to and from non-communal storage buckets, you should use an AWS access key.
Vertica uses both of these authentication methods to support different features and use cases:
-
An Eon Mode database's access to S3 for communal and catalog storage must always use IAM role authentication. IAM roles are the default access control method for AWS resources. Vertica uses this method if you do not configure the legacy access control session parameters.
-
Individual users can read data from S3 storage locations other than the ones Vertica uses for communal storage. For example, users can use COPY to load data into Vertica from an S3 bucket or query an external table stored on S3. If the IAM role assigned to the Vertica nodes does not have access to this external S3 data, the user must set an id, secret, and optionally an access token in session variables to authorize access to it. These session variables override the IAM role set on the server. See S3 parameters for a list of these session parameters.
-
Individual users can export data to S3 using file export. File export cannot use IAM authorization. Users who want to export data to S3 must set id, secret, and optionally access token values in session variables.
Important
If the database is running in Eon Mode, using id and secret authentication is more complex. In addition to having access to the external S3 data, any id that a user sets must be authorized to read from and write to the S3 storage locations that Vertica uses to store communal and catalog data. The queries that the user executes uses this id for all storage requests, not just those for accessing external S3 data. If the id does not have access to the catalog and communal storage, the user cannot execute queries.
Configuring an IAM role
To configure an IAM role to grant Vertica to access AWS resources you must:
-
Create an IAM role to allow EC2 instances to access the specific resources.
-
Grant that role permission to access your resources.
-
Attach this IAM role to each EC2 instance in the Vertica cluster.
To see an example of IAM roles for a Vertica cluster, look at the roles defined in one of the Cloud Formation Templates provided by Vertica. You can download these templates from any of the Vertica entries in the Amazon Marketplace. Under each entry's Usage Information section, click the View CloudFormation Template link, then click Download CloudFormation Template.
For more information about IAM roles, see IAM Roles for Amazon EC2 in the AWS documentation.
1.3 - Deploy Vertica using CloudFormation templates
Vertica provides CloudFormation Templates (CFTs) on the AWS Marketplace that allow you to get a cluster up and running quickly.
Vertica provides CloudFormation Templates (CFTs) on the AWS Marketplace that allow you to get a cluster up and running quickly. Using the template allows you to automatically provision your AWS resources and launch a Vertica cluster and Management Console, with minimal configuration required.
If you prefer to deploy a VPC, instances, and related resources manually, see Manually deploy Vertica on AWS.
For details about creating an Eon Mode or Enterprise Mode database after you create a cluster with CFTs, see Amazon Web Services in MC.
1.3.1 - CloudFormation template (CFT) overview
With Vertica on AWS, use CloudFormation Templates (CFTs) to easily manage provisioning the AWS resources with a running Vertica system.
With Vertica on AWS, use CloudFormation Templates (CFTs) to easily manage provisioning the AWS resources with a running Vertica system. After you provide a few parameters to the template, you can create a stack to automatically provision the AWS resources for your Vertica system.
To access Vertica CFTs, go to the AWS Marketplace.
CFT licensing models
Licensing models for CFTs are:
-
Bring Your Own License (BYOL): By default, free CE license is installed with 3 nodes and 1 TB. To extend nodes or size, you can purchase the Vertica BYOL license.
Outside of the BYOL license on CFTs, you can also access the Community Edition without a license file:
-
By the Hour: A pay-as-you-go model where you pay for only the number of hours you use for each node. One advantage of using the Paid Listing is that all charges appear on your Amazon AWS bill. This offers an alternative to purchasing a full Vertica license. This eliminates the need to compute potential storage needs in advance.
CFT prerequisites
Before you can deploy Vertica on AWS using CloudFormation Templates (CFTs), verify that you have:
-
AWS account with permissions to create a VPC, subnet, security group, EC2 instances, and IAM roles (For more information about AWS accounts, see the AWS documentation)
-
Amazon key pair for SSH access to an EC2 instance. (See the AWS documentation for key pairs.)
Supported CFTs and Vertica offerings
Available Vertica CFTs are:
-
Management Console with 3 Vertica nodes: The easiest way to deploy Vertica. This CFT deploys an Eon Mode database by default. However, this environment can also be used to create an Enterprise Mode database. For more information, see Creating a database.
-
Deploy Management Console into new VPC: This CFT deploys all required AWS resources and installs the Vertica Management Console (MC). After stack creation completes, log in to the MC to provision a Vertica database cluster.
-
Deploy Management Console into existing VPC: This CFT deploys the Vertica Management Console (MC) in an already-existing VPC and subnet. After stack creation completes, the MC is available. Log in to MC to provision either a Vertica database cluster or an Eon Mode database cluster.
For this CFT, you must first set up the VPC, subnet, and related network resources. For more information about the correct configuration of these resources for Vertica, see the following topics in the AWS documentation:
Using the license models and supported CFTs, you can deploy the following Vertica products:
See Deploy MC and AWS resources with a CloudFormation template for information on deploying these products.
1.3.2 - Creating a Virtual Private Cloud
A Vertica cluster on AWS must be logically located in the same network.
A Vertica cluster on AWS must be logically located in the same network. This is similar to placing the nodes of an on-premises cluster within the same network. Create a virtual private cloud (VPC) to ensure the nodes in your cluster will be able to communicate with each other within AWS.
Create a single public subnet VPC with the following configurations:
Note
A Vertica cluster must be operated within a single availability zone.
For more information about VPCs, including how to create one, see the AWS documentation.
1.3.3 - Deploy MC and AWS resources with a CloudFormation template
You can deploy (MC) and its associated AWS resources using CloudFormation templates (CFTs) that are available through the AWS Marketplace.
You can deploy Management Console (MC) and its associated AWS resources using CloudFormation templates (CFTs) that are available through the AWS Marketplace. For a list of available CFTs, see CloudFormation template (CFT) overview.
Complete the following to deploy the Vertica MC and related resources in AWS:
-
Log in to the AWS Marketplace with an AWS account (see the Prerequisites section above).
-
Search for "Vertica" in the AWS Marketplace.
-
Select a Vertica CFT. Each CFT leads you to a product overview page, with pricing estimates. (Also see CloudFormation template (CFT) overview for an overview of available templates and products).
-
Click Continue to Subscribe.
-
On the next page, select your launch settings based on your requirements for deployment.
-
If you have not agreed to Vertica EULA terms on the AWS Marketplace before, click Accept Software Terms to subscribe.
-
Click Launch with CloudFormation Console. The CloudFormation Console opens.
-
The CloudFormation Console automatically supplies the URL in the Specify an Amazon S3 template URL field. Click Next.
-
Follow the CloudFormation workflow and enter the parameters (collectively called a stack).
Note
Important: Take note of the username and password you set for Management Console during this step. You cannot recover or reset these credentials after you create the stack.
-
After confirming the details you have provided for your new stack, click Create. The AWS console brings you to the Stacks page, where you can view the progress of the creation process. The process takes several minutes.
-
The Outputs tab displays information about accessing your environment after the process completes.
Next, access the Management Console (MC) to deploy your cluster instances and create a database, as described in Access Management Console.
1.3.4 - Access Management Console
Complete the following steps to access Management Console on your deployed AWS resources:.
Complete the following steps to access Management Console on your deployed AWS resources:
-
On the AWS CloudFormation Stacks page, select your new stack and view the Outputs tab. This tab provides information about accessing your environment, as well as documentation and licensing resources.
-
In the ManagementConsole row, select the URL in the Value column to open the MC login page.
-
To log in, enter the MC username and password that you created using the CloudFormation Console.
After login, MC displays the home page, with options to provision a new cluster or database or import existing ones. If you chose a CFT that also creates a database, your new database is also displayed on the home page.
This page also provides a Resources section with links to online training, blogs, community, and help resources.
You have successfully launched and connected to Management Console on AWS resources.
If you have not yet provisioned a Vertica cluster and database, complete the steps in one of the following:
1.4 - Manually deploy Vertica on AWS
Vertica provides tested and pre-configured Amazon Machine Images (AMIs) to deploy cluster hosts or MC hosts on AWS.
Vertica provides tested and pre-configured Amazon Machine Images (AMIs) to deploy cluster hosts or MC hosts on AWS. When you create an EC2 instance on AWS using a Vertica AMI, the instance includes the Vertica software and the recommended configuration. The Vertica AMI acts as a template, requiring fewer configuration steps.
This section will guide you through configuring your network settings on AWS, launching and preparing EC2 instances using the Vertica AMI, and creating a Vertica cluster on those EC2 instances.
Choose this method of installation if you are familiar with configuring AWS and have many specific AWS configuration needs. To automatically deploy AWS resources and a Vertica cluster instead, see Deploy Vertica using CloudFormation templates.
1.4.1 - Configure your network
Before you deploy your cluster, you must configure the network on which Vertica will run.
Before you deploy your cluster, you must configure the network on which Vertica will run. Vertica requires a number of specific network configurations to operate on AWS. You may also have specific network configuration needs beyond the default Vertica settings.
Important
You can create a Vertica database that uses IPv6 for internal communications running on AWS. However, if you do so, you must identify the hosts in your cluster using IP addresses rather than host names. The AWS DNS resolution service is incompatible with IPv6.
The following sections explain which Amazon EC2 features you need to configure for instance creation.
1.4.1.1 - Create a placement group, key pair, and VPC
Part of configuring your network for AWS is to create the following:.
Part of configuring your network for AWS is to create the following:
Create a placement group
A placement group is a logical grouping of instances in a single Availability Zone. Placement Groups are required for clusters and all Vertica nodes must be in the same Placement Group.
Vertica recommends placement groups for applications that benefit from low network latency, high network throughput, or both. To provide the lowest latency, and the highest packet-per-second network performance for your Placement Group, choose an instance type that supports enhanced networking.
For information on creating placement groups, see Placement Groups in the AWS documentation.
Create a key pair
You need a key pair to access your instances using SSH. Create the key pair using the AWS interface and store a copy of your key (*.pem) file on your local machine. When you access an instance, you need to know the local path of your key.
Use a key pair to:
for information on creating a key pair, see Amazon EC2 Key Pairs in the AWS documentation.
Create a virtual private cloud (VPC)
You create a Virtual Private Cloud (VPC) on Amazon so that you can create a network of your EC2 instances. Your instances in the VPC all share the same network and security settings.
A Vertica cluster on AWS must be logically located in the same network. Create a VPC to ensure the nodes in you cluster can communicate with each other in AWS.
Create a single public subnet VPC with the following configurations:
Note
A Vertica cluster must be operated in a single availability zone.
For information on creating a VPC, see Create a Virtual Private Cloud (VPC) in the AWS documentation.
1.4.1.2 - Network ACL settings
Vertica requires the following network access control list (ACL) settings on an AWS instance running the Vertica AMI.
Vertica requires the following basic network access control list (ACL) settings on an AWS instance running the Vertica AMI. Vertica recommends that you secure your network with additional ACL settings that are appropriate to your situation.
Inbound Rules
|
Type |
Protocol |
Port Range |
Use |
Source |
Allow/Deny |
|
SSH |
TCP (6) |
22 |
SSH (Optional—for access to your cluster from outside your VPC) |
User Specific |
Allow |
|
Custom TCP Rule |
TCP (6) |
5450 |
MC (Optional—for MC running outside of your VPC) |
User Specific |
Allow |
|
Custom TCP Rule |
TCP (6) |
5433 |
SQL Clients (Optional—for access to your cluster from SQL clients) |
User Specific |
Allow |
|
Custom TCP Rule |
TCP (6) |
50000 |
Rsync (Optional—for backup outside of your VPC) |
User Specific |
Allow |
|
Custom TCP Rule |
TCP (6) |
1024-65535 |
Ephemeral Ports (Needed if you use any of the above) |
User Specific |
Allow |
|
ALL Traffic |
ALL |
ALL |
N/A |
0.0.0.0/0 |
Deny |
Outbound Rules
|
Type |
Protocol |
Port Range |
Use |
Source |
Allow/Deny |
|
Custom TCP Rule |
TCP (6) |
0–65535 |
Ephemeral Ports |
0.0.0.0/0 |
Allow |
You can use the entire port range specified in the previous table, or find your specific ephemeral ports by entering the following command:
$ cat /proc/sys/net/ipv4/ip_local_port_range
For detailed information on network ACLs within AWS, refer to Network ACLs in the Amazon documentation.
For detailed information on ephemeral ports within AWS, refer to Ephemeral Ports in the Amazon documentation.
1.4.1.3 - Configure TCP keepalive with AWS network load balancer
AWS supports three types of elastic load balancers (ELBs):.
AWS supports three types of elastic load balancers (ELBs):
Vertica strongly recommends the AWS Network Load Balancer (NLB), which provides the best performance with your Vertica database. The Network Load Balancer acts as a proxy between clients (such as JDBC) and Vertica servers. The Classic and Application Load Balancers do not work with Vertica, in Enterprise Mode or Eon Mode.
To avoid timeouts and hangs when connecting to Vertica through the NLB, it is important to understand how AWS NLB handles idle timeouts for connections. For the NLB, AWS sets the idle timeout value to 350 seconds and you cannot change this value. The timeout applies to both connection points.
For a long-running query, if either the client or the server fails to send a timely keepalive, that side of the connection is terminated. This can lead to situations where a JDBC client hangs waiting for results that would never be returned because the server fails to send a keepalive within 350 seconds.
To identify an idle timeout/keepalive issue, run a query like this via a client such as JDBC:
=> SELECT SLEEP(355);
If there’s a problem, one of the following situations occurs:
-
The client connection terminates before 355 seconds. In this case, lower the JDBC keepalive setting so that keepalives are sent less than 350 seconds apart.
-
The client connection doesn’t return a result after 355 seconds. In this case, you need to adjust the server keepalive settings (tcp_keepalive_time and tcp_keepalive_intvl) so that keepalives are sent less than 350 seconds apart.
You can adjust the keepalive settings on the server, or you can adjust them in Vertica.
For detailed information about AWS Network Load Balancers, see the AWS documentation.
1.4.1.4 - Create and assign an internet gateway
When you create a VPC, an Internet gateway is automatically assigned to it.
When you create a VPC, an Internet gateway is automatically assigned to it. You can use that gateway, or you can assign your own. If you are using the default Internet gateway, continue with the procedure described in Create a security group.
Otherwise, create an Internet gateway specific to your needs. Associate that internet gateway with your VPC and subnet.
For information about how to create an Internet Gateway, see Internet Gateways in the AWS documentation.
1.4.1.5 - Assign an elastic IP address
An elastic IP address is an unchanging IP address that you can use to connect to your cluster externally.
An elastic IP address is an unchanging IP address that you can use to connect to your cluster externally. Vertica recommends you assign a single elastic IP to a node in your cluster. You can then connect to other nodes in your cluster from your primary node using their internal IP addresses dictated by your VPC settings.
Create an elastic IP address. For information, see Elastic IP Addresses in the AWS documentation.
1.4.1.6 - Create a security group
The Vertica AMI has specific security group requirements.
The Vertica AMI has specific security group requirements. When you create a Virtual Private Cloud (VPC), AWS automatically creates a default security group and assigns it to the VPC. You can use the default security group, or you can name and assign your own.
Create and name your own security group using the following basic security group settings. You may make additional modifications based on your specific needs.
Inbound
|
Type |
Use |
Protocol |
Port Range |
IP |
|
SSH |
|
TCP |
22 |
The CIDR address range of administrative systems that require SSH access to the Vertica nodes. Make this range as restrictive as possible. You can add multiple rules for separate network ranges, if necessary. |
|
DNS (UDP) |
|
UDP |
53 |
Your private subnet address range (for example, 10.0.0.0/24). |
|
Custom UDP |
Spread |
UDP |
4803 and 4804 |
Your private subnet address range (for example, 10.0.0.0/24). |
|
Custom TCP |
Spread |
TCP |
4803 |
Your private subnet address range (for example, 10.0.0.0/24). |
|
Custom TCP |
VSQL/SQL |
TCP |
5433 |
The CIDR address range of client systems that require access to the Vertica nodes. This range should be as restrictive as possible. You can add multiple rules for separate network ranges, if necessary. |
|
Custom TCP |
Inter-node Communication |
TCP |
5434 |
Your private subnet address range (for example, 10.0.0.0/24). |
|
Custom TCP |
|
TCP |
5444 |
Your private subnet address range (for example, 10.0.0.0/24). |
|
Custom TCP |
MC |
TCP |
5450 |
The CIDR address of client systems that require access to the management console. This range should be as restrictive as possible. You can add multiple rules for separate network ranges, if necessary. |
|
Custom TCP |
Rsync |
TCP |
50000 |
Your private subnet address range (for example, 10.0.0.0/24). |
|
ICMP |
Installer |
Echo Reply |
N/A |
Your private subnet address range (for example, 10.0.0.0/24). |
|
ICMP |
Installer |
Traceroute |
N/A |
Your private subnet address range (for example, 10.0.0.0/24). |
Note
In Management Console (MC), the Java IANA discovery process uses port 7 once to detect if an IP address is reachable before the database import operation. Vertica tries port 7 first. If port 7 is blocked, Vertica switches to port 22.
Outbound
|
Type |
Protocol |
Port Range |
Destination |
IP |
|
All TCP |
TCP |
0-65535 |
Anywhere |
0.0.0.0/0 |
|
All ICMP |
ICMP |
0-65535 |
Anywhere |
0.0.0.0/0 |
|
All UDP |
UDP |
0-65535 |
Anywhere |
0.0.0.0/0 |
For information about what a security group is, as well as how to create one, see Amazon EC2 Security Groups for Linux Instances in the AWS documentation.
1.4.2 - Deploy AWS instances for your Vertica database cluster
After you Configure Your Network, you can create AWS instances and deploy Vertica.
After you Configure your network, you can create AWS instances and deploy Vertica. Follow these procedures to deploy and run Vertica on AWS.
1.4.2.1 - Configure and launch an instance
After you configure your network settings on AWS, configure and launch the instances where you will install Vertica.
After you configure your network settings on AWS, configure and launch the instances where you will install Vertica. An Elastic Compute Cloud (EC2) instance without a Vertica AMI is similar to a traditional host. Just like with an on-premises cluster, you must prepare and configure your cluster and network at the hardware level before you can install Vertica.
When you create an EC2 instance on AWS using a Vertica AMI, the instance includes the Vertica software and the recommended configuration. Vertica recommends that you use the Vertica AMI unmodified. The Vertica AMI acts as a template, requiring fewer configuration steps:
-
Choose a Vertica AMI Operating Systems
-
Configure EC2 instances.
-
Add storage to instances.
-
Optionally, configure EBS volumes as a RAID array.
-
Set the security group and S3 access.
-
Launch instances and verify they are running.
OpenText provides Vertica and Management Console AMIs on the Red Hat Enterprise Linux 8 operating system.
You can use the AMI to deploy MC hosts or cluster hosts. For more information, see the AWS Marketplace.
-
Select a Vertica AMI from the AWS marketplace.For instance type recommendations for Eon Mode databases, see Choosing AWS Eon Mode Instance Types.
-
Select the desired fulfillment method.
-
Configure the following:
Add storage to instances
Consider the following issues when you add storage to your instances:
-
Add a number of drives equal to the number of physical cores in your instance—for example, for a c3.8xlarge instance, 16 drives; for an r3.4xlarge, 8 drives.
-
Do not store your information on the root volume.
-
Amazon EBS provides durable, block-level storage volumes that you can attach to running instances. For guidance on selecting and configuring an Amazon EBS volume type, see Amazon EBS Volume Types.
You can configure your EBS volumes into a RAID 0 array to improve disk performance. Before doing so, use the vioperf utility to determine whether the performance of the EBS volumes is fast enough without using them in a RAID array. Pass vioperf the path to a mount point for an EBS volume. In this example, an EBS volume is mounted on a directory named /vertica/data:
[dbadmin@ip-10-11-12-13 ~]$ /opt/vertica/bin/vioperf /vertica/data

The minimum required I/O is 20 MB/s read and write per physical processor core on
each node, in full duplex i.e. reading and writing at this rate simultaneously,
concurrently on all nodes of the cluster. The recommended I/O is 40 MB/s per
physical core on each node. For example, the I/O rate for a server node with 2
hyper-threaded six-core CPUs is 240 MB/s required minimum, 480 MB/s recommended.

Using direct io (buffer size=1048576, alignment=512) for directory "/vertica/data"

test      | directory     | counter name        | counter | counter   | counter       | counter       | thread | %CPU  | %IO Wait  | elapsed | remaining
          |               |                     | value   | value (10 | value/core    | value/core    | count  |       |           | time (s)| time (s)
          |               |                     |         | sec avg)  |               | (10 sec avg)  |        |       |           |         |
--------------------------------------------------------------------------------------------------------------------------------------------------------
Write     | /vertica/data | MB/s                | 259     | 259       | 32.375        | 32.375        | 8      | 4     | 11        | 10      | 65
Write     | /vertica/data | MB/s                | 248     | 232       | 31            | 29            | 8      | 4     | 11        | 20      | 55
Write     | /vertica/data | MB/s                | 240     | 234       | 30            | 29.25         | 8      | 4     | 11        | 30      | 45
Write     | /vertica/data | MB/s                | 240     | 233       | 30            | 29.125        | 8      | 4     | 13        | 40      | 35
Write     | /vertica/data | MB/s                | 240     | 233       | 30            | 29.125        | 8      | 4     | 13        | 50      | 25
Write     | /vertica/data | MB/s                | 240     | 232       | 30            | 29            | 8      | 4     | 12        | 60      | 15
Write     | /vertica/data | MB/s                | 240     | 238       | 30            | 29.75         | 8      | 4     | 12        | 70      | 5
Write     | /vertica/data | MB/s                | 240     | 235       | 30            | 29.375        | 8      | 4     | 12        | 75      | 0
ReWrite   | /vertica/data | (MB-read+MB-write)/s| 237+237 | 237+237   | 29.625+29.625 | 29.625+29.625 | 8      | 4     | 22        | 10      | 65
ReWrite   | /vertica/data | (MB-read+MB-write)/s| 235+235 | 234+234   | 29.375+29.375 | 29.25+29.25   | 8      | 4     | 20        | 20      | 55
ReWrite   | /vertica/data | (MB-read+MB-write)/s| 234+234 | 235+235   | 29.25+29.25   | 29.375+29.375 | 8      | 4     | 20        | 30      | 45
ReWrite   | /vertica/data | (MB-read+MB-write)/s| 233+233 | 234+234   | 29.125+29.125 | 29.25+29.25   | 8      | 4     | 18        | 40      | 35
ReWrite   | /vertica/data | (MB-read+MB-write)/s| 233+233 | 234+234   | 29.125+29.125 | 29.25+29.25   | 8      | 4     | 20        | 50      | 25
ReWrite   | /vertica/data | (MB-read+MB-write)/s| 234+234 | 235+235   | 29.25+29.25   | 29.375+29.375 | 8      | 3     | 19        | 60      | 15
ReWrite   | /vertica/data | (MB-read+MB-write)/s| 233+233 | 236+236   | 29.125+29.125 | 29.5+29.5     | 8      | 4     | 21        | 70      | 5
ReWrite   | /vertica/data | (MB-read+MB-write)/s| 232+232 | 236+236   | 29+29         | 29.5+29.5     | 8      | 4     | 21        | 75      | 0
Read      | /vertica/data | MB/s                | 248     | 248       | 31            | 31            | 8      | 4     | 12        | 10      | 65
Read      | /vertica/data | MB/s                | 241     | 236       | 30.125        | 29.5          | 8      | 4     | 15        | 20      | 55
Read      | /vertica/data | MB/s                | 240     | 232       | 30            | 29            | 8      | 4     | 10        | 30      | 45
Read      | /vertica/data | MB/s                | 240     | 232       | 30            | 29            | 8      | 4     | 12        | 40      | 35
Read      | /vertica/data | MB/s                | 240     | 234       | 30            | 29.25         | 8      | 4     | 12        | 50      | 25
Read      | /vertica/data | MB/s                | 238     | 235       | 29.75         | 29.375        | 8      | 4     | 15        | 60      | 15
Read      | /vertica/data | MB/s                | 238     | 232       | 29.75         | 29            | 8      | 4     | 13        | 70      | 5
Read      | /vertica/data | MB/s                | 238     | 238       | 29.75         | 29.75         | 8      | 3     | 9         | 75      | 0
SkipRead  | /vertica/data | seeks/s             | 22909   | 22909     | 2863.62       | 2863.62       | 8      | 0     | 6         | 10      | 65
SkipRead  | /vertica/data | seeks/s             | 21989   | 21068     | 2748.62       | 2633.5        | 8      | 0     | 6         | 20      | 55
SkipRead  | /vertica/data | seeks/s             | 21639   | 20936     | 2704.88       | 2617          | 8      | 0     | 7         | 30      | 45
SkipRead  | /vertica/data | seeks/s             | 21478   | 20999     | 2684.75       | 2624.88       | 8      | 0     | 6         | 40      | 35
SkipRead  | /vertica/data | seeks/s             | 21381   | 20995     | 2672.62       | 2624.38       | 8      | 0     | 5         | 50      | 25
SkipRead  | /vertica/data | seeks/s             | 21310   | 20953     | 2663.75       | 2619.12       | 8      | 0     | 5         | 60      | 15
SkipRead  | /vertica/data | seeks/s             | 21280   | 21103     | 2660          | 2637.88       | 8      | 0     | 8         | 70      | 5
SkipRead  | /vertica/data | seeks/s             | 21272   | 21142     | 2659          | 2642.75       | 8      | 0     | 6         | 75      | 0
If the EBS volume read and write performance (the entries with Read and Write in column 1 of the output) is greater than 20MB/s per physical processor core (columns 6 and 7), you do not need to configure the EBS volumes as a RAID array to meet the minimum requirements to run Vertica. You may still consider configuring your EBS volumes as a RAID array if the performance is less than the optimal 40MB/s per physical core (as is the case in this example).
Note
If your EC2 instance has hyper-threading enabled, vioperf may incorrectly count the number of cores in your system. The 20MB/s throughput per core requirement only applies to physical cores, rather than virtual cores. If your EC2 instance has hyper-threading enabled, divide the counter value (column 4 in the output) by the number of physical cores. See CPU Cores and Threads Per CPU Core Per Instance Type section in the AWS documentation topic
Optimizing CPU Options for a list of physical cores in each instance type.
If you determine you need to configure your EBS volumes as a RAID 0 array, see the AWS documentation topic RAID Configuration on Linux the steps you need to take.
Security group and access
-
Choose between your previously configured security group or the default security group.
-
Configure S3 access for your nodes by creating and assigning an IAM role to your EC2 instance. See AWS authentication for more information.
1.4.2.2 - Connect to an instance
Using your private key, take these steps to connect to your cluster through the instance to which you attached an elastic IPaddress:.
Using your private key, take these steps to connect to your cluster through the instance to which you attached an elastic IPaddress:
-
As the dbadmin user, type the following command, substituting your ssh key:
$ ssh --ssh-identity <ssh key> dbadmin@elasticipaddress
-
Select Instances from the Navigation panel.
-
Select the instance that is attached to the Elastic IP.
-
Click Connect.
-
On Connect to Your Instance, choose one of the following options:
-
A Java SSH Client directly from my browser—Add the path to your private key in the field Private key path, andclick Launch SSH Client.
-
Connect with a standalone SSH client**—**Follow the steps required by your standalone SSH client.
Connect to an instance from windows using putty
If you connect to the instance from the Windows operating system, and plan to use Putty:
-
Convert your key file using PuTTYgen.
-
Connect with Putty or WinSCP (connect via the elastic IP), using your converted key (i.e., the *ppk file).
-
Move your key file (the *pem file) to the root dir using Putty or WinSCP.
1.4.2.3 - Prepare instances for cluster formation
After you create your instances, you need to prepare them for cluster formation.
After you create your instances, you need to prepare them for cluster formation. Prepare your instances by adding your AWS .pem key and your Vertica license.
By default, each AMI includes a Community Edition license. Once Vertica is installed, you can find the license at this location:
/opt/vertica/config/licensing/vertica_community_edition.license.key
-
As the dbadmin user, copy your *pem file (from where you saved it locally) onto your primary instance.
Depending upon the procedure you use to copy the file, the permissions on the file may change. If permissions change, the install_vertica script fails with a message similar to the following:
FATAL (19): Failed Login Validation 10.0.3.158, cannot resolve or connect to host as root.
If you receive a failure message, enter the following command to correct permissions on your *pem file:
$ chmod 600 /<name-of-pem>.pem
-
Copy your Vertica license over to your primary instance, placing it in your home directory or other known location.
1.4.2.4 - Change instances on AWS
You can change instance types on AWS.
You can change instance types on AWS. For example, you can downgrade a c3.8xlarge instance to c3.4xlarge. See Supported AWS instance types for a list of valid AWS instances.
When you change AWS instances you may need to:
-
Reconfigure memory settings
-
Reset memory size in a resource pool
-
Reset number of CPUs in a resource pool
If you change to an AWS instance type that requires a different amount of memory, you may need to recompute the following and then reset the values:
Note
You may need root user permissions to reset these values.
Reset memory size in a resource pool
If you used absolute memory in a resource pool, you may need to reconfigure the memory using the MEMORYSIZE parameter in ALTER RESOURCE POOL.
Note
If you set memory size as a percentage when you created the original resource pool, you do not need to change it here.
Reset number of CPUs in a resource pool
If your new instance requires a different number of CPUs, you may need to reset the CPUAFFINITYSET parameter in ALTER RESOURCE POOL.
1.4.2.5 - Configure storage
Vertica recommends that you store information — especially your data and catalog directories — on dedicated Amazon EBS volumes formatted with a supported file system.
Vertica recommends that you store information — especially your data and catalog directories — on dedicated Amazon EBS volumes formatted with a supported file system. The /opt/vertica/sbin/configure_software_raid.sh script automates the storage configuration process.
Caution
Do not store information on the root volume because it might result in data loss.
Vertica performance tests Eon Mode with a per-node EBS volume of up to 2TB. For best performance, combine multiple EBS volumes into a RAID 0 array.
For more information about RAID 0 arrays and EBS volumes, see RAID configuration on Linux.
Determining volume names
Because the storage configuration script requires the volume names that you want to configure, you must identify the volumes on your machine. The following command lists the contents of the /dev directory. Search for the volumes that begin with xvd:
$ ls /dev
Important
Ignore the root volume. Do not include any of your root volumes in the RAID creation process.
Combining volumes for storage
The configure_software_raid.sh shell script combines your EBS volumes into a RAID 0 array.
Caution
Run configure_software_raid.sh in the default setting only if you have a fresh configuration with no existing RAID settings.
If you have existing RAID settings, open the script in a text editor and manually edit the raid_dev value to reflect your current RAID settings. If you have existing RAID settings and you do not edit the script, the script deletes important operating system device files.
Alternately, use the Management Console (MC) console to add storage nodes without unwanted changes to operating system device files. For more information, see Managing database clusters.
The following steps combine your EBS volumes into RAID 0 with the configure_software_raid.sh script:
-
Edit the /opt/vertica/sbin/configure_software_raid.sh shell file as follows:
-
Comment out the safety exit command at the beginning .
-
Change the sample volume names to your own volume names, which you noted previously. Add more volumes, if necessary.
-
Run the /opt/vertica/sbin/configure_software_raid.sh shell file. Running this file creates a RAID 0 volume and mounts it to /vertica/data.
-
Change the owner of the newly created volume to dbadmin with chown.
-
Repeat steps 1-3 for each node on your cluster.
1.4.2.6 - Create a cluster
On AWS, use the install_vertica script to combine instances and create a cluster.
On AWS, use the
install_vertica script to combine instances and create a cluster. Check your My Instances page on AWS for a list of current instances and their associated IP addresses. You need these IP addresses when you run install_vertica.
Create a cluster as follows:
-
While connected to your primary instance, enter the following command to combine your instances into a cluster. Substitute the IP addresses for your instances and include your root *.pem file name.
$ sudo /opt/vertica/sbin/install_vertica --hosts 10.0.11.164,10.0.11.165,10.0.11.166 \
  --dba-user-password-disabled --point-to-point --data-dir /vertica/data \
  --ssh-identity ~/name-of-pem.pem --license license.file
Note
-
If you are using Vertica Community Edition, which limits you to three instances, you can specify -L CE with no license file.
-
When you issue install_vertica or update_vertica on a Vertica AMI script, --point-to-point is the default. This parameter configures Spread to use direct point-to-point communication between all Vertica nodes, which is a requirement for clusters on AWS.
-
If you are using IPv6 network addresses to identify the hosts in your cluster, use the --ipv6 flag in your install_vertica command. You must also use IP addresses instead of host names, as the AWS DNS server cannot resolve host names to IPv6 addresses.
-
After combining your instances, Vertica recommends deleting your *.pem key from your cluster to reduce security risks. The example below uses the shred command to delete the file:
$ shred name-of-pem.pem
-
After creating one or more clusters, create your database or connect to Management Console on AWS.
For complete information on the install_vertica script and its parameters, see Install Vertica with the installation script.
Important
Stopping or rebooting an instance or cluster without first shutting down the database down, may result in disk or database corruption. To safely shut down and restart your cluster, see
Operating the database.
Check open ports manually using the netcat utility
Once your cluster is up and running, you can check ports manually through the command line using the netcat (nc) utility. What follows is an example using the utility to check ports.
Before performing the procedure, choose the private IP addresses of two nodes in your cluster.
The examples given below use nodes with the private IPs:
10.0.11.60 10.0.11.61
Install the nc utility on your nodes. Once installed, you can issue commands to check the ports on one node from another node.
To check a TCP port:
- Put one node in listen mode and specify the port. The following sample shows how to put IP
10.0.11.60 into listen mode for port 480
[root@ip-10-0-11-60 ~]# nc -l 4804
- From the other node, run
nc specifying the IP address of the node you just put in listen mode, and the same port number.
[root@ip-10-0-11-61 ~]# nc 10.0.11.60 4804
-
Enter sample text from either node and it should show up on the other node. To cancel after you have checked a port, enter Ctrl+C.
Note
To check a UDP port, use the same nc commands with the –u option.
[root@ip-10-0-11-60 ~]# nc -u -l 4804
[root@ip-10-0-11-61 ~]# nc -u 10.0.11.60 4804
1.4.2.7 - Management Console on AWS
Management Console (MC) is a database management tool that allows you to view and manage aspects of your cluster.
Management Console (MC) is a database management tool that allows you to view and manage aspects of your cluster. Vertica provides an MC AMI, which you can use with AWS. The MC AMI allows you to create an instance, dedicated to running MC, that you can attach to a new or existing Vertica cluster on AWS. You can create and attach an MC instance to your Vertica on AWS cluster at any time.
After you launch your MC instance and configure your security group settings, you can log in to your database. To do so, use the elastic IP you specified during instance creation.
From this elastic IP, you can manage your Vertica database on AWS using standard MC procedures.
Considerations when using MC on AWS
-
Because MC is already installed on the MC AMI, the MC installation process does not apply.
-
To uninstall MC on AWS, follow the procedures provided in Uninstalling Management Console before terminating the MC Instance.
2 - Vertica on Microsoft Azure
Vertica supports automatic deployment on Azure through the Microsoft Azure Marketplace, or manual installation and deployment on Azure VMs.
Vertica supports automatic deployment on Azure through the Microsoft Azure Marketplace, or manual installation and deployment on Azure VMs.
You can deploy a Vertica database on the Microsoft Azure Cloud running in either Enterprise Mode or Eon Mode. In Eon Mode, Vertica stores its data communally using Azure block blob storage.
This section explains how to deploy a Vertica database to Microsoft Azure.
For more information about Azure, see the Azure documentation.
2.1 - Recommended Azure VM types and operating systems
Vertica supports a range of Microsoft Azure virtual machine (VM) types, each optimized for different purposes.
Recommended Azure VM types
Vertica supports a range of Microsoft Azure virtual machine (VM) types, each optimized for different purposes. Choose the VM type that best matches your performance and price needs as a user.
For the best performance in most common scenarios, use one of the following VMs:
|
Virtual Machine Types |
Virtual Machine Size |
|
Memory optimized |
DS13_v2
DS14_v2
DS15_v2
D8s_v3
D16s_v3
D32s_v3
|
|
High memory and I/O throughput |
GS3
GS4
GS5
E8s_v3
E16s_v3
E32s_v3
L8s
L16s
L32s
|
Recommended Azure operating systems
For best performance, use one of the following operating systems when deploying Vertica on Azure:
For more information, see Supported platforms.
2.2 - Eon Mode on Azure prerequisites
Before you can create an Eon Mode database on Azure, you must have a database cluster and an Azure blob storage container to store your database's data.
Before you can create an Eon Mode database on Azure, you must have a database cluster and an Azure blob storage container to store your database's data.
You can create an Eon Mode database on a cluster that is hosted on Azure. In this configuration, your database stores its data communally in Azure Blob storage. See Eon Mode to learn more about this database mode.
Cluster requirements
Before you can create an Eon Mode database on Azure, you must provision a cluster to host it. See Configuring your Vertica cluster for Eon Mode for suggestions on choosing VM configurations and the number of nodes your cluster should start with.
Storage requirements
An Eon Mode database on Azure stores its data communally in Azure blob storage. Vertica only supports block blob storage for communal data storage, not append or page blob storage.
You must create a storage path for Vertica to use exclusively. This path can be a blob container or a folder within a blob container. This path must not contain any files. If you attempt to create an Eon Mode database with a container or folder that contains files, admintools returns an error.
You pass Vertica a URI for the storage path using the azb:// schema. See Azure Blob Storage object store for the format of this URI.
You must also configure the storage container so Vertica is authorized to access it. Depending on authentication method you use, you may need to supply Vertica the with credentials to access the container. Vertica can use one of following methods to authenticate with the blob storage container:
-
Using Azure managed identities. This authentication method is transparent—you do not need to add any authentication configuration information to Vertica. Vertica automatically uses the managed identity bound to the VMs it runs on to authenticate with the blob storage container. See the Azure AD-managed identities for Azure resources documentation page in the Azure documentation for more information.
If you provide credentials for either of the other two supported authentication methods, Vertica uses them instead of authenticating using a managed identity bound to your VM.
Note
If your Azure VMs have more than one managed identity bound to them, you must tell Vertica which identity to use when authenticating with the blob storage container. Vertica gets the identity to use from a tag set on the VMs that it is running on.
On your VMs, create a tag with its key named VerticaManagedIdentityClientId and its value to the name of a managed identity bound to your VMs. See the Use tags to organize your Azure resources and management hierarchy page in the Azure documentation for more information.
-
Using an account name and access key credentials for a service account that has full access to the blob storage container. In this case, you provide Vertica with the credentials when you create the Eon Mode database. See Creating an Authentication File for details.
-
Using a shared access signature (SAS) that grants Vertica access to the storage container. See Grant limited access to Azure Storage resources using shared access signatures (SAS) in the Azure documentation. See Creating an Authentication File for details.
For details on how Vertica accesses Azure blob storage, see Azure Blob Storage object store.
Azure Blob Storage encryption
Eon Mode databases on Azure support some of the encryption features built into Azure Storage. You can use its encryption at rest feature transparently—you do not need to configure Vertica to take advantage of it. You can use Microsoft-managed or customer-managed keys for storage encryption. Vertica does not support Azure Storage's client-side encryption and encryption using customer-provided keys. See the Azure Data Encryption at rest page in the Azure documentation for more information about the encryption at rest features in Azure Storage.
2.3 - Deploy Vertica from the Azure Marketplace
Deploy Vertica in the Microsoft Azure Cloud using the Vertica Data Warehouse entry in the Azure Marketplace.
Deploy Vertica in the Microsoft Azure Cloud using the Vertica Data Warehouse entry in the Azure Marketplace. Vertica provides the following deployment options:
-
Eon Mode: Deploy a Management Console (MC) instance, and then provision and create an Eon Mode database from the MC. For cluster and storage requirements, see Eon Mode on Azure prerequisites.
-
Enterprise Mode: Deploy a four-node Enterprise Mode database comprised of one MC instance and three database nodes. This requires an Azure subscription with a minimum of 12 cores for the Vertica Marketplace solution.
The Enterprise Mode deployment uses the MC primarily as a monitoring tool. For example, you cannot provision and create a database with an Enterprise Mode MC. For information about creating and managing an Enterprise Mode database, see Create a database using administration tools.
Create a deployment
Eon Mode and Enterprise Mode require much of the same information for deployment. Any information that is not required for both deployment types is clearly marked.
1. Select the deployment type
-
Sign in to your Microsoft Azure account. From the Home screen, select Create a resource under Azure services.
-
Search for Vertica Data Warehouse and select it from the search results.
-
On the Vertica Data Warehouse page, select one of the following:
-
To deploy an MC instance that can manage an Eon Mode database, select Vertica Data Warehouse, Eon BYOL.
-
To deploy an Enterprise Mode database, select Vertica Data Warehouse, Enterprise BYOL.
-
On the next screen, select Create.
After you select your deployment type, the Basics tab on the Create Vertica Data Warehouse page displays.
2. Add project and instance details on the basics tab
Provide the following information in the Project details and Instance details sections:
-
Subscription: Azure bills this subscription for the cluster resources.
-
Resource group: The location to save all of the Azure resources. Create a new resource group or choose an existing one from the dropdown list.
-
Region: The location where the virtual machine running your MC instance is deployed.
-
VerticaManagement ConsoleUser: Eon Mode only. The administrator username for the MC.
-
SSH public key for OS Access: Provide the SSH public key associated with the Vertica User, for command line access to the virtual machine.
-
Password for MC Access: Enter a password to log in to Management Console. Note that Management Console requires that you change your password after the initial login.
-
Confirm password: Reenter the value you entered in Password for MC Access.
-
Select Next: Virtual Machine Settings >.
3. Select virtual machine settings
Provide the following information on the Virtual Machine Settings tab:
-
Management Console VM size: Select Change size to customize the VM settings or select the default. For a list of VM types recommended by use case, see Recommended Azure VM types and operating systems.
-
Storage account of Eon DB: Eon Mode only. The storage account associated with the database deployment.
-
Number of Vertica Cluster nodes: Enterprise Mode only. The number of nodes to deploy in the cluster, in addition to the MC instance.
The Community Edition (CE) license is automatically applied to the cluster. This license is limited to 1 TB of RAW data 3 Vertica nodes. If you select more than 3 nodes with a CE license, the initial database is created on the first 3 nodes. For information about upgrading your license, see Managing licenses.
-
Vertica Node VM size: Enterprise Mode only. Select the VM type to deploy in your cluster. Use the default or select Change size to customize the VM settings. For a list of VM types recommended by use case, see Recommended Azure VM types and operating systems.
-
Total RAW storage per node: Enterprise Mode only. Select the amount of storage per node from the dropdown list. Each VM has a set of premium data disks that are configured and presented as a single storage location.
-
Select Next: Network Settings >.
4. Select network settings
Provide the following information on the Network Settings tab:
-
Virtual Network: The virtual network that hosts the Vertica cluster. Create a new virtual network or select an existing one from the dropdown list.
If you select an existing virtual network, Vertica recommends that you already created a subnet to use for the deployment.
-
First subnet: The subnet for the associated Virtual Network. Create a new subnet or select an existing one from the dropdown list.
-
Public IP Address Resource Name: Each VM is configured with a publicly accessible IP address. This field allows you to specify the resource name for those IP addresses, and whether they are static or dynamic. The first public IP address resource is created exactly as entered, and associated with the VerticaManagement Console. Azure appends a number from 1 to 16 to the resource name for each additional Vertica cluster node created. This number associates each VM with a resource.
-
Domain Name Label for Management Console: Because each VM has a public IP address, each node requires a DNS name. Enter a prefix for the name. The first DNS name is created exactly as entered, and associated with the VerticaManagement Console. Azure appends a number from 1 to 16 to the DNS name for each Vertica cluster node created. That number associates each VM with a resource. Azure adds the remaining part of the fully qualified domain name based on the location where you created the cluster.
-
Select Next: Review + create >.
5. Verify on review + create
As the Review + create page loads, Azure validates your settings. After it passes validation, review your settings. When you are satisfied with your selections, select Create.
Access the MC after deployment
After your resources are successfully deployed, you are brought to the Overview page on Home > resources-name > Deployments. You must retrieve your Management Console IP address and username to log in.
-
From the Overview page, select Outputs in the left navigation.
-
Copy the Vertica Management Console URL and Vertica Management Console user name*.
-
Paste the Vertica Management Console URL in the browser address bar and press Enter.
-
Depending on your browser, you might receive a warning of a security risk. If you receive the warning, select the Advanced button and follow the browsers instructions to proceed to the Management Console.
-
On the VerticaManagement Console log in page, paste the Vertica Management Console user name, and enter the Password for MC Access that you entered on Basics > Project details when you were deploying your MC instance.
Delete a resource group
For details about the Azure Resource Manager and deleting a resource group, see the Azure documentation.
2.4 - Manually deploy Vertica on Microsoft Azure
Manually creating a database cluster for your Vertica deployment lets you customize your VMs to meet your specific needs.
Manually creating a database cluster for your Vertica deployment lets you customize your VMs to meet your specific needs. You often want to manually configure your VMs when deploying a Vertica cluster to host an Eon Mode database.
To start creating your Vertica cluster in Azure using manual steps, you first need to create a VM. During the VM creation process, you create and configure the other resources required for your cluster, which are then available for any additional VMs that you create.
2.4.1 - Configure and launch a new instance
An Azure VM is similar to a traditional host.
An Azure VM is similar to a traditional host. Just as with an on-premises cluster, you must prepare and configure the hardware settings for your cluster and network before you install Vertica.
The first steps are:
-
From the Azure marketplace, select an operating system that Vertica supports.
-
Select a VM type.See Recommended Azure VM types and operating systems.
-
Choose a deployment model. For best results, choose the resource manager deployment model.
Vertica has specific network security group requirements, as described in Create a security group.
Create and name your own network security group, following these guidelines.
You must configure SSH as:
You can make additional modifications, based on your specific requirements.
Add disk containers
Create an Azure storage account, which later contains your cluster storage disk containers.
For optimal throughput, select Premium storage and align the storage to your chosen VM type.
For more information about what a storage account is, and how to create one, refer to About Azure storage accounts.
For an Enterprise Mode database deployment, provision enough space
Create a password or assign an SSH key pair to use with Vertica.
For information about how to use key pairs in Azure, see How to create and use an SSH public and private key pair for Linux VMs in Azure.
Assign a public IP address
A public IP is an IP address that you can use to connect to your cluster externally. For best results, assign a single static public IP to a node in your cluster. You can then connect to other nodes in your cluster from your primary node using the internal IP addresses that Azure generated when you specified your virtual network settings.
By default, a public IP address is dynamic; it changes every time you shut down the server. You can choose a static IP address, but doing so can add cost to your deployment.
During a VM installation, you cannot set a DNS name. If you use dynamic public IPs, set the DNS name in the public IP resource for each VM after deployment.
For information about public IP addresses, refer to IP address types and allocation methods in Azure.
Create additional VMs
If needed, to create additional VMs, repeat the previous instructions in this document.
2.4.2 - Connect to a virtual machine
Before you can connect to any of the VMs you created, you must first make your virtual network externally accessible.
Before you can connect to any of the VMs you created, you must first make your virtual network externally accessible. To do so, you must attach the public IP address you created during network configuration to one of your VMs.
Connect to your VM
To connect to your VM, complete the following tasks:
-
Connect to your VM using SSH with the public IP address you created in the configuration steps.
-
Authenticate using the credentials and authentication method you specified during the VM creation process.
Connect to other VMs
Connect to other virtual machines in your virtual network by first using SSH to connect to your publicly connected VM. Then, use SSH again from that VM to connect through the private IP addresses of your other VMs.
If you are using private key authentication, you may need to move your key file to the root directory of your publicly connected VM. Then, use PuTTY or WinSCP to connect to other VMs in your virtual network.
2.4.3 - Prepare the virtual machines
After you create your VMs, you need to prepare them for cluster formation.
After you create your VMs, you need to prepare them for cluster formation.
Add the Vertica license and private key
Prepare your nodes by adding your private key (if you are using one) to each node and to your Vertica license. These steps assume that the initial user you configured is the DBADMIN user.
-
As the dbadmin user, copy your private key file from where you saved it locally onto your primary node.
Depending upon the procedure you use to copy the file, the permissions on the file may change. If permissions change, the install_vertica script fails with a message similar to the following:
Failed Login Validation 10.0.2.158, cannot resolve or connect to host as root.
If you receive a failure message, enter the following command to correct permissions on your private key file:
$ chmod 600 /<name-of-key>.pem
-
Copy your Vertica license to your primary VM. Save it in your home directory or other known location.
Install software dependencies for Vertica on Azure
In addition to the Vertica standard Package dependencies, as the root user, you must install the following packages before you install Vertica on Azure:
-
pstack
-
mcelog
-
sysstat
-
dialog
2.4.4 - Configure storage
Use a dedicated Azure storage account for node storage.
Use a dedicated Azure storage account for node storage.
Caution
Caution: Do not store your information on the root volume, especially your data and catalog directories. Storing information on the root volume may result in data loss.
When configuring your storage, make sure to use a supported file system. For details, see File system.
Attach disk containers to virtual machines (VMs)
Using your previously created storage account, attach disk containers to your VMs that are appropriate to your needs.
For best performance, combine multiple storage volumes into RAID-0. For most RAID-0 implementations, attach 6 storage disk containers per VM.
Combine disk containers for storage
If you are using RAID, follow these steps to create a RAID-0 drive on your VMs. The following example shows how you can create a RAID-0 volume named md10 from 6 individual volumes named:
-
Form a RAID-0 volume using the mdadm utility:
$ mdadm --create /dev/md10 --level 0 --raid-devices=6 \
  /dev/sdc /dev/sdd /dev/sde /dev/sdf /dev/sdg /dev/sdh
-
Format the file system to be one that Vertica supports:
$ mkfs.ext4 /dev/md10
-
Find the UUID on the newly-formed RAID volume using the blkid command. In the output, look for the device you assigned to the RAID volume:
$ blkid
 . . .
 /dev/md10 : UUID="e7510a6f-2922-4413-b5fa-9dcd725967fd" TYPE="ext4" PARTUUID="fb9b7449-08c3-4231-9ee5-086f7b0c9001"
 . . .
-
The RAID device can be renamed after a reboot. To ensure the filesystem is mounted in a predictable location on your VM, create a directory to use as the mount point to mount the filesystem. For example, you can choose to create a mount point named /data that you will use to store your database's catalog and data (or depot, if you are running Vertica in Eon Mode).
$ mkdir /data
-
Using a text editor, add an entry to the /etc/fstab file for the UUID of the filesystem and your mount point so it is mounted when the system boots:
UUID=RAID_UUID mountpoint ext4 defaults,nofail,nobarrier 0 2
For example, if you have the UUID shown in the previous example and the mount point /data, add the following line to the /etc/fstab file:
UUID=e7510a6f-2922-4413-b5fa-9dcd725967fd /data ext4 defaults,nofail,nobarrier 0 2
-
Mount the RAID filesystem you added to the fstab file. For example, to mount a mount point named /data use the command:
$ mount /data
-
Create folders for your Vertica data and catalog under your mount point.
$ mkdir /data/vertica
$ mkdir /data/vertica/data
If you are planning to run Vertica in Eon Mode, create a directory for the depot instead of data:
$ mkdir /data/vertica/depot
Create a swap file
In addition to storage volumes to store your data, Vertica requires a swap volume or swap file to operate.
Create a swap file or swap volume of at least 2 GB. The following steps show how to create a swap file within Vertica on Azure:
-
Install devnull and swapfile:
$ install -o root -g root -m 0600 /dev/null /swapfile
-
Create the swap file:
$ dd if=/dev/zero of=/swapfile bs=1024 count=2048k
-
Prepare the swap file using mkswap:
$ mkswap /swapfile
-
Use swapon to instruct Linux to swap on the swap file:
$ swapon /swapfile
-
Persist the swapfile in FSTAB:
$ echo "/swapfile swap swap auto 0 0" >> /etc/fstab
Repeat the volume attachment, combination, and swap file creation procedures for each VM in your cluster.
2.4.5 - Form a cluster and install Vertica
Use the install_vertica script to combine two or more individual VMs to form a cluster and install the Vertica database.
Use the install_vertica script to combine two or more individual VMs to form a cluster and install the Vertica database.
Download Vertica
To download the Vertica server appropriate for your operating system and license type, go to www.vertica.com/download/vertica.
Run the rpm to extract the files.
After you complete the download and extraction, the next section describes how to use the install_vertica script to form a cluster and install the Vertica database software.
Before you start
Before you run the install_vertica script:
-
Check the Virtual Network page for a list of current VMs and their associated private IP addresses.
-
Identify your storage location. The installer assumes that you have mounted your storage to /vertica/data. To specify another location, use the --data-dir argument.
-
Identify your storage location. To create your database's data directory on mounted RAID drive, when you run the install_vertica script, provide /vertica/data as the value of the --data-dir option .
Caution
Caution: Do not store your data on the root drive.
Combine virtual machines (VMs)
The following example shows how to combine VMs using the install_vertica script.
-
While connected to your primary node, construct the following command to combine your nodes into a cluster.
$ sudo /opt/vertica/sbin/install_vertica --hosts 10.2.0.164,10.2.0.165,10.2.0.166 --dba-user-password-disabled --point-to-point --data-dir /vertica/data --ssh-identity ~/<name-of-private-key>.pem --license <license.file>
-
Substitute the IP addresses for your VMs and include your root key file name, if applicable.
-
Include the --point-to-point parameter to configure spread to use direct point-to-point communication between all Vertica nodes, as required for clusters on Azure when installing or updating Vertica.
-
If you are using Vertica Community Edition, which limits you to three nodes, specify -L CE with no license file.
-
After you combine your nodes, to reduce security risks, keep your key file in a secure place—separate from your cluster—and delete your on-cluster key with the shred command:
$ shred examplekey.pem
Important
You need your key file to perform future Vertica updates.
-
Reboot your cluster to complete the cluster formation and Vertica installation.
For complete information on the install_vertica script and its parameters, see Install Vertica with the installation script.
After your cluster is up and running
Now that your cluster is configured and running, take these steps:
-
Log into one of the database nodes using the database administrator account (named dbadmin by default).
-
Create and start a database:
-
Configure your database. See Configuring the database.
3 - Vertica on Google Cloud Platform
Vertica supports automatic deployment on Google Cloud Platform (GCP) through the Google Cloud Launcher, or manual installation and deployment on GCP machines.
Vertica supports automatic deployment on Google Cloud Platform (GCP) through the Google Cloud Launcher, or manual installation and deployment on GCP machines.
You can deploy a Vertica database on GCP running in either Enterprise Mode or Eon Mode. In Eon Mode, Vertica stores its data communally using Google Cloud Storage (GCS).
This section explains how to deploy a Vertica database to GCP.
For more information about GCP, see the Google Cloud documentation.
3.1 - Supported GCP machine types
Vertica Analytic Database supports a range of machine types, each optimized for different workloads.
Vertica Analytic Database supports a range of machine types, each optimized for different workloads. When you deploy your Vertica Analytic Database cluster to the Google Cloud Platform (GCP), different machine types are available depending on how you provision your database.
Note
Some machine types are not available across all regions.
The sections below list the GCP machine types that Vertica supports for Vertica cluster hosts, and for use in Management Console. For details on the configuration of the machine type options, see the Google Cloud documentation's Machine types page.
Machine types available for MC hosts
Vertica supports all N1, N2, E2, M1, M2, and C2 machine types to deploy an instance for running the Vertica Management Console.
Tip
In most cases, 8 vCPUs are sufficient when selecting a machine type for running the Management Console.
Machine types available for Vertica database cluster hosts
Vertica supports all N1, N2, E2, M1, M2, and C2 machine types to deploy cluster hosts.
Machine types for Vertica database cluster hosts provisioned from MC
The table below lists the GCP machine types that Vertica supports when you provision your cluster from Management Console.
|
Machine Type |
Machine Name |
|
N1 standard |
n1-standard-16
n1-standard-32
n1-standard-64
|
|
N1 high-memory |
n1-highmem-16
n1-highmem-32
n1-highmem-64
|
|
N2 standard |
n2-standard-16
n2-standard-32
n2-standard-48
n2-standard-64
|
|
N2 high-memory |
n2-highmem-16
n2-highmem-32
n2-highmem-48
n2-highmem-64
|
3.2 - Deploy Vertica from the Google cloud marketplace
The Vertica entries in the Google Cloud Launcher Marketplace let you quickly deploy a Vertica cluster in the Google Cloud Platform (GCP).
The Vertica entries in the Google Cloud Launcher Marketplace let you quickly deploy a Vertica cluster in the Google Cloud Platform (GCP). Currently, three entries let you select the database mode and the license you want to use:
-
The Enterprise Mode launcher deploys a Vertica database with 3 or more nodes, plus an additional VM running the Management Console (MC). See Deploy an Enterprise Mode database in GCP from the marketplace for more information.
-
The Eon Mode BYOL (bring your own license) launcher deploys a single instance running the MC. You use this MC instance to deploy a Vertica database running on Eon Mode. This database has a community license applied to it initially. You can later upgrade it to a license you have obtained from Vertica. See Deploy an MC instance in GCP for Eon Mode for more information.
-
The Eon Mode BTH (by the hour) launcher also deploys a single instance running the MC that you use to deploy a database. This database has a by-the-hour license applied to it. Instead of paying for a license up front, you pay an hourly fee that covers both Vertica and running your instances. The BTH license is automatically applied to all clusters you create using a BTH MC instance. See Deploy an MC instance in GCP for Eon Mode for more information. If you choose, you can upgrade this hourly license to a longer-term license you purchase from Vertica. To move a BTH cluster to a BYOL license, follow the instructions in Moving a cloud installation from by the hour (BTH) to bring your own license (BYOL).
Note
Vertica clusters that use IPv6 to identify hosts have not been tested on GCP. Vertica recommends you use IPv4 addresses to identify the hosts in your cluster on GCP.
3.2.1 - Eon Mode on GCP prerequisites
Before deploying an Eon Mode database on GCP, you must take several steps:.
Before deploying an Eon Mode database on GCP, you must take several steps:
-
Review the default service account's permissions for your GCP project.
-
Create an HMAC key to use when creating your cluster.
-
Create a communal storage location.
Service account permissions
Service accounts allow automated processes to authenticate with GCP. The Eon Mode database deployment process uses the project's service account for your GCP project to deploy instances. When you create a new project, GCP automatically creates a default service account (identified by project_number-compute@developer.gserviceaccount.com) for the project and grants it the IAM role Editor. See the Google Cloud documentation's Understanding roles for details about this and other IAM roles.
The Editor role lets the service account create resources from the Marketplace. When you create an instance of the Management Console (MC), the MC uses the account to deploy further resources, such as provisioning instances for an database.
For details, see the Google Cloud documentation's Understanding service accounts page.
Permissions and roles
To deploy Vertica on GCP, your user account must have the:
Creating an HMAC key
Vertica uses a hash-based message authentication code (HMAC) key to authenticate requests to access the communal storage location. This key has two parts: an access ID and a secret. When you create an Eon Mode database in GCP, you provide both parts of an HMAC key for the nodes to use to access communal storage.
To create an HMAC key:
-
Log in to your Google Cloud account.
-
If the name of the project you will use to create your database does not appear in the top banner, click the dropdown and select the correct project.
-
In the navigation menu in the upper-left corner, under the Storage heading, click Storage and select Settings.
-
In the Settings page, click Interoperability.
-
Scroll to the bottom of the page and find the User account HMAC heading.
-
Unless you have already set a default project, you will see the message stating you haven’t set a default project for your user account yet. Click the Set project-id as default project button to choose the current project as your default for interoperability.
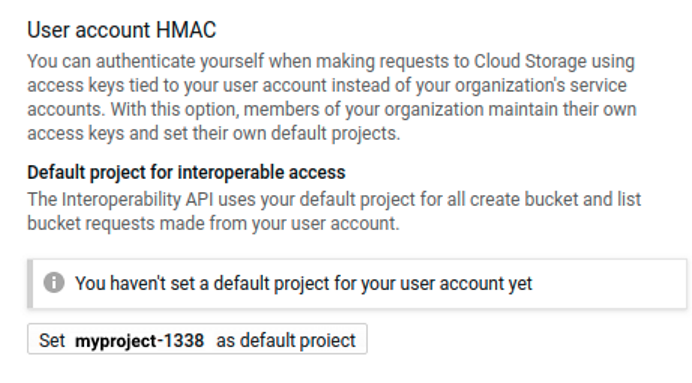
Note
The project ID appears in the button label, not the project name.
-
Under Access keys for your user account, click Create a key.
-
Your new access key and secret appear in the HMAC key list. You will need them when you create your Eon Mode database. You can copy them to a handy location (such as a text editor) or leave a browser tab open to this page while you use another tab or window to create your database. These keys remain available on this page, so you do not need to worry about saving them elsewhere.
Caution
It is vital that you protect the security of your HMAC key. It can grant others access to your Eon Mode database's communal storage location. This means they could access all of the data in your database. Do not write the HMAC key anyplace where it may be exposed, such as email, shared folders, or similar insecure locations.
Creating a communal storage location
Your Eon Mode database needs a storage location for its communal storage. Eon Mode databases running on GCP use Google Cloud Storage (GCS) for their communal storage location. When you create your new Eon Mode database, you will supply the MC's wizard with a GCS URL for the storage location.
This location needs to meet the following criteria:
-
The URL must include at least a bucket name. You can use one or more levels of folders, as well. For example, the following GCS URLs are valid:
Multiple databases can share the same bucket, as long as each has its own folder.
-
If provided, the lowest-level folder in the URL must not already exist. For example, in the GCS URL gs://verticabucket/databases/mydatabase, the bucket named verticabucket and the directory named databases must exist. The subdirectory named mydatabase must not exist. The Vertica install process expects to create the final folder itself. If the folder already exists, the installation process fails.
-
The permissions on the bucket must be set to allow the service account read, write, and delete privileges on the bucket. The best role to assign to the user to gain these permissions is Storage Object Admin.
-
To prevent performance issues, the bucket must be in the same region as all of the nodes running the Eon Mode database.
-
If you create the database through the admintools UI, you must set gcsauth as a bootstrap parameter in admintools.conf. For more information on this and other GCP parameters, see Google Cloud Storage parameters.
[BootstrapParameters]
gcsauth = ID:secret
3.2.2 - Deploy an Enterprise Mode database in GCP from the marketplace
The Vertica Cloud Launcher solution creates a Vertica Enterprise Mode database.
The Vertica Cloud Launcher solution creates a Vertica Enterprise Mode database. The solution includes the Vertica Management Console (MC) as the primary UI for you to get started.
The launcher automatically creates a database named vdb using the Community Edition (CE) license. The CE license is limited to a maximum of 3 nodes. You can tell the launcher to add more than 3 nodes to your deployment. In this case, it uses the first three nodes in the cluster to create the database. The remaining nodes are not part of the database, but are added to your cluster. To add these nodes to your database, you must replace the Community Edition license with a license key you receive from the Software Entitlement support site. See Managing licenses for more information.
After the launcher creates the initial database, it configures the MC to attach to that database automatically.
To get started with a deployment of Vertica from the Google Cloud Launcher, search for the Vertica Data Warehouse, Enterprise Mode entry.
Follow these steps:
-
Verify that your user account has the Editor role and the runtimeconfig.waiters.getIamPolicy permission.
-
From the listing page, click LAUNCH.
-
On the New Vertica Analytics Platform deployment page, enter the following information:
-
Deployment name: Each deployment must have a unique name. That name is used as the prefix for the names of all VMs created during the deployment. The deployment name can only contain lowercase characters, numbers, and dashes. The name must start with a lowercase letter and cannot end with a dash.
-
Zone: GCP breaks its cloud data centers into regions and zones. Regions are a collection of zones in the same geographical location. Zones are collections of compute resources, which vary from zone to zone.
For best results, pick the zone in your designated region that supports the latest Intel CPUs. For a complete listing of regions and zones, including supported processors, see Regions and Zones.
-
Service Account: Service accounts allow automated processes to authenticate with GCP. Select the default service account, identified by project_number-compute@developer.gserviceaccount.com.
-
Under Vertica Management Console, choose the configuration for the virtual machine that will run the Management Console. The Vertica Analytics Platform in Cloud Launcher always deploys the Vertica Management Console (MC) as part of the solution.
The default machine type for MC is sufficient for most deployments. You can choose another machine type that better suits any additional purposes, such serving as a target node for backups, data transformation, or additional management tools.
-
Node count for Vertica Cluster: The total number of VMs you want to deploy in the Vertica Cluster. The default is 3.
Note
As mentioned above, the Cloud Launcher automatically deploys the Vertica Community Edition license, which limits the database to 3 nodes and up to 1 TB in raw data. Any additional nodes will be part of your database cluster, but will not be part of your database.
If you intend to use the Community Edition license for your database, leave the setting at 3. Otherwise, you would add nodes that will sit idle and cost you money without being part of your database.
-
Machine type for Vertica Cluster nodes: The Cloud Launcher builds each node in the cluster using the same machine type. Modify the machine type for your nodes based on the workloads you expect your database to handle. See Supported GCP machine types for more information.
-
Data disk type: GCP offers two types of persistent disk storage: Standard and SSD. The costs associated with Standard are less, but the performance of SSD storage is much better. Vertica recommends you use SSD storage. For more information on Standard and SSD persistent disks, see Storage Options.
-
Disk size in GB: Disk performance is directly tied to the disk size in GCP. The default value of 2000 GBs (2 TB) is the minimum disk size for SSD persistent disks that allows maximum throughput.
If you select a smaller disk size, the throughput performance decreases. If you select a large disk size, the performance remains the same as the 2 TB option.
-
Network: VMs in GCP must exist on a virtual private cloud (VPC). When you created your GCP account, a default VPC was created. Create additional VPCs to isolate solutions or projects from one another. The Vertica Analytics Plaform creates all the nodes in the same VPC.
-
Subnetwork: Just as a GCP account may have multiple VPCs, each VPC may also have multiple subnets. Use additional subnets to group or isolate solutions within the same VPC.
-
Firewall: If you want your MC to be accessible via the internet, check the Allow access to the Management Console from the Internet box. Vertica recommends you protect your MC using a firewall that restricts access to just the IP addresses of users that need to access it. You can enter one or more comma-separated CIDR address ranges.
After you have entered all the required information, click Deploy to begin the deployment process.
Monitor the deployment
After the deployment begins, Google Cloud Launcher automatically opens the Deployment Manager page that displays the status of the deployment. Items that are still being processed have a spinning circle to the left of them and the text is a light gray color. Items that have been created are dark gray in color, with an icon designating that resource type on the left.
After the deployment completes, a green check mark appears next to the deployment name in the upper left-hand section of the screen.
Accessing the cluster after deployment
After the deployment completes, the right-hand section of the screen displays the following information:
-
dbadmin password: A randomly generated password for the dbadmin account on the nodes. For security reasons, change the dbadmin password when you first log in to one of the Vertica cluster nodes.
-
mcadmin password: A randomly generated password for the mcadmin account for accessing the Management Console. For security reasons, change the mcadmin password after you first log in to the MC.
-
Vertica Node 1 IP address: The external IP address for the first node in the Vertica cluster is exposed here so that you can connect to the VM using a standard SSH client.To access the MC, press the Access Vertica MC button in the Get Started section of the dialog box. Copy the mcadmin password and paste it when asked.
For more information on using the MC, see Management Console.
Access the cluster nodes
There are two ways to access the cluster nodes directly:
-
Use GCP's integrated SSH shell by selecting the SSH button in the Get Started section. This shell opens a pop-up in your browser that runs GCP's web-based SSH client. You are automatically logged on as the user you authenticated as in the GCP environment.
After you have access to the first Vertica cluster node, execute the su dbadmin command, and authenticate using the dbadmin password.
-
In addition, use other standard SSH clients to connect directly to the first Vertica cluster node. Use the Vertica Node 1 IP address listed on the screen as the dbadmin user, and authenticate with the dbadmin password.
Follow the on-screen directions to log in using the mcadmin account and accept the EULA. After you've been authenticated, access the initial database by clicking the vdb icon (looks like a green cylinder) in the Recent Databases section.
Using a custom service account
In general, you should use the default service account created by the GCP deployment (project_number-compute@developer.gserviceaccount.com), but if you want to use a custom service account:
3.2.3 - Deploy an MC instance in GCP for Eon Mode
To deploy an Eon Mode database to GCP using Google Cloud Platform Launcher, you must deploy a Management Console (MC) instance.
To deploy an Eon Mode database to GCP using Google Cloud Platform Launcher, you must deploy a Management Console (MC) instance. You then use the MC instance to provision and deploy an Eon Mode database.
Once you have taken the steps listed in Eon Mode on GCP prerequisites, you are ready to deploy an Eon Mode database in GCP. To deploy an MC instance that is able to deploy Eon Mode databases to GCP:
-
Log into your GCP account, if you are not currently logged in.
-
Verify that your user account has the Editor role and the runtimeconfig.waiters.getIamPolicy permission.
-
Verify that the name of the GCP project you want to use for the deployment appears in the top banner. If it does not, click the down arrow next to the project name and select the correct project.
-
Click the navigation menu icon in the top left of the page and select Marketplace.
-
In the Search for solutions box, type Vertica Eon Mode and press enter.
-
Click the search result for Vertica Data Warehouse, Eon Mode. There are two license options: by the hour (BTH) and bring your own license (BYOL). See Deploy Vertica from the Google cloud marketplace for more information on this license choice.
-
Click Launch on the license option you prefer.
-
On the following page, fill in the fields to configure your MC instance:
-
Deployment name identifies your MC deployment in the GCP Deployments page.
-
Zone is the location where the virtual machine running your MC instance will be deployed. Make this the same location where your communal storage bucket is located.
-
Service Account: Service accounts allow automated processes to authenticate with GCP. Select the default service account, identified by project_number-compute@developer.gserviceaccount.com.
-
Machine Type is the virtual hardware configuration of the instance that will run the MC. The default values here are "middle of the road" settings which are sufficient for most use cases. If you are doing a small proof-of-concept deployment, you can choose a less powerful instance to save some money. If you are planning on deploying multiple large databases, consider increasing the count of virtual CPUs and RAM.
For details about Vertica's default volume configurations, see Eon Mode volume configuration defaults for GCP.
-
User Name for Access to MC is the administrator username for the MC. You can customize this if you want.
-
Network and Subnetwork are the virtual private cloud (VPC) network and subnet within that network you want your MC instance and your Vertica nodes to use. This setting does not affect your MC's external network address. If you want to isolate your Vertica cluster from other GCP instances in your project, create a custom VPC network and optionally a subnet in your GCP project and select them in these fields. See the Google Cloud documentation's VPC network overview page for more information.
-
Firewall enables access to the MC from the internet by opening port 5450 in the firewall. You can choose to not open this port by clearing the I accept opening a port in the firewall (5450) for Vertica box. However, if you do not open the port in the firewall, your MC instance will only be accessible from within the VPC network. Not opening the port will make accessing your MC instance much harder.
-
Source IP ranges for MC traffic: If you choose to open the MC for external access, add one or more or more CIDR address ranges to this box for network addresses that you want to be able to access to the MC.
Caution
Make the address ranges as limited as possible to reduce the chances of unauthorized access to your MC instance.
-
Click the Deploy button to start the deployment of your MC instance.
The deployment process will take several minutes.
Using a custom service account
In general, you should use the default service account created by the GCP deployment (project_number-compute@developer.gserviceaccount.com), but if you want to use a custom service account:
Connect and log into the MC instance
After the deployment process is finished, the Deployment Manager page for your MC instance contains links to connect to the MC via your browser or ssh.
To connect to the MC instance:
-
The MC administrator user has a randomly-generated password that you need to log into the MC. Copy the password in the MC Admin Password field to the clipboard.
-
Click Access Management Console.
-
A new browser tab or window opens, showing you a page titled Redirection Notice. Click the link for the MC URL to continue to the MC login page.
-
Your browser will likely show you a security warning. The MC instance uses a self-signed security certificate. Most browsers treat these certificates as a security hazard because they cannot verify their origin. You can safely ignore this warning and continue. In most browsers, click the Advanced button on the warning page, and select the option to proceed. In Chrome, this is a link titled Proceed to xxx.xxx.xxx.xxx (unsafe). In Firefox, it is a button labeled Accept the Risk and Continue.
-
At the login screen, enter the MC administrator user name into the Username box. This user name is mcadmin, unless you changed the user name in the MC deployment form.
-
Paste the automatically-generated password you copied from the MC Admin Password field earlier into the Password box.
-
Click Log In.
Once you have logged into the MC, change the MC administrator account's password.
Caution
The automatically-generated password appears on the MC instance's deployment page and can be revealed in several locations in the deployment logs. Failure to change this password can lead to unauthorized access to your MC instance.
To change the password:
-
On the home page of the MC, under the MC Tools section, click MC Settings.
-
In the left-hand menu, click User Management.
-
Select the entry for the MC administrator account and click Edit.
-
Click either the Generate new or Edit password button to change the password. If you click the Generate new button, be sure to save the automatically-generated password in a safe location. If you click Edit password, you are prompted to enter a new password twice.
-
Click Save to update the password.
Now that you have created your MC instance, you are ready to deploy a Vertica Eon Mode cluster. See Provision an Eon Mode cluster and database on GCP in MC.
3.3 - Manually deploy an Enterprise Mode database on GCP
Before you create your Vertica cluster in Google Cloud Platform (GCP) using manual steps, you must create a virtual machine (VM) instance from the Compute Engine section of GCP.
Before you create your Vertica cluster in Google Cloud Platform (GCP) using manual steps, you must create a virtual machine (VM) instance from the Compute Engine section of GCP.
All VM instances that you create should be launched in the same virtual public cloud (VPC).
To configure and launch a new VM instance, follow these instructions:
-
From within the Compute Engine section of GCP, from the menu on the left-hand site of the screen, select VM Instances.
GCP displays all the VM instances that you have created so far.
-
Click CREATE INSTANCE.
-
Enter a name for the new instance.
-
Select the zone where you plan to deploy the instance.
GCP breaks its cloud data centers down by regions and zones. Regions are a collection of zones that are all in the same geographical location. Zones are collections of compute resources, which vary from zone to zone. Always pick the zone in your designated region that supports the latest Intel CPUs.
For a complete listing of regions and zones, including supported processors, see Regions and Zones.
-
Select a machine type.
GCE offers many different types of VM instances. For best results, only deploy Vertica on VM instances with 8 vCPus or more and at least 30 GB of RAM.
-
Select the boot disk (image).
You create VM instances from a public or custom image. If you are starting with Vertica in GCP for the first time, select either the CentOS 7 or RHEL 7 public image. Those images have been tested thoroughly with Vertica.
For more information about deploying a VM instance, see Creating and Starting an Instance.
After you have configured the VM instance to be used as a Vertica cluster node, GCP allows you to convert that instance into a custom image. Doing so allows you to deploy multiple versions of that VM instance; each VM instance is identical except for the node name and IP address.
For more information about creating a custom image, see Creating, Deleting, and Deprecating Custom Images.
Connect to a virtual machine
Before you can connect to any of the VMs you created, you must first identify the external IP address. The VM instance section of GCP contains a list of all currently deployed VMs and their associated external IP addresses.
Connect to your VM
To connect to your VM, complete the following tasks:
-
Connect to your VM using SSH with the external IP address you created in the configuration steps.
-
Authenticate using the credentials and SSH key that you provided to your GCP account upon creation.
Connect to other VMs
To connect to other virtual machines in your virtual network:
-
Use SSH to connect to your publicly connected VM.
-
Use SSH again from that VM to connect through the private IP addresses of your other VMs.
Because GCP forces the use of private key authentication, you may need to move your key file to the root directory of your publicly connected VM. Then, use SSH to connect to other VMs in your virtual network.
Prepare the virtual machines
After you create your VMs, you need to prepare them for cluster formation.
Add the Vertica license and private key
Prepare your nodes by adding your private key (if you are using one) to each node and to your Vertica license. The following steps assume that the initial user you configured is the DBADMIN user:
-
As the DBADMIN user, copy your private key file from where you saved it locally onto your primary node.
Depending upon the procedure you use to copy the file, the permissions on the file may change. If permissions change, the install_vertica script fails with a message similar to the following:
Failed Login Validation 10.0.2.158, cannot resolve or connect to host as root.
If you see the previous failure message, enter the following command to correct permissions on your private key file:
$ chmod 600 /<name-of-key>.pem
-
Copy your Vertica license to your primary VM. Save it in your home directory or other known location.
Install software dependencies for Vertica on GCP
In addition to the Vertica standard Package dependencies, as the root user, you must install the following packages before you install Vertica:
-
pstack
-
mcelog
-
sysstat
-
dialog
For best disk performance in GCP, Vertica recommends customers use SSD persistent storage, configured to at least 2TB (2000 GB) in size. Disk performance is directly tied to the disk size in GCP. 2000 GBs (2TB) is the minimum disk size for SSD persistent disks that allows maximum throughput.
Caution
Do not store your information on the root volume, especially in your data and catalog directories. Storing information on the root volume may result in data loss.
When configuring your storage, make sure to use a supported file system. See for details.
Create a swap file
In addition to storage volumes to store your data, Vertica requires a swap volume or swap file for the setup script to complete.
Create a swap file or swap volume of at least 2 GB. The following steps show how to create a swap file within Vertica on GCP:
-
Install the devnull and swapfile files:
$ install -o root -g root -m 0600 /dev/null /swapfile
-
Create the swap file:
$ dd if=/dev/zero of=/swapfile bs=1024 count=2048k
-
Prepare the swap file using mkswap:
$ mkswap /swapfile
-
Use swapon to instruct Linux to swap on the swap file:
$ swapon /swapfile
-
Persist the swapfile in FSTAB:
$ echo "/swapfile swap swap auto 0 0" >> /etc/fstab
-
Repeat the volume attachment, combination, and swap file creation procedures for each VM in your cluster.
Download Vertica
To download the Vertica server appropriate for your operating system and license type, follow the steps in described in Download and install the Vertica server package.
After you complete the download and extraction, use the install_vertica script to form a cluster and install the Vertica database software, as described in the next section.
Use the install_vertica script to combine two or more individual VMs to form a cluster and install your Vertica database.
Before you run the install_vertica script, follow these steps:
-
Check the VM Instances page of the Compute Engine section on GCP to locate a list of current VMs and their associated internal IP addresses.
-
Identify your storage location on your VMs. The installer assumes that you have mounted your storage to /home/dbadmin. To specify another location, use the --data-dir argument.
Caution
Do not store your data on the root drive.
The following steps show how to combine virtual machines (VMs) into a cluster using the install_vertica script:
-
While connected to your primary node, construct the following command to combine your nodes into a cluster.
$ sudo /opt/vertica/sbin/install_vertica --hosts 10.2.0.164,10.2.0.165,10.2.0.166 --dba-user-password-disabled --point-to-point --data-dir /vertica/data --ssh-identity ~/.pem --license
-
Substitute the IP addresses for your VMs, and include your root key file name, if applicable.
-
Include the --point-to-point parameter to configure spread to use direct point-to-point communication among all Vertica nodes, as required for clusters on GCP when installing or updating Vertica.
-
If you are using Vertica Community Edition, which limits you to three nodes, specify -L CE with no license file.
-
After you combine your nodes, to reduce security risks, keep your key file in a secure place—separate from your cluster—and delete your on-cluster key with the shred command:
$ shred examplekey.pem
Important
You need your key file to perform future Vertica updates.
For complete information about the install_vertica script and its parameters, see Install Vertica with the installation script.
After your cluster is up and running
Now that your cluster is configured and running, and Vertica is running, take these steps:
- Create a database. See Creating a database for details.
- When you installed Vertica, a database administrator user was created with the DBADMIN role (usually named dbadmin). Use this account to create and start a database.
- See Configuring the database for important database configuration steps.