To create a design using Management Console and specify the configuration, take these steps.
To create a design using Management Console and specify the configuration, take these steps.
-
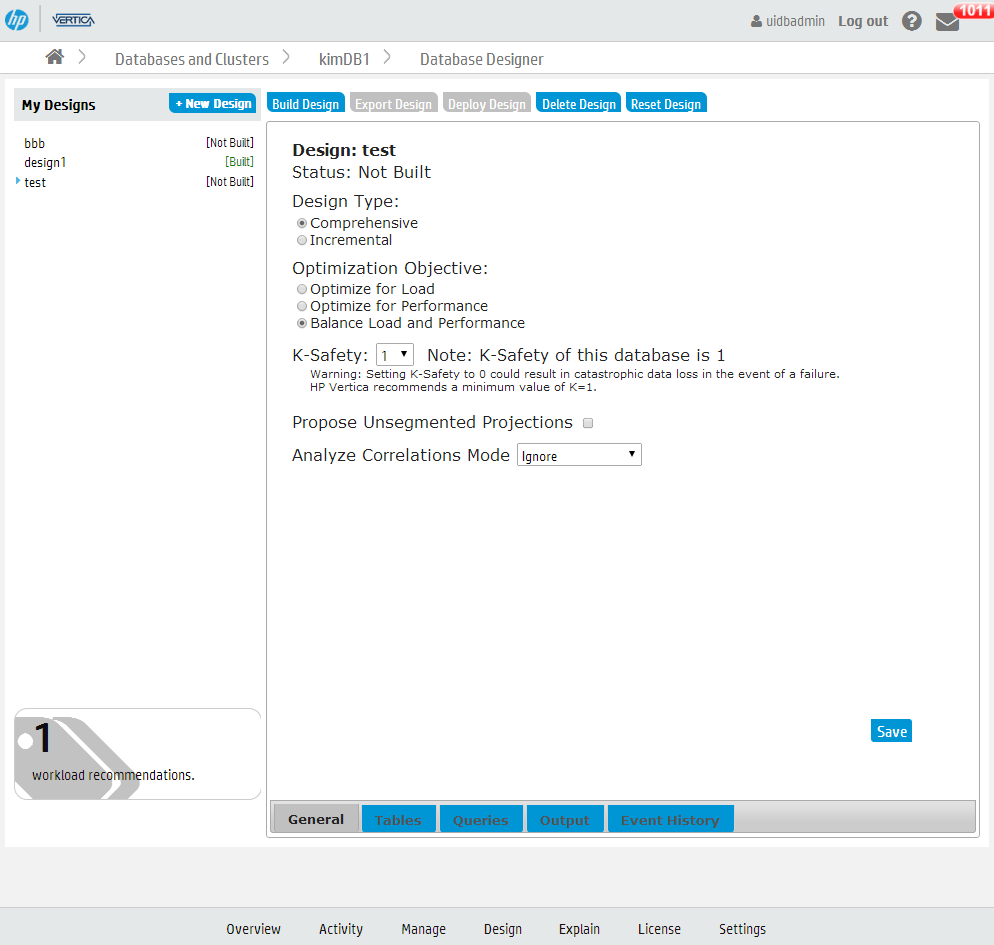
On your database's dashboard, click the Design tab at the bottom of the page to navigate to the Database Designer page.
The left side of the Database Designer page lists the database designs you own, with the most recent design you worked on highlighted. That pane also lists the current status of the design. Details about the most recent design appear in the main pane.
The main pane contains details about the selected design.
-
To create a new design, click New Design.
-
Enter a name for your design and select Manual.
The main Database Design window opens, displaying the default design parameters. Vertica has created and saved a design with the name you specified, and assigned it the default parameters.
-
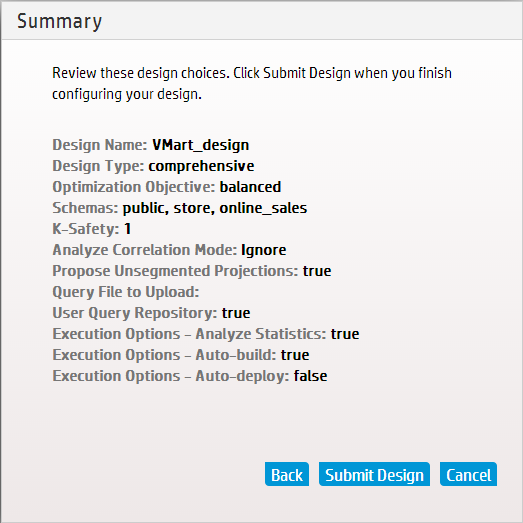
On the General window, modify the design type, optimization objectives, K-safety, Analyze Correlations Mode, and the setting that allows Database Designer to create unsegmented projections.
If you choose Incremental, the design automatically optimizes for the desired queries, and the K-safety defaults to the value of the cluster K-safety; you cannot change these values for an incremental design.
Analyze Correlations Mode determines if Database Designer analyzes and considers column correlations when creating the design.
-
Click the Tables tab. You must submit tables to your design.
-
To add tables of sample data to your design, click Add Tables. A list of available tables appears; select the tables you want and click Save. If you want to remove tables from your design, click the tables you want to remove, and click Remove Selected.
If a design table has been dropped from the database, a red circle with a white exclamation point appears next to the table name. Before you can build or deploy the design, you must remove any dropped tables from the design. To do this, select the dropped tables and and click Remove Selected. You cannot build or deploy a design if any of the design tables have been dropped.
-
Click the Queries tab. To add queries to your design, do one of the following:
- To add queries from the QUERY_REQUESTS system table, click Query Repository. In the Queries Repository dialog that appears, you can sort queries by most recent, most frequently executed, and longest running. Select the desired queries and click Save. All valid queries that you selected appear in the Queries window.
Database Designer checks the validity of the queries when you add the queries to the design and again when you build the design. If it finds invalid queries, it ignores them.
If you have a large number of queries, it may take time to load them. Make sure that all the queries you want Database Designer to consider when creating the design are listed in the Queries window.
-
Once you have specified all the parameters for your design, you should build the design. To do this, select your design and click Build Design.
-
Select Analyze Statistics if you want Database Designer to analyze the statistics before building the design.
For more information see Statistics Analysis.
-
If you do not need to review the design before deploying it, select Deploy Immediately. Otherwise, leave that option unselected.
-
Click Start. On the left-hand pane, the status of your design displays as Building until it is complete.
-
To follow the progress of a build, click Event History. Status messages appear in this window and you can see the current phase of the build operation. The information in the Event History tab contains data from theOUTPUT_EVENT_HISTORY system table.
-
When the build completes, the left-hand pane displays Built. To view the deployment script, select your design and click Output.
-
After you deploy the design using Management Console, the deployment script is deleted. To keep a permanent copy of the deployment script, copy and paste the SQL commands from the Output window to a file.
-
Once you have reviewed your design and are ready to deploy it, select the design and click Deploy Design.
-
To follow the progress of the deployment, click Event History. Status messages appear in this window and you can see the current phase of the deployment operation.
In the Event History window, while the design is running, you can do one of the following:
-
Click the blue button next to the design name to refresh the event history listing.
-
Click Cancel Design Run to cancel the design in progress.
-
Click Force Delete Design to cancel and delete the design in progress.
-
When the deployment completes, the left-hand pane displays Deployment Completed. To view the deployment script, select your design and click Output.
Your database is now optimized according to the parameters you set.