Database management with VCluster UI
The VCluster UI is a tool for administering your database. This tool is bundled with Vertica installations. VCluster UI works with the VCluster CLI to manage your database. It works with both the EON and Enterprise database types.
Setting up VCluster UI
Setting up the VCluster UI for your system depends on whether you already have a database set up and how you created your database: AdminTools or VCluster CLI. Use the section below that corresponds to your setup:
Configure VCluster Server
To set up VCluster UI and create a new database:
-
Start the node management agent on all of the nodes:
$ /opt/vertica/bin/manage_node_agent.sh start node_management_agentHere is an example script that can be used to start the node management agent on multiple nodes:
for x in 10.20.71.10 10.20.71.11 10.20.71.12 10.20.71.13; do echo "host is $x"; ssh $x /opt/vertica/bin/manage_node_agent.sh start node_management_agent; done; -
Start the VCluster Server service on one of the hosts (this is the host that you will connect to in order to use VCluster Server):
$ /opt/vertica/bin/manage_vcluster_server.sh start vcluster_server -
Create and grant TLS authentication methods for both IPv4 and IPv6 (replace
<dbadmin user>with your dbadmin user or the users that will operate the database):CREATE AUTHENTICATION tls_for_all_ipv4 METHOD 'tls' HOST TLS '0.0.0.0/0' FALLTHROUGH; GRANT AUTHENTICATION tls_for_all_ipv4 TO <dbadmin user>; CREATE AUTHENTICATION tls_for_all_ipv6 METHOD 'tls' HOST TLS '::/0' FALLTHROUGH; GRANT AUTHENTICATION tls_for_all_ipv6 TO <dbadmin user>;Note
Using `FALLTHROUGH` authentication is optional and is used as an example in the command above. Please refer to [Fallthrough authentication]({{ref "fallthrough-authentication.md"}}) for more information aobut using `FALLTHROUGH`. -
Verify that TLS authentication exists and has the required priority for the user that will connect with client certificates:
SELECT * FROM client_auth;Example output:
auth_oid | auth_name | is_auth_enabled | auth_host_type | auth_host_address | auth_method | auth_parameters | auth_priority | method_priority | address_priority | is_fallthrough_enabled | enforce_mfa -------------------+---------------------------+-----------------+----------------+-------------------+-------------+-----------------+---------------+-----------------+------------------+------------------------+------------- 45035996273705224 | default_hash_network_ipv4 | True | HOST | 0.0.0.0/0 | HASH | | -1 | 2 | 96 | False | f 45035996273705228 | default_hash_network_ipv6 | True | HOST | ::/0 | HASH | | -1 | 2 | 0 | False | f 45035996273705232 | default_hash_local | True | LOCAL | | HASH | | -1 | 2 | 0 | False | f 45035996390865984 | tls_for_all_ipv4 | True | HOSTSSL | 0.0.0.0/0 | TLS | | 0 | 5 | 96 | True | f 45035996390865988 | tls_for_all_ipv6 | True | HOSTSSL | | TLS | | 0 | 5 | 0 | True | f (5 rows) -
If you have your own server certificates and CA certificate in PEM or key format, you can import them into VCluster UI by following the steps in [Generating TLS certificates & keys]({{ref "generating-tls-certificates-and-keys.md"}}) and skip this step. Otherwise, follow the steps below to create server certificates:
Note
Creating a new Certificate Authority (CA) is optional. Creating a server certifidate is required for Workload Replay, Health Watchdog, and Cluster Health.CREATE KEY k_ca TYPE 'RSA' LENGTH 4096; CREATE CA CERTIFICATE ca SUBJECT '/C=US/ST=Massachusetts/L=Cambridge/O=Vertica/OU=Vertica/CN=Vertica Root CA' VALID FOR 3650 EXTENSIONS 'nsComment' = 'Vertica generated root CA cert' KEY k_ca; CREATE KEY k_server TYPE 'RSA' LENGTH 2048; CREATE CERTIFICATE server SUBJECT '/C=US/ST=Massachusetts/L=Cambridge/O=Vertica/OU=Vertica/CN=Eng Vertica Cluster/emailAddress=Vertica-IT@vertica.com' SIGNED BY ca KEY k_server; CREATE KEY superuser_key TYPE 'RSA' LENGTH 2048; CREATE CERTIFICATE superuser_cert SUBJECT '/C=US/ST=Massachusetts/L=Cambridge/O=Vertica/OU=Vertica/CN=<your_dbadmin_user>/emailAddress=me@vertica.com' SIGNED BY ca EXTENSIONS 'nsComment' = 'Vertica generated client cert', 'extendedKeyUsage' = 'clientAuth' KEY superuser_key; -
Export the generated certificates to the file system.
Note
Optionally, back up the existing `/opt/vertica/config/https_certs` directory.-
Export the CA certificate and key files:
vsql -Atc "SELECT key FROM cryptographic_keys WHERE name = 'k_ca';" -o /opt/vertica/config/https_certs/rootca.key vsql -Atc "SELECT certificate_text FROM certificates WHERE name = 'ca';" -o /opt/vertica/config/https_certs/rootca.pem -
Export the server certificate and key files:
vsql -Atc "SELECT key FROM cryptographic_keys WHERE name = 'k_server';" -o /opt/vertica/config/https_certs/vertica_https.key vsql -Atc "SELECT certificate_text FROM certificates WHERE name = 'server';" -o /opt/vertica/config/https_certs/vertica_https.pem -
Export the dbadmin user certificate and key files:
vsql -Atc "SELECT key FROM cryptographic_keys WHERE name = 'superuser_key';" -o /opt/vertica/config/https_certs/dbadmin.key vsql -Atc "SELECT certificate_text FROM certificates WHERE name = 'superuser_cert';" -o /opt/vertica/config/https_certs/dbadmin.pem -
Copy the dbadmin certificates to the NMA client certificate files:
cp /opt/vertica/config/https_certs/dbadmin.key /opt/vertica/config/https_certs/nma_client.key
cp /opt/vertica/config/https_certs/dbadmin.pem /opt/vertica/config/https_certs/nma_client.pem
-
-
Copy the generated files to every node in the cluster. At minimum, synchronize the following files under
/opt/vertica/config/https_certson each host:rootca.keyrootca.pemvertica_https.keyvertica_https.pemnma_client.keynma_client.pem
-
Configure the embedded HTTPS service to use the server certificate and CA:
ALTER TLS CONFIGURATION https CERTIFICATE server ADD CA CERTIFICATES ca TLSMODE 'VERIFY_CA'; ALTER TLS CONFIGURATION server TLSMODE 'ENABLE'; -
Restart the Node Management Agent on each host so it begins using the new certificates:
for x in <cluster_host_list>; do echo "host is $x"; ssh $x /opt/vertica/bin/manage_node_agent.sh stop node_management_agent; done for x in <cluster_host_list>; do echo "host is $x"; ssh $x /opt/vertica/bin/manage_node_agent.sh start node_management_agent; done -
Verify that the VCluster CLI can connect with the new client certificate:
vcluster list_all_nodes -
Recreate the VCluster Server certificates so that the UI also uses the same CA. On the host where
vcluster_serverruns, stop the service and remove the certificate files from/opt/vertica/config/vcluster_server. Keep the directory and delete only the certificate files such asca.pem,ca.key,server.pem,certchain.pem,server.key,admin.pem,admin.key,admin.p12, andcerts_db. Then restartvcluster_serverso it regenerates the certificates from/opt/vertica/config/https_certs. -
Restart the VCluster Server and, if installed, the MCP server:
/opt/vertica/bin/manage_vcluster_server.sh stop vcluster_server /opt/vertica/bin/manage_vcluster_server.sh start vcluster_server /opt/vertica/bin/manage_vcluster_server.sh stop mcp_server /opt/vertica/bin/manage_vcluster_server.sh start mcp_server -
Verify VCluster Server access:
curl https://<nodeip>:8443/v1/nodes --key /opt/vertica/config/https_certs/dbadmin.key --cert /opt/vertica/config/https_certs/dbadmin.pem --cacert /opt/vertica/config/https_certs/rootca.pem |jqNote
If the embedded HTTPS service returns a `Wrong Certificate` error, inspect `vertica.log` for the most recent `Authenticating client certificates for user` entry. This usually indicates either missing TLS authentication or an incorrect TLS authentication priority for the connecting user. -
Navigate to
/opt/vertica/config/vcluster_serverand download theadmin.p12certificate to the local machine where you intend to access the VCluster Web UI. This is the admin certificate. For role based access controls, other client certificates should be creating in VCluster UI.Note
If you need to create your own certificate, use the `vcluster_server --init` command. -
In a browser, import the certificate by going to Settings > Manage Certificate and add the
admin.p12certificate. The password for the default certificate isvertica. -
Launch the VCluster Web UI by navigating to
https://<hostname>:8665. When prompted, select the certificate that you just imported and click OK. -
Click the link in the
Dashboardto create your database and follow the steps in #createdb-vui to create your database or follow the steps in #configure-vcli if you already have a database created.
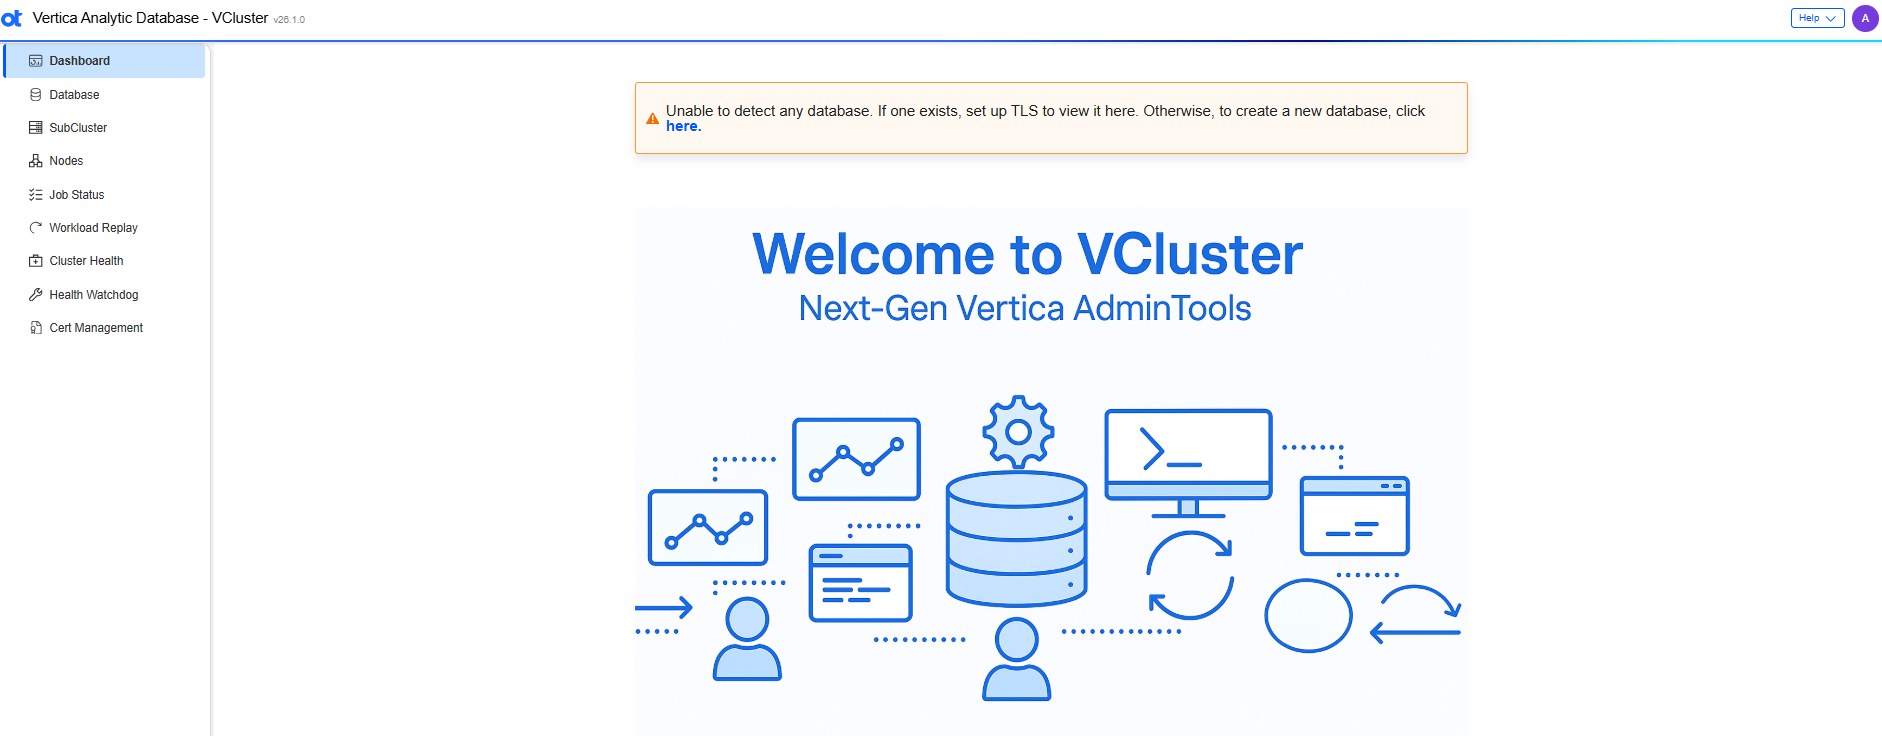
Create a database from VCluster UI
- After you click the link to create a database, you are directed to the
Create Databasepage. - Choose Eon or Enterprise as the database type. The available fields change based on your selection.
- Specify the details of your database.
Note
- Configuration parameters are mandatory when creating an Eon Mode database. - The default time for **Startup Timeout** is 5 minutes. - Click Create.
- In the Job Status page, you can view the status of your new database.
- Continue with Accessing the VCluster UI.
Access existing database from VCluster UI
Follow these steps if your database was created using the VCluster CLI:
-
Start the node management agent on all of the nodes:
$ /opt/vertica/bin/manage_node_agent.sh start node_management_agentHere is an example script that can be used to start the node management agent on multiple nodes:
for x in 10.20.71.10 10.20.71.11 10.20.71.12 10.20.71.13; do echo "host is $x"; ssh $x /opt/vertica/bin/manage_node_agent.sh start node_management_agent; done; -
Start the VCluster service on one of the hosts (this is the host that you will connect to in order to use VCluster):
$ /opt/vertica/bin/manage_vcluster_server.sh start vcluster_server -
Navigate to
/opt/vertica/config/vcluster_serverand download theadmin.p12certificate to the local machine where you intend to access the VCluster Web UI. -
In a browser, import the certificate by going to Settings > Manage Certificate and add the
admin.p12certificate. The password for the default certificate isvertica. -
The VCluster Web Server leverages an embedded HTTPS service, which requires TLS authentication for secure access. Run the following commands to set the client-server TLS setting:
vsql -c "create authentication tls_for_all method 'tls' host tls '0.0.0.0/0';"
vsql -c "grant authentication tls_for_all to <your_desired_roles_to_use_tls_auth_method>;"
Please specify your desired role(s) for TLS authentication. For example, you could set it to
dbadminby updating the command tovsql -c "grant authentication tls_for_all to dbadmin;".
Understanding VCluster UI
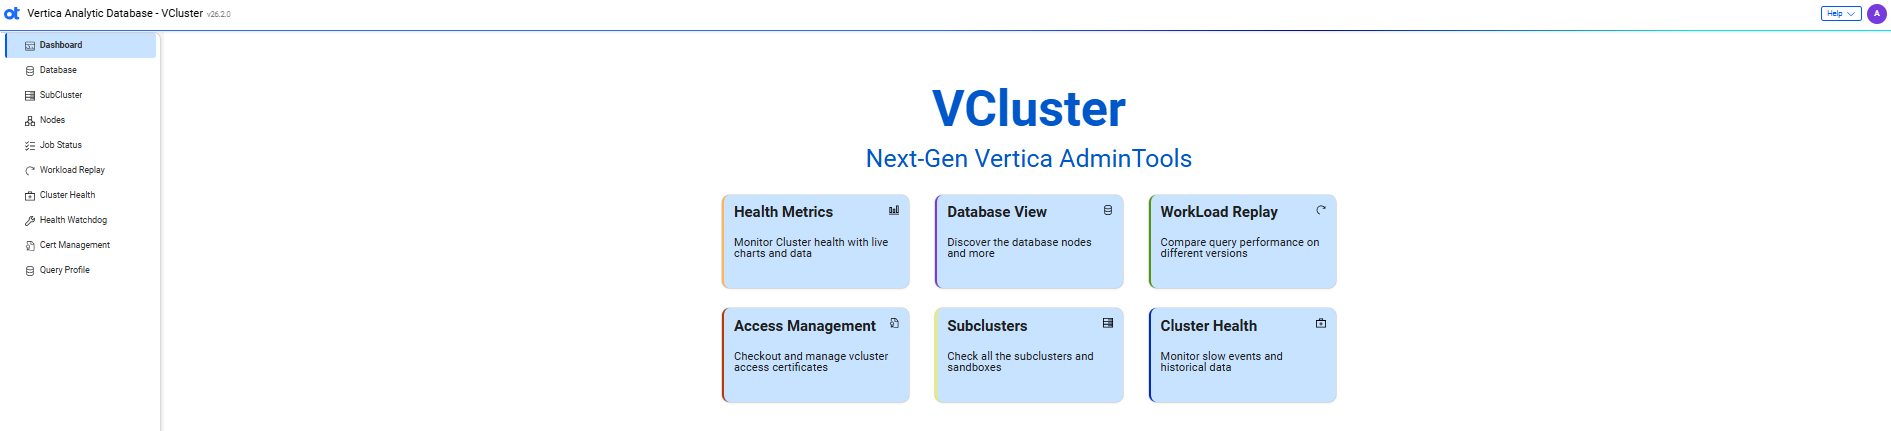
-
Vertica version information: Displays the current version of the database.
-
Help: Access the VCluster UI documentation and Swagger documentation.
-
Left navigation: Shows the available pages and highlights the current page.
-
Landing page: Displays the different tiles to manage your database.