This is the multi-page printable view of this section.
Click here to print.
Return to the regular view of this page.
Managing storage locations
Vertica are paths to file destinations that you designate to store data and temporary files.
Vertica storage locations are paths to file destinations that you designate to store data and temporary files. Each cluster node requires at least two storage locations: one to store data, and another to store database catalog files. You set up these locations as part of installation and setup. (See Prepare disk storage locations for disk space requirements.)
Important
While no technical issue prevents you from using CREATE LOCATION to add one or more Network File System (NFS) storage locations, Vertica does not support NFS data or catalog storage except for MapR mount points. You will be unable to run queries against any other NFS data. When creating locations on MapR file systems, you must specify ALL NODES SHARED.
How Vertica uses storage locations
When you add data to the database or perform a DML operation, the new data is added to storage locations on disk as ROS containers. Depending on the configuration of your database, many ROS containers are likely to exist.
You can label the storage locations that you create, in order to reference them for object storage policies. If an object has no storage policy associated with it, Vertica uses default storage algorithms to store its data in available storage locations. If the object has a storage policy, Vertica stores the data at the object's designated storage location. You can can retire or drop store locations when you no longer need them.
Local storage locations
By default, Vertica stores data in unique locations on each node. Each location is in a directory in a file system that the node can access, and is often in the node’s own file system. You can create a local storage location for a single node or for all nodes in the cluster. Cluster-wide storage locations are the most common type of storage. Vertica defaults to using a local cluster-wide storage location for storing all data. If you want it to store data differently, you must create additional storage locations.
Shared storage locations
You can create shared storage locations, where data is stored on a single file system to which all cluster nodes in the cluster have access. This shared file system is often hosted outside of the cluster, such as on a distributed file system like HDFS. Currently, Vertica supports only HDFS shared storage locations. You cannot use NFS as a Vertica shared storage location except when using MapR mount points. See Vertica Storage Location for HDFS for more information.
When you create a shared storage location for DATA and/or TEMP usage, each node in the Vertica cluster creates its own subdirectory in the shared location. The separate directories prevent nodes from overwriting each other's data.
Deprecated
SHARED DATA and SHARED DATA,TEMP storage locations are deprecated.
For databases running in Eon Mode, the STORAGE_LOCATIONS system table shows a third type of location, communal.
1 - Viewing storage locations and policies
You can monitor information about available storage location labels and your current storage policies.
You can monitor information about available storage location labels and your current storage policies.
Query the V_MONITOR.DISK_STORAGE system table for disk storage information on each database node. For more information, see Using system tables and Altering location use. The V_MONITOR.DISK_STORAGE system table includes a CATALOG annotation, indicating that the location is used to store catalog files.
Note
You cannot add or remove a catalog storage location. Vertica creates and manages this storage location internally, and the area exists in the same location on each cluster node.
Viewing location labels
Three system tables have information about storage location labels in their location_labels columns:
-
storage_containers
-
storage_locations
-
partitions
Use a query such as the following for relevant columns of the storage_containers system table:
VMART=> select node_name,projection_name, location_label from v_monitor.storage_containers;
    node_name     |   projection_name    | location_label
------------------+----------------------+-----------------
 v_vmart_node0001 | states_p             |
 v_vmart_node0001 | states_p             |
 v_vmart_node0001 | t1_b1                |
 v_vmart_node0001 | newstates_b0         | FAST3
 v_vmart_node0001 | newstates_b0         | FAST3
 v_vmart_node0001 | newstates_b1         | FAST3
 v_vmart_node0001 | newstates_b1         | FAST3
 v_vmart_node0001 | newstates_b1         | FAST3
 .
 .
 .
Use a query such as the following for columns of the v_catalog.storage_locations system_table:
VMart=> select node_name, location_path, location_usage, location_label from storage_locations;
    node_name     |               location_path               | location_usage | location_label
------------------+-------------------------------------------+----------------+----------------
 v_vmart_node0001 | /home/dbadmin/VMart/v_vmart_node0001_data | DATA,TEMP      |
 v_vmart_node0001 | home/dbadmin/SSD/schemas                  | DATA           |
 v_vmart_node0001 | /home/dbadmin/SSD/tables                  | DATA           | SSD
 v_vmart_node0001 | /home/dbadmin/SSD/schemas                 | DATA           | Schema
 v_vmart_node0002 | /home/dbadmin/VMart/v_vmart_node0002_data | DATA,TEMP      |
 v_vmart_node0002 | /home/dbadmin/SSD/tables                  | DATA           |
 v_vmart_node0002 | /home/dbadmin/SSD/schemas                 | DATA           |
 v_vmart_node0003 | /home/dbadmin/VMart/v_vmart_node0003_data | DATA,TEMP      |
 v_vmart_node0003 | /home/dbadmin/SSD/tables                  | DATA           |
 v_vmart_node0003 | /home/dbadmin/SSD/schemas                 | DATA           |
(10 rows)
Use a query such as the following for columns of the v_monitor.partitions system table:
VMART=> select partition_key, projection_name, location_label from v_monitor.partitions;
 partition_key |   projection_name    | location_label
---------------+----------------------+---------------
 NH            | states_b0            | FAST3
 MA            | states_b0            | FAST3
 VT            | states_b1            | FAST3
 ME            | states_b1            | FAST3
 CT            | states_b1            | FAST3
 .
 .
 .
Viewing storage tiers
Query the storage_tiers system table to see both the labeled and unlabeled storage containers and information about them:
VMart=> select * from v_monitor.storage_tiers;
 location_label | node_count | location_count | ros_container_count | total_occupied_size
----------------+------------+----------------+---------------------+---------------------
                |          1 |              2 |                  17 |           297039391
 SSD            |          1 |              1 |                   9 |                1506
 Schema         |          1 |              1 |                   0 |                   0
(3 rows)
Viewing storage policies
Query the storage_policies system table to view the current storage policy in place.
VMART=> select * from v_monitor.storage_policies;
 schema_name | object_name |  policy_details  | location_label
-------------+-------------+------------------+-----------------
             | public      | Schema           | F4
 public      | lineorder   | Partition [4, 4] | M3
(2 rows)
2 - Creating storage locations
You can use CREATE LOCATION to add and configure storage locations (other than the required defaults) to provide storage for these purposes:.
You can use CREATE LOCATION to add and configure storage locations (other than the required defaults) to provide storage for these purposes:
-
Isolating execution engine temporary files from data files.
-
Creating labeled locations to use in storage policies.
-
Creating storage locations based on predicted or measured access patterns.
-
Creating USER storage locations for specific users or user groups.
Important
While no technical issue prevents you from using CREATE LOCATION to add one or more Network File System (NFS) storage locations, Vertica does not support NFS data or catalog storage except for MapR mount points. You will be unable to run queries against any other NFS data. When creating locations on MapR file systems, you must specify ALL NODES SHARED.
You can add a new storage location from one node to another node or from a single node to all cluster nodes. However, do not use a shared directory on one node for other cluster nodes to access.
Planning storage locations
Before adding a storage location, perform the following steps:
-
Verify that the directory you plan to use for a storage location destination is an empty directory with write permissions for the Vertica process.
-
Plan the labels to use if you want to label the location as you create it.
-
Determine the type of information to store in the storage location:
-
DATA,TEMP (default): The storage location can store persistent and temporary DML-generated data, and data for temporary tables.
-
TEMP: A path-specified location to store DML-generated temporary data. If path is set to S3, then this location is used only when the RemoteStorageForTemp configuration parameter is set to 1, and TEMP must be qualified with ALL NODES SHARED. For details, see S3 Storage of Temporary Data.
-
DATA: The storage location can only store persistent data.
-
USER: Users with READ and WRITE privileges can access data and external tables of this storage location.
-
DEPOT: The storage location is used in Eon Mode to store the depot. Only create DEPOT storage locations on local Linux file systems.
Vertica allows a single DEPOT storage location per node. If you want to move your depot to different location (on a different file system, for example) you must first drop the old depot storage location, then create the new location.
Storing temp and data files in different storage locations is advantageous because the two types of data have different disk I/O access patterns. Temp files are distributed across locations based on available storage space. However, data files can be stored on different storage locations, based on storage policy, to reflect predicted or measured access patterns.
If you plan to place storage locations on HDFS, see Requirements for HDFS storage locations for additional requirements.
Creating unlabeled local storage locations
This example shows a three-node cluster, each with a vertica/SSD directory for storage.
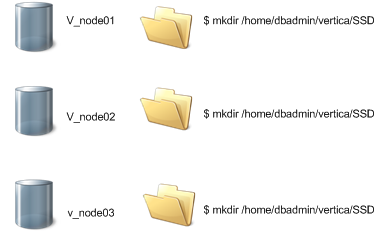
On each node in the cluster, create a directory where the node stores its data. For example:
$ mkdir /home/dbadmin/vertica/SSD
Vertica recommends that you create the same directory path on each node. Use this path when creating a storage location.
Use the CREATE LOCATION statement to add a storage location. Specify the following information:
-
The path on the node where Vertica stores the data.
Important
Vertica does not validate the path that you specify. Confirm that the path value points to a valid location.
-
The node where the location is available, or ALL NODES. If you specify ALL NODES, the statement creates the storage locations on all nodes in the cluster in a single transaction.
-
The type of information to be stored.
To give unprivileged (non-dbadmin) Linux users access to data, you must create a USER storage location. You can also use a USER storage location to give users without their own credentials access to shared file systems and object stores like HDFS and S3. See Creating a Storage Location for USER Access.
The following example shows how to add a location available on all nodes to store only data:
=> CREATE LOCATION '/home/dbadmin/vertica/SSD/' ALL NODES USAGE 'DATA';
The following example shows how to add a location that is available on the v_vmart_node0001 node to store data and temporary files:
=> CREATE LOCATION '/home/dbadmin/vertica/SSD/' NODE 'v_vmart_node0001';
Suppose you are using a storage location for data files and want to create ranked storage locations. In this ranking, columns are stored on different disks based on their measured performance. To create ranked storage locations, see Measuring storage performance and Setting storage performance.
After you create a storage location, you can alter the type of information it stores, with some restrictions. See Altering location use.
Storage location subdirectories
You cannot create a storage location in a subdirectory of an existing storage location. Doing so results in an error similar to the following:
=> CREATE LOCATION '/tmp/myloc' ALL NODES USAGE 'TEMP';
CREATE LOCATION
=> CREATE LOCATION '/tmp/myloc/ssd' ALL NODES USAGE 'TEMP';
ERROR 5615:  Location [/tmp/myloc/ssd] conflicts with existing location
[/tmp/myloc] on node v_vmart_node0001
Creating labeled storage locations
You can add a storage location with a descriptive label using the CREATE LOCATION statement's LABEL keyword. You use labeled locations to set up storage policies. See Creating storage policies.
This example shows how to create a storage location on v_mart_node0002 with the label SSD:
=> CREATE LOCATION '/home/dbadmin/SSD/schemas' NODE 'v_vmart_node0002'
   USAGE 'DATA' LABEL 'SSD';
This example shows you how to create a storage location on all nodes. Specifying the ALL NODES keyword adds the storage location to all nodes in a single transaction:
=> CREATE LOCATION '/home/dbadmin/SSD/schemas' ALL NODES
   USAGE 'DATA' LABEL 'SSD';
The new storage location is listed in the DISK_STORAGE system table:
=> SELECT * FROM v_monitor.disk_storage;
.
.
-[ RECORD 7 ]-----------+-----------------------------------------------------
node_name               | v_vmart_node0002
storage_path            | /home/dbadmin/SSD/schemas
storage_usage           | DATA
rank                    | 0
throughput              | 0
latency                 | 0
storage_status          | Active
disk_block_size_bytes   | 4096
disk_space_used_blocks  | 1549437
disk_space_used_mb      | 6053
disk_space_free_blocks  | 13380004
disk_space_free_mb      | 52265
disk_space_free_percent | 89%
...
Creating a storage location for USER access
To give unprivileged (non-dbadmin) Linux users access to data, you must create a USER storage location.
By default, Vertica uses user-provided credentials to access external file systems such as HDFS and cloud object stores. You can override this default and create a USER storage location to manage access to these locations. To override the default, set the UseServerIdentityOverUserIdentity configuration parameter.
After you create a USER storage location, you can grant one or more users access to it. USER storage locations grant access only to data files, not temp files. You cannot assign a USER storage location to a storage policy. You cannot change an existing storage location to have USER access.
The following example shows how to create a USER storage location on a specific node:
=> CREATE LOCATION '/home/dbadmin/UserStorage/BobStore' NODE
   'v_mcdb_node0007' USAGE 'USER';
The following example shows how to grant a specific user read and write permissions to the location:
=> GRANT ALL ON LOCATION '/home/dbadmin/UserStorage/BobStore' TO Bob;
GRANT PRIVILEGE
The following example shows how to use a USER storage location to grant access to locations on S3. Vertica uses the server credential to access the location:
   --- set database-level credential (once):
=> ALTER DATABASE DEFAULT SET AWSAuth = 'myaccesskeyid123456:mysecretaccesskey123456789012345678901234';

=> CREATE LOCATION 's3://datalake' SHARED USAGE 'USER' LABEL 's3user';

=> CREATE ROLE ExtUsers;
   --- Assign users to this role using GRANT (Role).

=> GRANT READ ON LOCATION 's3://datalake' TO ExtUsers;
For more information about configuring user privileges, see Database users and privileges and the GRANT (storage location) and REVOKE (storage location) reference pages.
Shared versus local storage
The SHARED keyword indicates that the location is shared by all nodes. Most remote file systems such as HDFS and S3 are shared. For these file systems, the path argument represents a single location in the remote file system where all nodes store data. Each node creates its own subdirectory in the shared storage location for its own files. Doing so prevents one node from overwriting files that belong to other nodes.
If using a remote file system, you must specify SHARED, even for one-node clusters. If the location is declared as USER, Vertica does not create subdirectories for each node. The setting of USER takes precedence over SHARED.
If you create a location and omit this keyword, the new storage location is treated as local. Each node must have unique access to the specified path. This location is usually a path in the node's own file system. Storage locations in file systems that are local to each node, such as Linux, are always local.
Deprecated
SHARED DATA storage locations are deprecated.
S3 storage of temporary data in Eon Mode
If you are using Vertica in Eon Mode and have limited local disk space, that space might be insufficient to handle the large quantities of temporary data that some DML operations can generate. This is especially true for large load operations and refresh operations.
You can leverage S3 storage to handle temporary data, as follows:
-
Create a remote storage location with CREATE LOCATION, where path is set to S3 as follows:
=> CREATE LOCATION 's3://bucket/path' ALL NODES SHARED USAGE 'TEMP';
-
Set the RemoteStorageForTemp session configuration parameter to 1:
=> ALTER SESSION SET RemoteStorageForTemp= 1;
A temporary storage location must already exist on S3 before you set this parameter to 1; otherwise, Vertica throws an error and hint to create the storage location.
-
Run the queries that require extra temporary storage.
-
Reset RemoteStorageForTemp to its default value:
=> ALTER SESSION DEFAULT CLEAR RemoteStorageForTemp;
When you set RemoteStorageForTemp, Vertica redirects temporary data for all DML operations to the specified remote location. The parameter setting remains in effect until it is explicitly reset to its default value (0), or the current session ends.
Important
Redirecting temporary data to S3 is liable to affect performance and require extra S3 API calls. Use it only for DML operations that involve large quantities of data.
3 - Storage locations on HDFS
You can place storage locations in HDFS, in addition to on the local Linux file system.
You can place storage locations in HDFS, in addition to on the local Linux file system. Because HDFS storage locations are not local, querying them can be slower. You might use HDFS storage locations for lower-priority data or data that is rarely queried (cold data). Moving lower-priority data to HDFS frees space on your Vertica cluster for higher-priority data.
If you are using Vertica for SQL on Apache Hadoop, you typically place storage locations only on HDFS.
3.1 - Requirements for HDFS storage locations
Caution
If you use HDFS storage locations, the HDFS data must be available when you start Vertica. Your HDFS cluster must be operational, and the ROS files must be present. If you moved data files, or they are corrupted, or your HDFS cluster is not responsive, Vertica cannot start.
To store Vertica's data on HDFS, verify that:
-
Your Hadoop cluster has WebHDFS enabled.
-
All of the nodes in your Vertica cluster can connect to all of the nodes in your Hadoop cluster. Any firewall between the two clusters must allow connections on the ports used by HDFS.
-
If your HDFS cluster is unsecured, you have a Hadoop user whose username matches the name of the Vertica database superuser (usually named dbadmin). This Hadoop user must have read and write access to the HDFS directory where you want Vertica to store its data.
-
If your HDFS cluster uses Kerberos authentication:
-
You have a Kerberos principal for Vertica, and it has read and write access to the HDFS directory that will be used for the storage location. See Kerberos below for instructions.
-
The Kerberos KDC is running.
-
Your HDFS cluster has enough storage available for Vertica data. See Space Requirements below for details.
-
The data you store in an HDFS-backed storage location does not expand your database's size beyond any data allowance in your Vertica license. Vertica counts data stored in an HDFS-backed storage location as part of any data allowance set by your license. See Managing licenses in the Administrator's Guide for more information.
Backup/Restore has additional requirements.
Space requirements
If your Vertica database is K-safe, HDFS-based storage locations contain two copies of the data you store in them. One copy is the primary projection, and the other is the buddy projection. If you have enabled HDFS's data-redundancy feature, Hadoop stores both projections multiple times. This duplication might seem excessive. However, it is similar to how a RAID level 1 or higher stores redundant copies of both the primary and buddy projections. The redundant copies also help the performance of HDFS by enabling multiple nodes to process a request for a file.
Verify that your HDFS installation has sufficient space available for redundant storage of both the primary and buddy projections of your K-safe data. You can adjust the number of duplicates stored by HDFS by setting the HadoopFSReplication configuration parameter. See Troubleshooting HDFS Storage Locations for details.
Kerberos
To use a storage location in HDFS with Kerberos, take the following additional steps:
-
Create a Kerberos principal for each Vertica node as explained in Using Kerberos with Vertica.
-
Give all node principals read and write permission to the HDFS directory you will use as a storage location.
If you plan to use vbr to back up and restore the location, see additional requirements in Requirements for backing up and restoring HDFS storage locations.
Adding HDFS storage locations to new nodes
If you add nodes to your Vertica cluster, they do not automatically have access to existing HDFS storage locations. You must manually create the storage location for the new node using the CREATE LOCATION statement. Do not use the ALL NODES option in this statement. Instead, use the NODE option with the name of the new node to tell Vertica that just that node needs to add the shared location.
Caution
You must manually create the storage location. Otherwise, the new node uses the default storage policy (usually, storage on the local Linux file system) to store data that the other nodes store in HDFS. As a result, the node can run out of disk space.
Consider an HDFS storage location that was created on a three-node cluster with the following statements:
=> CREATE LOCATION 'hdfs://hadoopNS/vertica/colddata' ALL NODES SHARED
    USAGE 'data' LABEL 'coldstorage';

=> SELECT SET_OBJECT_STORAGE_POLICY('SchemaName','coldstorage');
The following example shows how to add the storage location to a new cluster node:
=> CREATE LOCATION 'hdfs://hadoopNS/vertica/colddata' NODE 'v_vmart_node0004'
   SHARED USAGE 'data' LABEL 'coldstorage';
Any active standby nodes in your cluster when you create an HDFS storage location automatically create their own instances of the location. When the standby node takes over for a down node, it uses its own instance of the location to store data for objects using the HDFS storage policy. Treat standby nodes added after you create the storage location as any other new node. You must manually define the HDFS storage location.
3.2 - How the HDFS storage location stores data
Vertica stores data in storage locations on HDFS similarly to the way it stores data in the Linux file system.
Vertica stores data in storage locations on HDFS similarly to the way it stores data in the Linux file system. When you create a storage location on HDFS, Vertica stores the ROS containers holding its data on HDFS. You can choose which data uses the HDFS storage location: from the data for just a single table or partition to all of the database's data.
When Vertica reads data from or writes data to an HDFS storage location, the node storing or retrieving the data contacts the Hadoop cluster directly to transfer the data. If a single ROS container file is split among several HDFS nodes, the Vertica node connects to each of them. The Vertica node retrieves the pieces and reassembles the file. Because each node fetches its own data directly from the source, data transfers are parallel, increasing their efficiency. Having the Vertica nodes directly retrieve the file splits also reduces the impact on the Hadoop cluster.
What you can store in HDFS
Use HDFS storage locations to store only data. You cannot store catalog information in an HDFS storage location.
Caution
While it is possible to use an HDFS storage location for temporary data storage, you must never do so. Using HDFS for temporary storage causes severe performance issues.
What HDFS storage locations cannot do
Because Vertica uses storage locations to store ROS containers in a proprietary format, MapReduce and other Hadoop components cannot access your Vertica ROS data stored in HDFS. Never allow another program that has access to HDFS to write to the ROS files. Any outside modification of these files can lead to data corruption and loss. Applications must use the Vertica client libraries to access Vertica data. If you want to share ROS data with other Hadoop components, you can export it (see File export).
3.3 - Best practices for Vertica for SQL on Apache Hadoop
If you are using the Vertica for SQLxa0on Apache Hadoop product, Vertica recommends the following best practices for storage locations:.
If you are using the Vertica for SQL on Apache Hadoop product, Vertica recommends the following best practices for storage locations:
-
Place only data type storage locations on HDFS storage.
-
Place temp space directly on the local Linux file system, not in HDFS.
-
For the best performance, place the Vertica catalog directly on the local Linux file system.
-
Create the database first on a local Linux file system. Then, you can extend the database to HDFS storage locations and set storage policies that exclusively place data blocks on the HDFS storage location.
-
For better performance, if you are running Vertica only on a subset of the HDFS nodes, do not run the HDFS balancer on them. The HDFS balancer can move data blocks farther away, causing Vertica to read non-local data during query execution. Queries run faster if they do not require network I/O.
Generally, HDFS requires approximately 2 GB of memory for each node in the cluster. To support this requirement in your Vertica configuration:
-
Create a 2-GB resource pool.
-
Do not assign any Vertica execution resources to this pool. This approach reserves the space for use by HDFS.
Alternatively, use Ambari or Cloudera Manager to find the maximum heap size required by HDFS and set the size of the resource pool to that value.
For more about how to configure resource pools, see Managing workloads.
3.4 - Troubleshooting HDFS storage locations
This topic explains some common issues with HDFS storage locations.
This topic explains some common issues with HDFS storage locations.
HDFS storage disk consumption
By default, HDFS makes three copies of each file it stores. This replication helps prevent data loss due to disk or system failure. It also helps increase performance by allowing several nodes to handle a request for a file.
A Vertica database with a K-safety value of 1 or greater also stores its data redundantly using buddy projections.
When a K-Safe Vertica database stores data in an HDFS storage location, its data redundancy is compounded by HDFS's redundancy. HDFS stores three copies of the primary projection's data, plus three copies of the buddy projection for a total of six copies of the data.
If you want to reduce the amount of disk storage used by HDFS locations, you can alter the number of copies of data that HDFS stores. The Vertica configuration parameter named HadoopFSReplication controls the number of copies of data HDFS stores.
You can determine the current HDFS disk usage by logging into the Hadoop NameNode and issuing the command:
$ hdfs dfsadmin -report
This command prints the usage for the entire HDFS storage, followed by details for each node in the Hadoop cluster. The following example shows the beginning of the output from this command, with the total disk space highlighted:
$ hdfs dfsadmin -report
Configured Capacity: 51495516981 (47.96 GB)
Present Capacity: 32087212032 (29.88 GB)
DFS Remaining: 31565144064 (29.40 GB)
DFS Used: 522067968 (497.88 MB)
DFS Used%: 1.63%
Under replicated blocks: 0
Blocks with corrupt replicas: 0
Missing blocks: 0
. . .
After loading a simple million-row table into a table stored in an HDFS storage location, the report shows greater disk usage:
Configured Capacity: 51495516981 (47.96 GB)
Present Capacity: 32085299338 (29.88 GB)
DFS Remaining: 31373565952 (29.22 GB)
DFS Used: 711733386 (678.76 MB)
DFS Used%: 2.22%
Under replicated blocks: 0
Blocks with corrupt replicas: 0
Missing blocks: 0
. . .
The following Vertica example demonstrates:
-
Creating the storage location on HDFS.
-
Dropping the table in Vertica.
-
Setting the HadoopFSReplication configuration option to 1. This tells HDFS to store a single copy of an HDFS storage location's data.
-
Recreating the table and reloading its data.
=> CREATE LOCATION 'hdfs://hadoopNS/user/dbadmin' ALL NODES SHARED
    USAGE 'data' LABEL 'hdfs';
CREATE LOCATION

=> DROP TABLE messages;
DROP TABLE

=> ALTER DATABASE DEFAULT SET PARAMETER HadoopFSReplication = 1;

=> CREATE TABLE messages (id INTEGER, text VARCHAR);
CREATE TABLE

=> SELECT SET_OBJECT_STORAGE_POLICY('messages', 'hdfs');
 SET_OBJECT_STORAGE_POLICY
----------------------------
Object storage policy set.
(1 row)

=> COPY messages FROM '/home/dbadmin/messages.txt';
 Rows Loaded
-------------
1000000
Running the HDFS report on Hadoop now shows less disk space use:
$ hdfs dfsadmin -report
Configured Capacity: 51495516981 (47.96 GB)
Present Capacity: 32086278190 (29.88 GB)
DFS Remaining: 31500988416 (29.34 GB)
DFS Used: 585289774 (558.18 MB)
DFS Used%: 1.82%
Under replicated blocks: 0
Blocks with corrupt replicas: 0
Missing blocks: 0
. . .
Caution
Reducing the number of copies of data stored by HDFS increases the risk of data loss. It can also negatively impact the performance of HDFS by reducing the number of nodes that can provide access to a file. This slower performance can impact the performance of Vertica queries that involve data stored in an HDFS storage location.
ERROR 6966: StorageBundleWriter
You might encounter Error 6966 when loading data into a storage location on a small Hadoop cluster (5 or fewer data nodes). This error is caused by the way HDFS manages the write pipeline and replication. You can mitigate this problem by reducing the number of replicas as explained in HDFS Storage Disk Consumption. For configuration changes you can make in the Hadoop cluster instead, see this blog post from Hortonworks.
Kerberos authentication when creating a storage location
If HDFS uses Kerberos authentication, then the CREATE LOCATION statement authenticates using the Vertica keytab principal, not the principal of the user performing the action. If the creation fails with an authentication error, verify that you have followed the steps described in Kerberos to configure this principal.
When creating an HDFS storage location on a Hadoop cluster using Kerberos, CREATE LOCATION reports the principal being used as in the following example:
=> CREATE LOCATION 'hdfs://hadoopNS/user/dbadmin' ALL NODES SHARED
             USAGE 'data' LABEL 'coldstorage';
NOTICE 0: Performing HDFS operations using kerberos principal [vertica/hadoop.example.com]
CREATE LOCATION
Backup or restore fails
For issues with backup/restore of HDFS storage locations, see Troubleshooting backup and restore.
4 - Altering location use
ALTER_LOCATION_USE lets you change the type of files that Vertica stores at a storage location.
ALTER_LOCATION_USE lets you change the type of files that Vertica stores at a storage location. You typically use labels only for DATA storage locations, not TEMP.
This example shows how to alter the storage location on v_vmartdb_node0004 to store only data files:
=> SELECT ALTER_LOCATION_USE ('/thirdVerticaStorageLocation/' , 'v_vmartdb_node0004' , 'DATA');
Altering HDFS storage locations
When altering an HDFS storage location, you must make the change for all nodes in the Vertica cluster. To do so, specify a node value of '', as in the following example:
=> SELECT ALTER_LOCATION_USE('hdfs:///user/dbadmin/v_vmart',
   '','TEMP');
Restrictions
You cannot change a storage location from a USER usage type if you created the location that way, or to a USER type if you did not. You can change a USER storage location to specify DATA (storing TEMP files is not supported). However, doing so does not affect the primary objective of a USER storage location, to be accessible by non-dbadmin users with assigned privileges.
You cannot change a storage location from SHARED TEMP or SHARED USER to SHARED DATA or the reverse.
Effects of altering storage location use
Before altering a storage location use type, be aware that at least one location must remain for storing data and temp files on a node. You can store data and temp files in the same, or separate, storage locations.
Altering an existing storage location has the following effects:
|
Alter use from... |
To store only... |
Has this effect... |
|
Temp and data files (or data only) |
Temp files |
Data content is eventually merged out by the Tuple Mover.You can also manually merge out data from the storage location using DO_TM_TASK.
The location stores only temp files from that point forward.
|
|
Temp and data files (or temp only) |
Data files |
Vertica continues to run all statements that use temp files (such as queries and loads).
Subsequent statements no longer use the changed storage location for temp files, and the location stores only data files from that point forward.
|
5 - Altering location labels
ALTER_LOCATION_LABEL lets you change the label for a storage location in several ways:.
ALTER_LOCATION_LABEL lets you change the label for a storage location in several ways:
You can perform these operations on individual nodes or cluster-wide.
Adding a location label
You add a location label to an unlabeled storage location with ALTER_LOCATION_LABEL. For example, unlabeled storage location /home/dbadmin/Vertica/SSD is defined on a three-node cluster:
You can label this storage location as SSD on all nodes as follows:
=> SELECT ALTER_LOCATION_LABEL('/home/dbadmin/vertica/SSD', '', 'SSD');
Caution
If you label a storage location that contains data, Vertica moves the data to an unlabeled location, if one exists. To prevent data movement between storage locations, labels should be applied either to all storage locations or none.
Removing a location label
You can remove a location label only if the following conditions are both true:
The following statement removes the SSD label from the specified storage location on all nodes:
=> SELECT ALTER_LOCATION_LABEL('/home/dbadmin/SSD/tables','', '');
          ALTER_LOCATION_LABEL
------------------------------------------
 /home/dbadmin/SSD/tables label changed.
(1 row)
Altering a storage location label
You can relabel a storage location only if no database object has a storage policy that specifies this label.
6 - Creating storage policies
Vertica meta-function SET_OBJECT_STORAGE_POLICY creates a that associates a database object with a labeled storage location.
Vertica meta-function
SET_OBJECT_STORAGE_POLICY creates a storage policy that associates a database object with a labeled storage location. When an object has a storage policy, Vertica uses the labeled location as the default storage location for that object's data.
You can create storage policies for the database, schemas, tables, and partition ranges. Each object can be associated with one storage policy. Each time data is loaded and updated, Vertica checks whether the object has a storage policy. If it does, Vertica uses the labeled storage location. If no storage policy exists for an object or its parent entities, data storage processing continues using standard storage algorithms on available storage locations. If all storage locations are labeled, Vertica uses one of them.
Storage policies let you determine where to store critical data. For example, you might create a storage location with the label SSD that represents the fastest available storage on the cluster nodes. You then create storage policies to associate tables with that labeled location. For example, the following SET_OBJECT_STORAGE_POLICY statement sets a storage policy on table test to use the storage location labeled SSD as its default location:
=>  SELECT SET_OBJECT_STORAGE_POLICY('test','ssd', true);
            SET_OBJECT_STORAGE_POLICY
--------------------------------------------------
Object storage policy set.
Task: moving storages
(Table: public.test) (Projection: public.test_b0)
(Table: public.test) (Projection: public.test_b1)

(1 row)
Note
You cannot include temporary files in storage policies. Storage policies are for use only with data files on storage locations for DATA. Storage policies are not valid for USER locations.
Creating one or more storage policies does not require that policies exist for all database objects. A site can support objects with or without storage policies. You can add storage policies for a discrete set of priority objects, while letting other objects exist without a policy, so they use available storage.
You can measure the performance of any disk storage location (see Measuring storage performance). Then, using the performance measurements, set the storage location performance. Vertica uses the performance measurements you set to rank its storage locations and, through ranking, to determine which key projection columns to store on higher performing locations, as described in Setting storage performance.
If you already set the performance of your site's storage locations, and decide to use storage policies, any storage location with an associated policy has a higher priority than the storage ranking setting.
You can use storage policies to move older data to less-expensive storage locations while keeping it available for queries. See Creating storage policies for low-priority data.
Storage hierarchy and precedence
Vertica determines where to store object data according to the following hierarchy of storage policies, listed below in ascending order of precedence:
-
Database
-
Schema
-
Table
-
Table partition
If an object lacks its own storage policy, it uses the storage policy of its parent object. For example, table Region.Income in database Sales is partitioned by months. Labeled storage policies FAST and STANDARD are assigned to the table and database, respectively. No storage policy is assigned to the table's partitions or its parent schema, so these use the storage policies of their parent objects, FAST and STANDARD, respectively:
|
Object |
Storage policy |
Policy precedence |
Labeled location |
Default location |
Sales (database) |
YES |
4 |
STANDARD |
STANDARD |
Region (schema) |
NO |
3 |
N/A |
STANDARD |
Income (table) |
YES |
2 |
FAST |
FAST |
MONTH (partitions) |
NO |
1 |
N/A |
FAST |
When Tuple Mover operations such as mergeout occur, all Income data moves to the FAST storage location. Other tables in the Region schema use their own storage policy. If a Region table lacks its own storarage policy, Tuple Mover uses the next storage policy above it—in this case, it uses database storage policy and moves the table data to STANDARD.
Querying existing storage policies
You can query existing storage policies, listed in the location_label column of system table STORAGE_CONTAINERS:
=> SELECT node_name, projection_name, location_label FROM v_monitor.storage_containers;
    node_name     |   projection_name    | location_label
------------------+----------------------+----------------
 v_vmart_node0001 | states_p             |
 v_vmart_node0001 | states_p             |
 v_vmart_node0001 | t1_b1                |
 v_vmart_node0001 | newstates_b0         | LEVEL3
 v_vmart_node0001 | newstates_b0         | LEVEL3
 v_vmart_node0001 | newstates_b1         | LEVEL3
 v_vmart_node0001 | newstates_b1         | LEVEL3
 v_vmart_node0001 | newstates_b1         | LEVEL3
 v_vmart_node0001 | states_p_v1_node0001 | LEVEL3
 v_vmart_node0001 | states_p_v1_node0001 | LEVEL3
 v_vmart_node0001 | states_p_v1_node0001 | LEVEL3
 v_vmart_node0001 | states_p_v1_node0001 | LEVEL3
 v_vmart_node0001 | states_p_v1_node0001 | LEVEL3
 v_vmart_node0001 | states_p_v1_node0001 | LEVEL3
 v_vmart_node0001 | states_b0            | SSD
 v_vmart_node0001 | states_b0            | SSD
 v_vmart_node0001 | states_b1            | SSD
 v_vmart_node0001 | states_b1            | SSD
 v_vmart_node0001 | states_b1            | SSD
...
Forcing existing data storage to a new storage location
By default, the Tuple Mover enforces object storage policies after all pending mergeout operations are complete. SET_OBJECT_STORAGE_POLICY moves existing data storage to a new location immediately, if you set its parameter enforce-storage-move to true. You might want to force a move, even though it means waiting for the operation to complete before continuing, if the data being moved is old. The Tuple Mover runs less frequently on older data.
Note
If parameter enforce-storage-move is set to true, SET_OBJECT_STORAGE_POLICY performs a cluster-wide operation. If an error occurs on any node, the function displays a warning message and skips that node. It then continues executing the operation on the remaining nodes.
7 - Creating storage policies for low-priority data
If some of your data is in a partitioned table, you can move less-queried partitions to less-expensive storage such as HDFS.
If some of your data is in a partitioned table, you can move less-queried partitions to less-expensive storage such as HDFS. The data is still accessible in queries, just at a slower speed. In this scenario, the faster storage is often referred to as "hot storage," and the slower storage is referred to as "cold storage."
Suppose you have a table named messages (containing social-media messages) that is partitioned by the year and month of the message's timestamp. You can list the partitions in the table by querying the PARTITIONS system table.
=> SELECT partition_key, projection_name, node_name, location_label FROM partitions
   ORDER BY partition_key;
partition_key | projection_name |    node_name     | location_label
--------------+-----------------+------------------+----------------
201309        | messages_b1     | v_vmart_node0001 |
201309        | messages_b0     | v_vmart_node0003 |
201309        | messages_b1     | v_vmart_node0002 |
201309        | messages_b1     | v_vmart_node0003 |
201309        | messages_b0     | v_vmart_node0001 |
201309        | messages_b0     | v_vmart_node0002 |
201310        | messages_b0     | v_vmart_node0002 |
201310        | messages_b1     | v_vmart_node0003 |
201310        | messages_b0     | v_vmart_node0001 |
. . .
201405        | messages_b0     | v_vmart_node0002 |
201405        | messages_b1     | v_vmart_node0003 |
201405        | messages_b1     | v_vmart_node0001 |
201405        | messages_b0     | v_vmart_node0001 |
(54 rows)
Next, suppose you find that most queries on this table access only the latest month or two of data. You might decide to move the older data to cold storage in an HDFS-based storage location. After you move the data, it is still available for queries, but with lower query performance.
To move partitions to the HDFS storage location, supply the lowest and highest partition key values to be moved in the SET_OBJECT_STORAGE_POLICY function call. The following example shows how to move data between two dates. In this example:
-
The partition key value 201309 represents September 2013.
-
The partition key value 201403 represents March 2014.
-
The name, coldstorage, is the label of the HDFS-based storage location.
-
The final argument, which is optional, is true, meaning that the function does not return until the move is complete. By default the function returns immediately and the data is moved when the Tuple Mover next runs. When data is old, however, the Tuple Mover runs less frequently, which would delay recovering the original storage space.
=> SELECT SET_OBJECT_STORAGE_POLICY('messages','coldstorage', '201309', '201403', 'true');
The partitions within the specified range are moved to the HDFS storage location labeled coldstorage the next time the Tuple Mover runs. This location name now displays in the PARTITIONS system table's location_label column.
=> SELECT partition_key, projection_name, node_name, location_label
   FROM partitions ORDER BY partition_key;
partition_key | projection_name |    node_name     | location_label
--------------+-----------------+------------------+----------------
201309        | messages_b0     | v_vmart_node0003 | coldstorage
201309        | messages_b1     | v_vmart_node0001 | coldstorage
201309        | messages_b1     | v_vmart_node0002 | coldstorage
201309        | messages_b0     | v_vmart_node0001 | coldstorage
. . .
201403        | messages_b0     | v_vmart_node0002 | coldstorage
201404        | messages_b0     | v_vmart_node0001 |
201404        | messages_b0     | v_vmart_node0002 |
201404        | messages_b1     | v_vmart_node0001 |
201404        | messages_b1     | v_vmart_node0002 |
201404        | messages_b0     | v_vmart_node0003 |
201404        | messages_b1     | v_vmart_node0003 |
201405        | messages_b0     | v_vmart_node0001 |
201405        | messages_b1     | v_vmart_node0002 |
201405        | messages_b0     | v_vmart_node0002 |
201405        | messages_b0     | v_vmart_node0003 |
201405        | messages_b1     | v_vmart_node0001 |
201405        | messages_b1     | v_vmart_node0003 |
(54 rows)
After your initial data move, you can move additional data to the HDFS storage location periodically. You can move individual partitions or a range of partitions from the "hot" storage to the "cold" storage location using the same method:
=> SELECT SET_OBJECT_STORAGE_POLICY('messages', 'coldstorage', '201404', '201404', 'true');

=> SELECT projection_name, node_name, location_label
   FROM PARTITIONS WHERE PARTITION_KEY = '201404';
 projection_name |    node_name     | location_label
-----------------+------------------+----------------
 messages_b0     | v_vmart_node0002 | coldstorage
 messages_b0     | v_vmart_node0003 | coldstorage
 messages_b1     | v_vmart_node0003 | coldstorage
 messages_b0     | v_vmart_node0001 | coldstorage
 messages_b1     | v_vmart_node0002 | coldstorage
 messages_b1     | v_vmart_node0001 | coldstorage
(6 rows)
Moving partitions to a table stored on HDFS
Another method of moving partitions from hot storage to cold storage is to move the partitions' data to a separate table in the other storage location. This method breaks the data into two tables, one containing hot data and the other containing cold data. Use this method if you want to prevent queries from inadvertently accessing data stored in cold storage. To query the older data, you must explicitly query the cold table.
To move partitions:
-
Create a new table whose schema matches that of the existing partitioned table.
-
Set the storage policy of the new table to use the HDFS-based storage location.
-
Use the MOVE_PARTITIONS_TO_TABLE function to move a range of partitions from the hot table to the cold table. The partitions migrate when the Tuple Mover next runs.
The following example demonstrates these steps. You first create a table named cold_messages. You then assign it the HDFS-based storage location named coldstorage, and, finally, move a range of partitions.
=> CREATE TABLE cold_messages LIKE messages INCLUDING PROJECTIONS;
=> SELECT SET_OBJECT_STORAGE_POLICY('cold_messages', 'coldstorage');
=> SELECT MOVE_PARTITIONS_TO_TABLE('messages','201309','201403','cold_messages');
8 - Moving data storage locations
SET_OBJECT_STORAGE_POLICY moves data storage from an existing location (labeled and unlabeled) to another labeled location.
SET_OBJECT_STORAGE_POLICY moves data storage from an existing location (labeled and unlabeled) to another labeled location. This function performs two tasks:
-
Creates a storage policy for an object, or changes its current policy.
-
Moves all existing data for the specified objects to the target storage location.
Before it moves object data to the specified storage location, Vertica calculates the required storage and checks available space at the target. Before calling SET_OBJECT_STORAGE_POLICY, check available space on the new target location. Be aware that checking does not guarantee that this space remains available when the Tuple Mover actually executes the move. If the storage location lacks sufficient free space, the function returns an error.
Note
Moving an object's current storage to a new target is a cluster-wide operation. If a node is unavailable, the function returns a warning message, and then continues to implement the move on other nodes. When the node rejoins the cluster, the Tuple Mover updates it with the storage data.
By default, the Tuple Mover moves object data to the new storage location after all pending mergeout tasks return. You can force the data to move immediately by setting the function's enforce-storage-move argument to true. For example, the following statement sets the storage policy for a table and implements the move immediately:
=> SELECT SET_OBJECT_STORAGE_POLICY('states', 'SSD', 'true');
                            SET_OBJECT_STORAGE_POLICY
------------------------------------------------------------------------------------------------
 Object storage policy set.
Task: moving storages
(Table: public.states) (Projection: public.states_p1)
(Table: public.states) (Projection: public.states_p2)
(Table: public.states) (Projection: public.states_p3)
(1 row)
Tip
Consider using the
ENFORCE_OBJECT_STORAGE_POLICY meta-function to relocate the data of multiple database objects as needed, to bring them into compliance with current storage policies. Using this function is equivalent to calling
SET_OBJECT_STORAGE_POLICY successively on multiple database objects and setting the
enforce-storage-move argument to true.
9 - Clearing storage policies
The CLEAR_OBJECT_STORAGE_POLICY meta-function clears a storage policy from a database, schema, table, or table partition.
The CLEAR_OBJECT_STORAGE_POLICY meta-function clears a storage policy from a database, schema, table, or table partition. For example, the following statement clears the storage policy for a table:
=> SELECT CLEAR_OBJECT_STORAGE_POLICY ('store.store_sales_fact');
  CLEAR_OBJECT_STORAGE_POLICY
--------------------------------
 Object storage policy cleared.
(1 row)
The Tuple Mover moves existing storage containers to the parent storage policy's location, or the default storage location if there is no parent policy. By default, this move occurs after all pending mergeout tasks return.
You can force the data to move immediately by setting the function's enforce-storage-move argument to true. For example, the following statement clears the storage policy for a table and implements the move immediately:
=> SELECT CLEAR_OBJECT_STORAGE_POLICY ('store.store_orders_fact', 'true');
                         CLEAR_OBJECT_STORAGE_POLICY
-----------------------------------------------------------------------------
 Object storage policy cleared.
Task: moving storages
(Table: store.store_orders_fact) (Projection: store.store_orders_fact_b0)
(Table: store.store_orders_fact) (Projection: store.store_orders_fact_b1)

(1 row)
Tip
Consider using the
ENFORCE_OBJECT_STORAGE_POLICY meta-function to relocate the data of multiple database objects as needed, to bring them into compliance with current storage policies. Using this function is equivalent to calling
CLEAR_OBJECT_STORAGE_POLICY successively on multiple database objects and setting
enforce-storage-move to true.
Clearing a storage policy at one level, such as a table, does not necessarily affect storage policies at other levels, such as that table's partitions.
For example, the lineorder table has a storage policy to store table data at a location labeled F2. Various partitions in this table are individually assigned their own storage locations, as verified by querying the STORAGE_POLICIES system table:
=> SELECT * from v_monitor.storage_policies;
 schema_name | object_name |  policy_details  | location_label
-------------+-------------+------------------+----------------
             | public      | Schema           | F4
 public      | lineorder   | Partition [0, 0] | F1
 public      | lineorder   | Partition [1, 1] | F2
 public      | lineorder   | Partition [2, 2] | F4
 public      | lineorder   | Partition [3, 3] | M1
 public      | lineorder   | Partition [4, 4] | M3
(6 rows)
Clearing the current storage policy from the lineorder table has no effect on the storage policies of its individual partitions. For example, given the following CLEAR_OBJECT_STORAGE_POLICY statement:
=> SELECT CLEAR_OBJECT_STORAGE_POLICY ('lineorder');
      CLEAR_OBJECT_STORAGE_POLICY
-------------------------------------
 Default storage policy cleared.
(1 row)
The individual partitions in the table retain their storage policies:
=> SELECT * from v_monitor.storage_policies;
 schema_name | object_name |  policy_details  | location_label
-------------+-------------+------------------+----------------
             | public      | Schema           | F4
 public      | lineorder   | Partition [0, 0] | F1
 public      | lineorder   | Partition [1, 1] | F2
 public      | lineorder   | Partition [2, 2] | F4
 public      | lineorder   | Partition [3, 3] | M1
 public      | lineorder   | Partition [4, 4] | M3
(6 rows)
If you clear storage policies from a range of partitions key in a table, the storage policies of parent objects and other partition ranges are unaffected. For example, the following statement clears storage policies from partition keys 0 through 3:
=> SELECT CLEAR_OBJECT_STORAGE_POLICY ('lineorder','0','3');
      clear_object_storage_policy
-------------------------------------
 Default storage policy cleared.
(1 row)
=> SELECT * from storage_policies;
 schema_name | object_name |  policy_details  | location_label
-------------+-------------+------------------+----------------
             | public      | Schema           | F4
 public      | lineorder   | Table            | F2
 public      | lineorder   | Partition [4, 4] | M3
(2 rows)
10 - Measuring storage performance
Vertica lets you measure disk I/O performance on any storage location at your site.
Vertica lets you measure disk I/O performance on any storage location at your site. You can use the returned measurements to set performance, which automatically provides rank. Depending on your storage needs, you can also use performance to determine the storage locations needed for critical data as part of your site's storage policies. Storage performance measurements apply only to data storage locations, not temporary storage locations.
Measuring storage location performance calculates the time it takes to read and write 1 MB of data from the disk, which equates to:
IO time = time to read/write 1MB + time to seek = 1/throughput + 1/Latency
Thus, the I/O time of a faster storage location is less than that of a slower storage location.
Note
Measuring storage location performance requires extensive disk I/O, which is a resource-intensive operation. Consider starting this operation when fewer other operations are running.
Vertica gives you two ways to measure storage location performance, depending on whether the database is running. You can either:
Both methods return the throughput and latency for the storage location. Record or capture the throughput and latency information so you can use it to set the location performance (see Setting storage performance).
Use the MEASURE_LOCATION_PERFORMANCE() function to measure performance for a storage location when the database is running. This function has the following requirements:
-
The storage path must already exist in the database.
-
You need RAM*2 free space available in a storage location to measure its performance. For example, if you have 16 GB RAM, you need 32 GB of available disk space. If you do not have enough disk space, the function returns an error.
Use the system table DISK_STORAGE to obtain information about disk storage on each database node.
The following example shows how to measure the performance of a storage location on v_vmartdb_node0004:
=> SELECT MEASURE_LOCATION_PERFORMANCE('/secondVerticaStorageLocation/','v_vmartdb_node0004');
WARNING:  measure_location_performance can take a long time. Please check logs for progress
           measure_location_performance
--------------------------------------------------
 Throughput : 122 MB/sec. Latency : 140 seeks/sec
You can measure disk performance before setting up a cluster. This approach is useful when you want to verify that the disk is functioning within normal parameters. To perform this measurement, you must already have Vertica installed.
To measure disk performance, use the following command:
opt/vertica/bin/vertica -m <path to disk mount>
For example:
opt/vertica/bin/vertica -m /secondVerticaStorageLocation/node0004_data
11 - Setting storage performance
You can use the measurements returned from the MEASURE_LOCATION_PERFORMANCE function as input values to the SET_LOCATION_PERFORMANCE() function.
You can use the measurements returned from the MEASURE_LOCATION_PERFORMANCE function as input values to the SET_LOCATION_PERFORMANCE() function.
Note
You must set the throughput and latency parameters of this function to 1 or more.
The following example shows how to set the performance of a storage location on v_vmartdb_node0004, using values for this location returned from the MEASURE_LOCATION_PERFORMANCE function. Set the throughput to 122 MB/second and the latency to 140 seeks/second. MEASURE_LOCATION_PERFORMANCE
=> SELECT SET_LOCATION_PERFORMANCE('/secondVerticaStorageLocation/','node2','122','140');
After you set performance-data parameters, Vertica automatically uses performance data to rank storage locations whenever it stores projection columns.
Vertica stores columns included in the projection sort order on the fastest available storage locations. Columns not included in the projection sort order are stored on slower disks. Columns for each projection are ranked as follows:
-
Columns in the sort order are given the highest priority (numbers > 1000).
-
The last column in the sort order is given the rank number 1001.
-
The next-to-last column in the sort order is given the rank number 1002, and so on until the first column in the sort order is given 1000 + # of sort columns.
-
The remaining columns are given numbers from 1000–1, starting with 1000 and decrementing by one per column.
Vertica then stores columns on disk from the highest ranking to the lowest ranking. It places highest-ranking columns on the fastest disks and the lowest-ranking columns on the slowest disks.
You initially measure location performance and set it in the Vertica database. Then, you can use the performance results to determine the fastest storage to use in your storage policies.
-
Set the locations with the highest performance as the default locations for critical data.
-
Use slower locations as default locations for older, or less-important data. Such slower locations may not require policies at all, if you do not want to specify default locations.
Vertica determines data storage as follows, depending on whether a storage policy exists:
|
Storage policy |
Label |
# Locations |
Vertica action |
|
No |
No |
Multiple |
Uses ranking (as described), choosing a location from all locations that exist. |
|
Yes |
Yes |
Single |
Uses that storage location exclusively. |
|
Yes |
Yes |
Multiple |
Ranks storage (as described) among all same-name labeled locations. |
12 - Retiring storage locations
You can retire a storage location to stop using it.
You can retire a storage location to stop using it. Retiring a storage location prevents Vertica from storing data or temp files to it, but does not remove the actual location. Any data previously stored on the retired location is eventually merged out by the Tuple Mover. Use the RETIRE_LOCATION function to retire a location.
The following example retires a location from a single node:
=> SELECT RETIRE_LOCATION('/secondStorageLocation/' , 'v_vmartdb_node0004');
To retire a storage location on all nodes, use an empty string ('') for the second argument. If the location is SHARED, you can retire it only on all nodes.
You can expedite retiring and then dropping a storage location by passing an optional third argument, enforce, as true. With this directive, the function moves the data out of the storage location instead of waiting for the Tuple Mover, allowing you to drop the location immediately.
You can also use the ENFORCE_OBJECT_STORAGE_POLICY function to trigger the move for all storage locations at once, which allows you to drop the locations. This approach is equivalent to using the enforce argument.
The following example shows how to retire a storage location on all nodes so that it can be immediately dropped:
=> SELECT RETIRE_LOCATION('/secondStorageLocation/' , '', true);
Note
If the location used in a storage policy is the last available storage for its associated objects, you cannot retire it unless you set enforce to true.
Data and temp files can be stored in one, or multiple separate, storage locations.
For further information on dropping a location after retiring it, see Dropping storage locations.
13 - Restoring retired storage locations
You can restore a previously retired storage location.
You can restore a previously retired storage location. After the location is restored, Vertica re-ranks the storage location and uses the restored location to process queries as determined by its rank.
Use the RESTORE_LOCATION function to restore a retired storage location.
The following example shows how to restore a retired storage location on a single node:
=> SELECT RESTORE_LOCATION('/secondStorageLocation/' , 'v_vmartdb_node0004');
To restore a storage location on all nodes, use an empty string ('') for the second argument. The following example demonstrates creating, retiring, and restoring a location on all nodes:
=> CREATE LOCATION '/tmp/ab1' ALL NODES USAGE 'TEMP';
CREATE LOCATION

=> SELECT RETIRE_LOCATION('/tmp/ab1', '');
retire_location
------------------------
/tmp/ab1 retired.
    (1 row)

=> SELECT location_id, node_name, location_path, location_usage, is_retired
          FROM STORAGE_LOCATIONS WHERE location_path ILIKE '/tmp/ab1';
location_id       | node_name           | location_path | location_usage | is_retired
------------------+---------------------+---------------+----------------+------------
45035996273736724 | v_vmart_node0001    | /tmp/ab1      | TEMP           | t
45035996273736726 | v_vmart_node0002    | /tmp/ab1      | TEMP           | t
45035996273736728 | v_vmart_node0003    | /tmp/ab1      | TEMP           | t
45035996273736730 | v_vmart_node0004    | /tmp/ab1      | TEMP           | t
    (4 rows)

=> SELECT RESTORE_LOCATION('/tmp/ab1', '');
restore_location
-------------------------
/tmp/ab1 restored.
    (1 row)

=> SELECT location_id, node_name, location_path, location_usage, is_retired
          FROM STORAGE_LOCATIONS WHERE location_path ILIKE '/tmp/ab1';
location_id       | node_name           | location_path | location_usage | is_retired
------------------+---------------------+---------------+----------------+------------
45035996273736724 | v_vmart_node0001    | /tmp/ab1      | TEMP           | f
45035996273736726 | v_vmart_node0002    | /tmp/ab1      | TEMP           | f
45035996273736728 | v_vmart_node0003    | /tmp/ab1      | TEMP           | f
45035996273736730 | v_vmart_node0004    | /tmp/ab1      | TEMP           | f
    (4 rows)
RESTORE_LOCATION restores the location only on the nodes where the location exists and is retired. The meta-function does not propagate the storage location to nodes where that location did not previously exist.
Restoring on all nodes fails if the location has been dropped on any of them. If you have dropped the location on some nodes, you have two options:
-
If you no longer want to use the node where the location was dropped, restore the location individually on each of the other nodes.
-
Alternatively, you can re-create the location on the node where you dropped it. To do so, use CREATE LOCATION. After you re-create the location, you can then restore it on all nodes.
The following example demonstrates the failure if you try to restore on nodes where you have dropped the location:
=> SELECT RETIRE_LOCATION('/tmp/ab1', '');
retire_location
------------------------
/tmp/ab1 retired.
    (1 row)

=> SELECT DROP_LOCATION('/tmp/ab1', 'v_vmart_node0002');
drop_location
------------------------
/tmp/ab1 dropped.
    (1 row)

==> SELECT location_id, node_name, location_path, location_usage, is_retired
          FROM STORAGE_LOCATIONS WHERE location_path ILIKE '/tmp/ab1';
location_id       | node_name           | location_path | location_usage | is_retired
------------------+---------------------+---------------+----------------+------------
45035996273736724 | v_vmart_node0001    | /tmp/ab1      | TEMP           | t
45035996273736728 | v_vmart_node0003    | /tmp/ab1      | TEMP           | t
45035996273736730 | v_vmart_node0004    | /tmp/ab1      | TEMP           | t
    (3 rows)

=> SELECT RESTORE_LOCATION('/tmp/ab1', '');
ERROR 2081:  [/tmp/ab1] is not a valid storage location on node v_vmart_node0002
14 - Dropping storage locations
To drop a storage location, use the DROP_LOCATION function.
To drop a storage location, use the DROP_LOCATION function. You cannot drop locations with DATA usage, only TEMP or USER usage. (See Altering Storage Locations Before Dropping Them.)
Because dropping a storage location cannot be undone, Vertica recommends that you first retire a storage location (see Retiring storage locations). Retiring a storage location before dropping it lets you verify that there will be no adverse effects on any data access. If you decide not to drop it, you can restore it (see Restoring retired storage locations).
The following example shows how to drop a storage location on a single node:
=> SELECT DROP_LOCATION('/secondStorageLocation/' , 'v_vmartdb_node0002');
When you drop a storage location, the operation cascades to associated objects including any granted privileges to the storage.
Caution
Dropping a storage location is a permanent operation and cannot be undone. Subsequent queries on storage used for external table access fail with a COPY COMMAND FAILED message.
Altering storage locations before dropping them
You can drop only storage locations containing temp files. Thus, you must alter a storage location to the TEMP usage type before you can drop it. However, if data files still exist in the storage location, Vertica prevents you from dropping it. Deleting data files does not clear the storage location and can result in database corruption. To handle a storage area containing data files so that you can drop it, use one of these options:
-
Manually merge out the data files.
-
Wait for the Tuple Mover to merge out the data files automatically.
-
Retire the location, and force changes to take effect immediately.
-
Manually drop partitions.
Dropping HDFS storage locations
After dropping a storage location on HDFS, clean up residual files and snapshots on HDFS as explained in Removing HDFS storage locations.
Dropping USER storage locations
Storage locations that you create with the USER usage type can contain only data files, not temp files. However, you can drop a USER location, regardless of any remaining data files. This behavior differs from that of a storage location not designated for USER access.
Checking location properties
You can check the properties of a storage location, such as whether it is a USER location or is being used only for TEMP files, in the STORAGE_LOCATIONS system table. You can also use this table to verify that a location has been retired.