This is the multi-page printable view of this section.
Click here to print.
Return to the regular view of this page.
Configuration procedure
This section describes the tasks required to set up a Vertica database.
This section describes the tasks required to set up a Vertica database. It assumes that you have a valid license key file, installed the Vertica rpm package, and ran the installation script as described.
You complete the configuration procedure using:
Note
You can also perform certain tasks using
Management Console. Those tasks point to the appropriate topic.
Continuing configuring
Follow the configuration procedure sequentially as this section describes.
Vertica strongly recommends that you first experiment with creating and configuring a database.
You can use this generic configuration procedure several times during the development process, modifying it to fit your changing goals. You can omit steps such as preparing actual data files and sample queries, and run the Database Designer without optimizing for queries. For example, you can create, load, and query a database several times for development and testing purposes, then one final time to create and load the production database.
1 - Prepare disk storage locations
You must create and specify directories in which to store your catalog and data files ().
You must create and specify directories in which to store your catalog and data files (physical schema). You can specify these locations when you install or configure the database, or later during database operations. Both the catalog and data directories must be owned by the database superuser.
The directory you specify for database catalog files (the catalog path) is used across all nodes in the cluster. For example, if you specify /home/catalog as the catalog directory, Vertica uses that catalog path on all nodes. The catalog directory should always be separate from any data file directories.
Note
Do not use a shared directory for more than one node. Data and catalog directories must be distinct for each node. Multiple nodes must not be allowed to write to the same data or catalog directory.
The data path you designate is also used across all nodes in the cluster. Specifying that data should be stored in /home/data, Vertica uses this path on all database nodes.
Do not use a single directory to contain both catalog and data files. You can store the catalog and data directories on different drives, which can be either on drives local to the host (recommended for the catalog directory) or on a shared storage location, such as an external disk enclosure or a SAN.
Before you specify a catalog or data path, be sure the parent directory exists on all nodes of your database. Creating a database in admintools also creates the catalog and data directories, but the parent directory must exist on each node.
You do not need to specify a disk storage location during installation. However, you can do so by using the --data-dir parameter to the install_vertica script. See Specifying disk storage location during installation.
1.1 - Specifying disk storage location during database creation
When you invoke the Create Database command in the , a dialog box allows you to specify the catalog and data locations.
When you invoke the Create Database command in the Administration tools, a dialog box allows you to specify the catalog and data locations. These locations must exist on each host in the cluster and must be owned by the database administrator.
When you click OK, Vertica automatically creates the following subdirectories:
catalog-pathname/database-name/node-name_catalog/data-pathname/database-name/node-name_data/
For example, if you use the default value (the database administrator's home directory) of
/home/dbadmin for the Stock Exchange example database, the catalog and data directories are created on each node in the cluster as follows:
/home/dbadmin/Stock_Schema/stock_schema_node1_host01_catalog/home/dbadmin/Stock_Schema/stock_schema_node1_host01_data
Notes
-
Catalog and data path names must contain only alphanumeric characters and cannot have leading space characters. Failure to comply with these restrictions will result in database creation failure.
-
Vertica refuses to overwrite a directory if it appears to be in use by another database. Therefore, if you created a database for evaluation purposes, dropped the database, and want to reuse the database name, make sure that the disk storage location previously used has been completely cleaned up. See Managing storage locations for details.
1.2 - Specifying disk storage location on MC
You can use the MC interface to specify where you want to store database metadata on the cluster in the following ways:.
You can use the MC interface to specify where you want to store database metadata on the cluster in the following ways:
See also
Configuring Management Console.
1.3 - Configuring disk usage to optimize performance
Once you have created your initial storage location, you can add additional storage locations to the database later.
Once you have created your initial storage location, you can add additional storage locations to the database later. Not only does this provide additional space, it lets you control disk usage and increase I/O performance by isolating files that have different I/O or access patterns. For example, consider:
-
Isolating execution engine temporary files from data files by creating a separate storage location for temp space.
-
Creating labeled storage locations and storage policies, in which selected database objects are stored on different storage locations based on measured performance statistics or predicted access patterns.
See also
Managing storage locations
1.4 - Using shared storage with Vertica
If using shared SAN storage, ensure there is no contention among the nodes for disk space or bandwidth.
If using shared SAN storage, ensure there is no contention among the nodes for disk space or bandwidth.
-
Each host must have its own catalog and data locations. Hosts cannot share catalog or data locations.
-
Configure the storage so that there is enough I/O bandwidth for each node to access the storage independently.
1.5 - Viewing database storage information
You can view node-specific information on your Vertica cluster through the.
You can view node-specific information on your Vertica cluster through the Management Console. See Monitoring Vertica Using Management Console for details.
1.6 - Anti-virus scanning exclusions
You should exclude the Vertica catalog and data directories from anti-virus scanning.
You should exclude the Vertica catalog and data directories from anti-virus scanning. Certain anti-virus products have been identified as targeting Vertica directories, and sometimes lock or delete files in them. This can adversely affect Vertica performance and data integrity.
Identified anti-virus products include the following:
-
ClamAV
-
SentinelOne
-
Sophos
-
Symantec
-
Twistlock
Important
This list is not comprehensive.
2 - Disk space requirements for Vertica
In addition to actual data stored in the database, Vertica requires disk space for several data reorganization operations, such as and managing nodes in the cluster.
In addition to actual data stored in the database, Vertica requires disk space for several data reorganization operations, such as mergeout and managing nodes in the cluster. For best results, Vertica recommends that disk utilization per node be no more than sixty percent (60%) for a K-Safe=1 database to allow such operations to proceed.
In addition, disk space is temporarily required by certain query execution operators, such as hash joins and sorts, in the case when they cannot be completed in memory (RAM). Such operators might be encountered during queries, recovery, refreshing projections, and so on. The amount of disk space needed (known as temp space) depends on the nature of the queries, amount of data on the node and number of concurrent users on the system. By default, any unused disk space on the data disk can be used as temp space. However, Vertica recommends provisioning temp space separate from data disk space.
See also
Configuring disk usage to optimize performance.
3 - Disk space requirements for Management Console
You can install Management Console on any node in the cluster, so it has no special disk requirements other than disk space you allocate for your database cluster.
You can install Management Console on any node in the cluster, so it has no special disk requirements other than disk space you allocate for your database cluster.
4 - Prepare the logical schema script
Designing a logical schema for a Vertica database is no different from designing one for any other SQL database.
Designing a logical schema for a Vertica database is no different from designing one for any other SQL database. Details are described more fully in Designing a logical schema.
To create your logical schema, prepare a SQL script (plain text file, typically with an extension of .sql) that:
-
Creates additional schemas (as necessary). See Using multiple schemas.
-
Creates the tables and column constraints in your database using the CREATE TABLE command.
-
Defines the necessary table constraints using the ALTER TABLE command.
-
Defines any views on the table using the CREATE VIEW command.
You can generate a script file using:
-
A schema designer application.
-
A schema extracted from an existing database.
-
A text editor.
-
One of the example database example-name_define_schema.sql scripts as a template. (See the example database directories in
/opt/vertica/examples.)
In your script file, make sure that:
-
Each statement ends with a semicolon.
-
You use data types supported by Vertica, as described in the SQL Reference Manual.
Once you have created a database, you can test your schema script by executing it as described in Create the logical schema. If you encounter errors, drop all tables, correct the errors, and run the script again.
5 - Prepare data files
Prepare two sets of data files:.
Prepare two sets of data files:
-
Test data files. Use test files to test the database after the partial data load. If possible, use part of the actual data files to prepare the test data files.
-
Actual data files. Once the database has been tested and optimized, use your data files for your initial Data load.
How to name data files
Name each data file to match the corresponding table in the logical schema. Case does not matter.
Use the extension .tbl or whatever you prefer. For example, if a table is named Stock_Dimension, name the corresponding data file stock_dimension.tbl. When using multiple data files, append _nnn (where nnn is a positive integer in the range 001 to 999) to the file name. For example, stock_dimension.tbl_001, stock_dimension.tbl_002, and so on.
6 - Prepare load scripts
You can postpone this step if your goal is to test a logical schema design for validity.
Note
You can postpone this step if your goal is to test a logical schema design for validity.
Prepare SQL scripts to load data directly into physical storage using COPY on vsql, or through ODBC.
You need scripts that load:
-
Large tables
-
Small tables
Vertica recommends that you load large tables using multiple files. To test the load process, use files of 10GB to 50GB in size. This size provides several advantages:
-
You can use one of the data files as a sample data file for the Database Designer.
-
You can load just enough data to Perform a partial data load before you load the remainder.
-
If a single load fails and rolls back, you do not lose an excessive amount of time.
-
Once the load process is tested, for multi-terabyte tables, break up the full load in file sizes of 250–500GB.
See also
Tip
You can use the load scripts included in the example databases as templates.
7 - Create an optional sample query script
The purpose of a sample query script is to test your schema and load scripts for errors.
The purpose of a sample query script is to test your schema and load scripts for errors.
Include a sample of queries your users are likely to run against the database. If you don't have any real queries, just write simple SQL that collects counts on each of your tables. Alternatively, you can skip this step.
8 - Create an empty database
Two options are available for creating an empty database:.
Two options are available for creating an empty database:
Although you can create more than one database (for example, one for production and one for testing), there can be only one active database for each installation of Vertica Analytic Database.
8.1 - Creating a database name and password
Database names must conform to the following rules:.
Database names
Database names must conform to the following rules:
-
Be between 1-30 characters
-
Begin with a letter
-
Follow with any combination of letters (upper and lowercase), numbers, and/or underscores.
Database names are case sensitive; however, Vertica strongly recommends that you do not create databases with names that differ only in case. For example, do not create a database called mydatabase and another called MyDataBase.
Database passwords
Database passwords can contain letters, digits, and special characters listed in the next table. Passwords cannot include non-ASCII Unicode characters.
The allowed password length is between 0-100 characters. The database superuser can change a Vertica user's maximum password length using ALTER PROFILE.
You use Profiles to specify and control password definitions. For instance, a profile can define the maximum length, reuse time, and the minimum number or required digits for a password, as well as other details.
The following special (ASCII) characters are valid in passwords. Special characters can appear anywhere in a password string. For example, mypas$word or $mypassword are both valid, while ±mypassword is not. Using special characters other than the ones listed below can cause database instability.
-
#
-
?
-
=
-
_
-
'
-
)
-
(
-
@
-
\
-
/
-
!
-
,
-
~
-
:
-
%
-
;
-
`
-
^
-
+
-
.
-
-
-
space
-
&
-
<
-
>
-
[
-
]
-
{
-
}
-
|
-
*
-
$
-
"
See also
8.2 - Create a database using administration tools
Run the from your as follows:.
-
Run the Administration tools from your Administration host as follows:
$ /opt/vertica/bin/admintools
If you are using a remote terminal application, such as PuTTY or a Cygwin bash shell, see Notes for remote terminal users.
-
Accept the license agreement and specify the location of your license file. For more information see Managing licenses for more information.
This step is necessary only if it is the first time you have run the Administration Tools
-
On the Main Menu, click Configuration Menu, and click OK.
-
On the Configuration Menu, click Create Database, and click OK.
-
Enter the name of the database and an optional comment, and click OK. See Creating a database name and password for naming guidelines and restrictions.
-
Establish the superuser password for your database.
-
To provide a password enter the password and click OK. Confirm the password by entering it again, and then click OK.
-
If you don't want to provide the password, leave it blank and click OK. If you don't set a password, Vertica prompts you to verify that you truly do not want to establish a superuser password for this database. Click Yes to create the database without a password or No to establish the password.
Caution
If you do not enter a password at this point, the superuser password is set to empty. Unless the database is for evaluation or academic purposes, Vertica strongly recommends that you enter a superuser password. See
Creating a database name and password for guidelines.
-
Select the hosts to include in the database from the list of hosts specified when Vertica was installed (
install_vertica -s), and click OK.
-
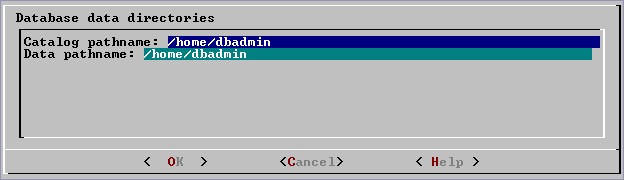
Specify the directories in which to store the data and catalog files, and click OK.
Note
Do not use a shared directory for more than one node. Data and catalog directories must be distinct for each node. Multiple nodes must not be allowed to write to the same data or catalog directory.
-
Catalog and data path names must contain only alphanumeric characters and cannot have leading spaces. Failure to comply with these restrictions results in database creation failure.
For example:
Catalog pathname: /home/dbadmin
Data Pathname: /home/dbadmin
-
Review the Current Database Definition screen to verify that it represents the database you want to create, and then click Yes to proceed or No to modify the database definition.
-
If you click Yes, Vertica creates the database you defined and then displays a message to indicate that the database was successfully created.
Note
For databases created with 3 or more nodes, Vertica automatically sets
K-safety to 1 to ensure that the database is fault tolerant in case a node fails. For more information, see
Failure recovery in the Administrator's Guide and
MARK_DESIGN_KSAFE.
-
Click OK to acknowledge the message.
9 - Create the logical schema
Connect to the database.
-
Connect to the database.
In the Administration Tools Main Menu, click Connect to Database and click OK.
See Connecting to the Database for details.
The vsql welcome script appears:
Welcome to vsql, the Vertica Analytic Database interactive terminal.
Type:  \h or \? for help with vsql commands
       \g or terminate with semicolon to execute query
       \q to quit

=>
-
Run the logical schema script
Using the \i meta-command in vsql to run the SQL logical schema script that you prepared earlier.
-
Disconnect from the database
Use the \q meta-command in vsql to return to the Administration Tools.
10 - Perform a partial data load
Vertica recommends that for large tables, you perform a partial data load and then test your database before completing a full data load.
Vertica recommends that for large tables, you perform a partial data load and then test your database before completing a full data load. This load should load a representative amount of data.
-
Load the small tables.
Load the small table data files using the SQL load scripts and data files you prepared earlier.
-
Partially load the large tables.
Load 10GB to 50GB of table data for each table using the SQL load scripts and data files that you prepared earlier.
For more information about projections, see Projections.
11 - Test the database
Test the database to verify that it is running as expected.
Test the database to verify that it is running as expected.
Check queries for syntax errors and execution times.
-
Use the vsql \timing meta-command to enable the display of query execution time in milliseconds.
-
Execute the SQL sample query script that you prepared earlier.
-
Execute several ad hoc queries.
12 - Optimize query performance
Optimizing the database consists of optimizing for compression and tuning for queries.
Optimizing the database consists of optimizing for compression and tuning for queries. (See Creating a database design.)
To optimize the database, use the Database Designer to create and deploy a design for optimizing the database. See Using Database Designer to create a comprehensive design.
After you run the Database Designer, use the techniques described in Query optimization to improve the performance of certain types of queries.
Note
The database response time depends on factors such as type and size of the application query, database design, data size and data types stored, available computational power, and network bandwidth. Adding nodes to a database cluster does not necessarily improve the system response time for every query, especially if the response time is already short, e.g., less then 10 seconds, or the response time is not hardware bound.
13 - Complete the data load
To complete the load:.
To complete the load:
-
Monitor system resource usage.
Continue to run the top, free, and df utilities and watch them while your load scripts are running (as described in Monitoring Linux resource usage). You can do this on any or all nodes in the cluster. Make sure that the system is not swapping excessively (watch kswapd in top) or running out of swap space (watch for a large amount of used swap space in free).
Note
Vertica requires a dedicated server. If your loader or other processes take up significant amounts of RAM, it can result in swapping.
-
Complete the large table loads.
Run the remainder of the large table load scripts.
14 - Test the optimized database
Check query execution times to test your optimized design:.
Check query execution times to test your optimized design:
-
Use the vsql \timing meta-command to enable the display of query execution time in milliseconds.
Execute a SQL sample query script to test your schema and load scripts for errors.
Note
Include a sample of queries your users are likely to run against the database. If you don't have any real queries, just write simple SQL that collects counts on each of your tables. Alternatively, you can skip this step.
-
Execute several ad hoc queries
-
Run Administration tools and select Connect to Database.
-
Use the \i meta-command to execute the query script; for example:
vmartdb=> \i vmart_query_03.sql  customer_name   | annual_income
------------------+---------------
 James M. McNulty |        999979
 Emily G. Vogel   |        999998
(2 rows)
Time: First fetch (2 rows): 58.411 ms. All rows formatted: 58.448 ms
vmartdb=> \i vmart_query_06.sql
 store_key | order_number | date_ordered
-----------+--------------+--------------
        45 |       202416 | 2004-01-04
       113 |        66017 | 2004-01-04
       121 |       251417 | 2004-01-04
        24 |       250295 | 2004-01-04
         9 |       188567 | 2004-01-04
       166 |        36008 | 2004-01-04
        27 |       150241 | 2004-01-04
       148 |       182207 | 2004-01-04
       198 |        75716 | 2004-01-04
(9 rows)
Time: First fetch (9 rows): 25.342 ms. All rows formatted: 25.383 ms
Once the database is optimized, it should run queries efficiently. If you discover queries that you want to optimize, you can modify and update the design incrementally.
15 - Implement locales for international data sets
Vertica uses the ICU library for locale support; you must specify locale using the ICU locale syntax.
Locale specifies the user's language, country, and any special variant preferences, such as collation. Vertica uses locale to determine the behavior of certain string functions. Locale also determines the collation for various SQL commands that require ordering and comparison, such as aggregate GROUP BY and ORDER BY clauses, joins, and the analytic ORDER BY clause.
The default locale for a Vertica database is en_US@collation=binary (English US). You can define a new default locale that is used for all sessions on the database. You can also override the locale for individual sessions. However, projections are always collated using the default en_US@collation=binary collation, regardless of the session collation. Any locale-specific collation is applied at query time.
If you set the locale to null, Vertica sets the locale to en_US_POSIX. You can set the locale back to the default locale and collation by issuing the vsql meta-command \locale. For example:
Note
=> set locale to '';
INFO 2567:  Canonical locale: 'en_US_POSIX'
Standard collation: 'LEN'
English (United States, Computer)
SET
=> \locale en_US@collation=binary;
INFO 2567:  Canonical locale: 'en_US'
Standard collation: 'LEN_KBINARY'
English (United States)
=>  \locale
en_US@collation-binary;
You can set locale through ODBC, JDBC, and ADO.net.
ICU locale support
Vertica uses the ICU library for locale support; you must specify locale using the ICU locale syntax. The locale used by the database session is not derived from the operating system (through the LANG variable), so Vertica recommends that you set the LANG for each node running vsql, as described in the next section.
While ICU library services can specify collation, currency, and calendar preferences, Vertica supports only the collation component. Any keywords not relating to collation are rejected. Projections are always collated using the en_US@collation=binary collation regardless of the session collation. Any locale-specific collation is applied at query time.
The SET DATESTYLE TO ... command provides some aspects of the calendar, but Vertica supports only dollars as currency.
Changing DB locale for a session
This examples sets the session locale to Thai.
-
At the operating-system level for each node running vsql, set the LANG variable to the locale language as follows:
export LANG=th_TH.UTF-8
Note
If setting the LANG= as shown does not work, the operating system support for locales may not be installed.
-
For each Vertica session (from ODBC/JDBC or vsql) set the language locale.
From vsql:
\locale th_TH
-
From ODBC/JDBC:
"SET LOCALE TO th_TH;"
-
In PUTTY (or ssh terminal), change the settings as follows:
settings > window > translation > UTF-8
-
Click Apply and then click Save.
All data loaded must be in UTF-8 format, not an ISO format, as described in Delimited data. Character sets like ISO 8859-1 (Latin1), which are incompatible with UTF-8, are not supported, so functions like SUBSTRING do not work correctly for multibyte characters. Thus, settings for locale should not work correctly. If the translation setting ISO-8859-11:2001 (Latin/Thai) works, the data is loaded incorrectly. To convert data correctly, use a utility program such as Linux
iconv.
Note
The maximum length parameter for VARCHAR and CHAR data type refers to the number of octets (bytes) that can be stored in that field, not the number of characters. When using multi-byte UTF-8 characters, make sure to size fields to accommodate from 1 to 4 bytes per character, depending on the data.
See also
15.1 - Specify the default locale for the database
After you start the database, the default locale configuration parameter, DefaultSessionLocale, sets the initial locale.
After you start the database, the default locale configuration parameter, DefaultSessionLocale, sets the initial locale. You can override this value for individual sessions.
To set the locale for the database, use the configuration parameter as follows:
=> ALTER DATABASE DEFAULT SET DefaultSessionLocale = 'ICU-locale-identifier';
For example:
=> ALTER DATABASE DEFAULT SET DefaultSessionLocale = 'en_GB';
15.2 - Override the default locale for a session
You can override the default locale for the current session in two ways:.
You can override the default locale for the current session in two ways:
-
VSQL command
\locale. For example:
=> \locale en_GBINFO:
INFO 2567:  Canonical locale: 'en_GB'
Standard collation: 'LEN'
English (United Kingdom)
-
SQL statement
SET LOCALE. For example:
=> SET LOCALE TO en_GB;
INFO 2567:  Canonical locale: 'en_GB'
Standard collation: 'LEN'
English (United Kingdom)
Both methods accept locale short and long forms. For example:
=> SET LOCALE TO LEN;
INFO 2567:  Canonical locale: 'en'
Standard collation: 'LEN'
English
=> \locale LEN
INFO 2567:  Canonical locale: 'en'
Standard collation: 'LEN'
English
See also
15.3 - Server versus client locale settings
Vertica differentiates database server locale settings from client application locale settings:.
Vertica differentiates database server locale settings from client application locale settings:
The following sections describe best practices to ensure predictable results.
Server locale
The server session locale should be set as described in Specify the default locale for the database. If locales vary across different sessions, set the server locale at the start of each session from your client.
vsql client
-
If the database does not have a default session locale, set the server locale for the session to the desired locale.
-
The locale setting in the terminal emulator where the vsql client runs should be set to be equivalent to session locale setting on the server side (ICU locale). By doing so, the data is collated correctly on the server and displayed correctly on the client.
-
All input data for vsql should be in UTF-8, and all output data is encoded in UTF-8
-
Vertica does not support non UTF-8 encodings and associated locale values; .
-
For instructions on setting locale and encoding, refer to your terminal emulator documentation.
ODBC clients
-
ODBC applications can be either in ANSI or Unicode mode. If the user application is Unicode, the encoding used by ODBC is UCS-2. If the user application is ANSI, the data must be in single-byte ASCII, which is compatible with UTF-8 used on the database server. The ODBC driver converts UCS-2 to UTF-8 when passing to the Vertica server and converts data sent by the Vertica server from UTF-8 to UCS-2.
-
If the user application is not already in UCS-2, the application must convert the input data to UCS-2, or unexpected results could occur. For example:
-
For non-UCS-2 data passed to ODBC APIs, when it is interpreted as UCS-2, it could result in an invalid UCS-2 symbol being passed to the APIs, resulting in errors.
-
The symbol provided in the alternate encoding could be a valid UCS-2 symbol. If this occurs, incorrect data is inserted into the database.
-
If the database does not have a default session locale, ODBC applications should set the desired server session locale using SQLSetConnectAttr (if different from database wide setting). By doing so, you get the expected collation and string functions behavior on the server.
JDBC and ADO.NET clients
-
JDBC and ADO.NET applications use a UTF-16 character set encoding and are responsible for converting any non-UTF-16 encoded data to UTF-16. The same cautions apply as for ODBC if this encoding is violated.
-
The JDBC and ADO.NET drivers convert UTF-16 data to UTF-8 when passing to the Vertica server and convert data sent by Vertica server from UTF-8 to UTF-16.
-
If there is no default session locale at the database level, JDBC and ADO.NET applications should set the correct server session locale by executing the SET LOCALE TO command in order to get the expected collation and string functions behavior on the server. For more information, see SET LOCALE.
16 - Using time zones with Vertica
Vertica uses the public-domain tz database (time zone database), which contains code and data that represent the history of local time for locations around the globe.
Vertica uses the public-domain tz database (time zone database), which contains code and data that represent the history of local time for locations around the globe. This database organizes time zone and daylight saving time data by partitioning the world into timezones whose clocks all agree on timestamps that are later than the POSIX Epoch (1970-01-01 00:00:00 UTC). Each timezone has a unique identifier. Identifiers typically follow the convention area/location, where area is a continent or ocean, and location is a specific location within the area—for example, Africa/Cairo, America/New_York, and Pacific/Honolulu.
Important
IANA acknowledge that 1970 is an arbitrary cutoff. They note the problems that face moving the cutoff earlier "due to the wide variety of local practices before computer timekeeping became prevalent." IANA's own description of the tz database suggests that users should regard historical dates and times, especially those that predate the POSIX epoch date, with a healthy measure of skepticism. For details, see
Theory and pragmatics of the tz code and data.
Vertica uses the TZ environment variable (if set) on each node for the default current time zone. Otherwise, Vertica uses the operating system time zone.
The TZ variable can be set by the operating system during login (see /etc/profile, /etc/profile.d, or /etc/bashrc) or by the user in .profile, .bashrc or .bash-profile. TZ must be set to the same value on each node when you start Vertica.
The following command returns the current time zone for your database:
=> SHOW TIMEZONE;
   name   |     setting
----------+------------------
 timezone | America/New_York
(1 row)
You can also set the time zone for a single session with SET TIME ZONE.
Conversion and storage of date/time data
There is no database default time zone. TIMESTAMPTZ (TIMESTAMP WITH TIMEZONE) data is converted from the current local time and stored as GMT/UTC (Greenwich Mean Time/Coordinated Universal Time).
When TIMESTAMPTZ data is used, data is converted back to the current local time zone, which might be different from the local time zone where the data was stored. This conversion takes into account daylight saving time (summer time), depending on the year and date to determine when daylight saving time begins and ends.
TIMESTAMP WITHOUT TIMEZONE data stores the timestamp as given, and retrieves it exactly as given. The current time zone is ignored. The same is true for TIME WITHOUT TIMEZONE. For TIME WITH TIMEZONE (TIMETZ), however, the current time zone setting is stored along with the given time, and that time zone is used on retrieval.
Note
Vertica recommends that you use TIMESTAMPTZ, not TIMETZ.
Querying data/time data
TIMESTAMPTZ uses the current time zone on both input and output, as in the following example:
=> CREATE TEMP TABLE s (tstz TIMESTAMPTZ);=> SET TIMEZONE TO 'America/New_York';
=> INSERT INTO s VALUES ('2009-02-01 00:00:00');
=> INSERT INTO s VALUES ('2009-05-12 12:00:00');
=> SELECT tstz AS 'Local timezone', tstz AT TIMEZONE 'America/New_York' AS 'America/New_York',
   tstz AT TIMEZONE 'GMT' AS 'GMT' FROM s;
     Local timezone     |  America/New_York   |         GMT
------------------------+---------------------+---------------------
 2009-02-01 00:00:00-05 | 2009-02-01 00:00:00 | 2009-02-01 05:00:00
 2009-05-12 12:00:00-04 | 2009-05-12 12:00:00 | 2009-05-12 16:00:00
(2 rows)
The -05 in the Local time zone column shows that the data is displayed in EST, while -04 indicates EDT. The other two columns show the TIMESTAMP WITHOUT TIMEZONE at the specified time zone.
The next example shows what happens if the current time zone is changed to GMT:
=> SET TIMEZONE TO 'GMT';=> SELECT tstz AS 'Local timezone', tstz AT TIMEZONE 'America/New_York' AS
   'America/New_York', tstz AT TIMEZONE 'GMT' as 'GMT' FROM s;
     Local timezone     |  America/New_York   |         GMT
------------------------+---------------------+---------------------
 2009-02-01 05:00:00+00 | 2009-02-01 00:00:00 | 2009-02-01 05:00:00
 2009-05-12 16:00:00+00 | 2009-05-12 12:00:00 | 2009-05-12 16:00:00
(2 rows)
The +00 in the Local time zone column indicates that TIMESTAMPTZ is displayed in GMT.
The approach of using TIMESTAMPTZ fields to record events captures the GMT of the event, as expressed in terms of the local time zone. Later, it allows for easy conversion to any other time zone, either by setting the local time zone or by specifying an explicit AT TIMEZONE clause.
The following example shows how TIMESTAMP WITHOUT TIMEZONE fields work in Vertica.
=> CREATE TEMP TABLE tnoz (ts TIMESTAMP);=> INSERT INTO tnoz VALUES('2009-02-01 00:00:00');
=> INSERT INTO tnoz VALUES('2009-05-12 12:00:00');
=> SET TIMEZONE TO 'GMT';
=> SELECT ts AS 'No timezone', ts AT TIMEZONE 'America/New_York' AS
   'America/New_York', ts AT TIMEZONE 'GMT' AS 'GMT' FROM tnoz;
      No timezone    |    America/New_York    |          GMT
---------------------+------------------------+------------------------
 2009-02-01 00:00:00 | 2009-02-01 05:00:00+00 | 2009-02-01 00:00:00+00
 2009-05-12 12:00:00 | 2009-05-12 16:00:00+00 | 2009-05-12 12:00:00+00
(2 rows)
The +00 at the end of a timestamp indicates that the setting is TIMESTAMP WITH TIMEZONE in GMT (the current time zone). The America/New_York column shows what the GMT setting was when you recorded the time, assuming you read a normal clock in the America/New_York time zone. What this shows is that if it is midnight in the America/New_York time zone, then it is 5 am GMT.
Note
00:00:00 Sunday February 1, 2009 in America/New_York converts to 05:00:00 Sunday February 1, 2009 in GMT.
The GMT column displays the GMT time, assuming the input data was captured in GMT.
If you don't set the time zone to GMT, and you use another time zone, for example America/New_York, then the results display in America/New_York with a -05 and -04, showing the difference between that time zone and GMT.
=> SET TIMEZONE TO 'America/New_York';
=> SHOW TIMEZONE;
    name   |     setting
 ----------+------------------
  timezone | America/New_York
 (1 row)
=> SELECT ts AS 'No timezone', ts AT TIMEZONE 'America/New_York' AS
   'America/New_York', ts AT TIMEZONE 'GMT' AS 'GMT' FROM tnoz;
      No timezone    |    America/New_York    |          GMT
---------------------+------------------------+------------------------
 2009-02-01 00:00:00 | 2009-02-01 00:00:00-05 | 2009-01-31 19:00:00-05
 2009-05-12 12:00:00 | 2009-05-12 12:00:00-04 | 2009-05-12 08:00:00-04
(2 rows)
In this case, the last column is interesting in that it returns the time in New York, given that the data was captured in GMT.
See also
17 - Change transaction isolation levels
By default, Vertica uses the READ COMMITTED isolation level for all sessions.
By default, Vertica uses the READ COMMITTED isolation level for all sessions. You can change the default isolation level for the database or for a given session.
A transaction retains its isolation level until it completes, even if the session's isolation level changes during the transaction. Vertica internal processes (such as the Tuple Mover and refresh operations) and DDL operations always run at the SERIALIZABLE isolation level to ensure consistency.
Database isolation level
The configuration parameter
TransactionIsolationLevel specifies the database isolation level, and is used as the default for all sessions. Use
ALTER DATABASE to change the default isolation level.For example:
=> ALTER DATABASE DEFAULT SET TransactionIsolationLevel = 'SERIALIZABLE';
ALTER DATABASE
=> ALTER DATABASE DEFAULT SET TransactionIsolationLevel = 'READ COMMITTED';
ALTER DATABASE
Changes to the database isolation level only apply to future sessions. Existing sessions and their transactions continue to use their original isolation level.
Use
SHOW CURRENT to view the database isolation level:
=> SHOW CURRENT TransactionIsolationLevel;
  level   |           name            |    setting
----------+---------------------------+----------------
 DATABASE | TransactionIsolationLevel | READ COMMITTED
(1 row)
Session isolation level
SET SESSION CHARACTERISTICS AS TRANSACTION changes the isolation level for a specific session. For example:
=> SET SESSION CHARACTERISTICS AS TRANSACTION ISOLATION LEVEL SERIALIZABLE;
SET
Use
SHOW to view the current session's isolation level:
=> SHOW TRANSACTION_ISOLATION;
See also
Transactions